Yann Le Gal Home About Contact
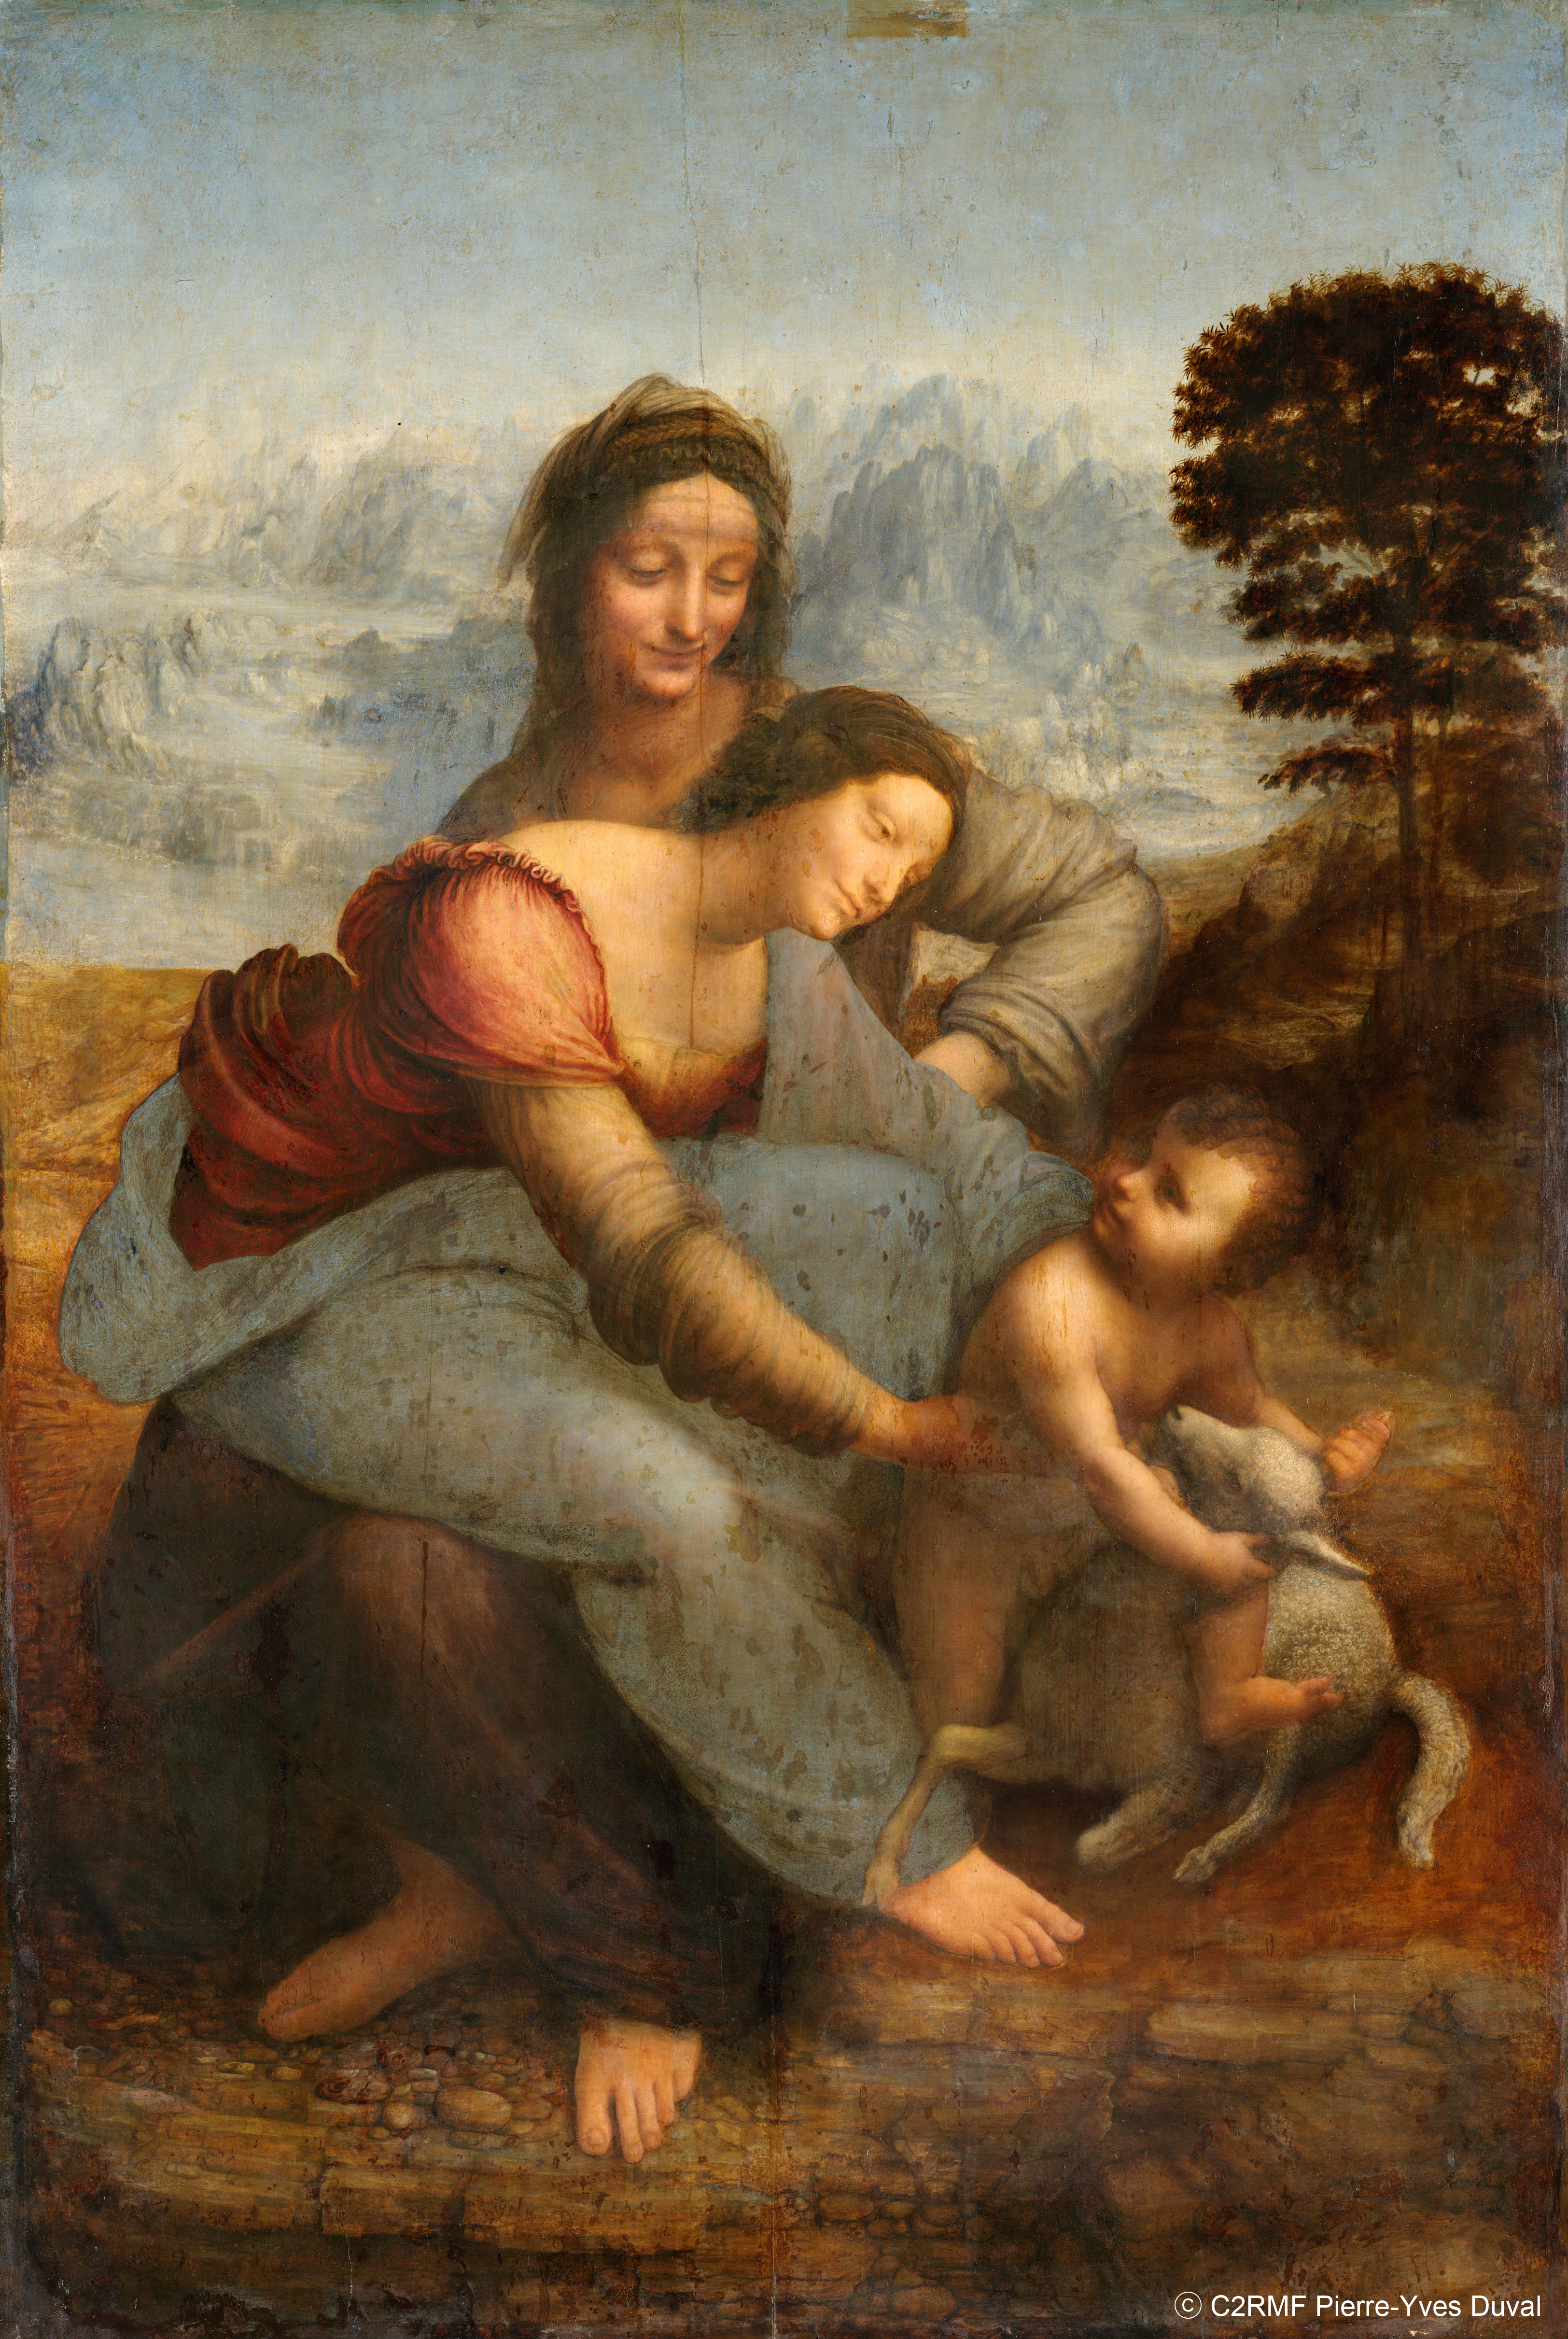
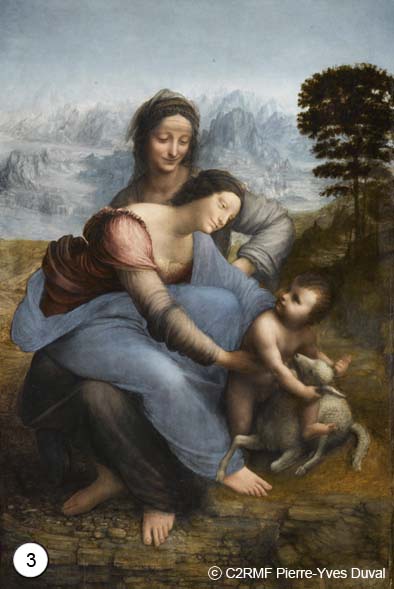
The Virgin and Child with Saint Anne from Leonardo da Vinci
Process of a ready-made, work in progress...
Part 2: Traditional tools and technology at the heart of the Workflow redesign.
To be able to reach the high level of quality I needed, I had to find a way to overcome a lack of documentation. I had to create my own one composed of patterns and templates built by the use of appropriate tools and technology such as digital imagery and lazer printing. Then I could return to the completion of the painting segment by segment and inch by inch, with the help of magnifying glasses.
A high resolution picture from the C2RMF (Center for Research and Restoration of Museums of France) is available on internet. I used it by combining the overlay of pictures from the 2012's book, to create a series of new documents at the same size of the original Leonardo's work.
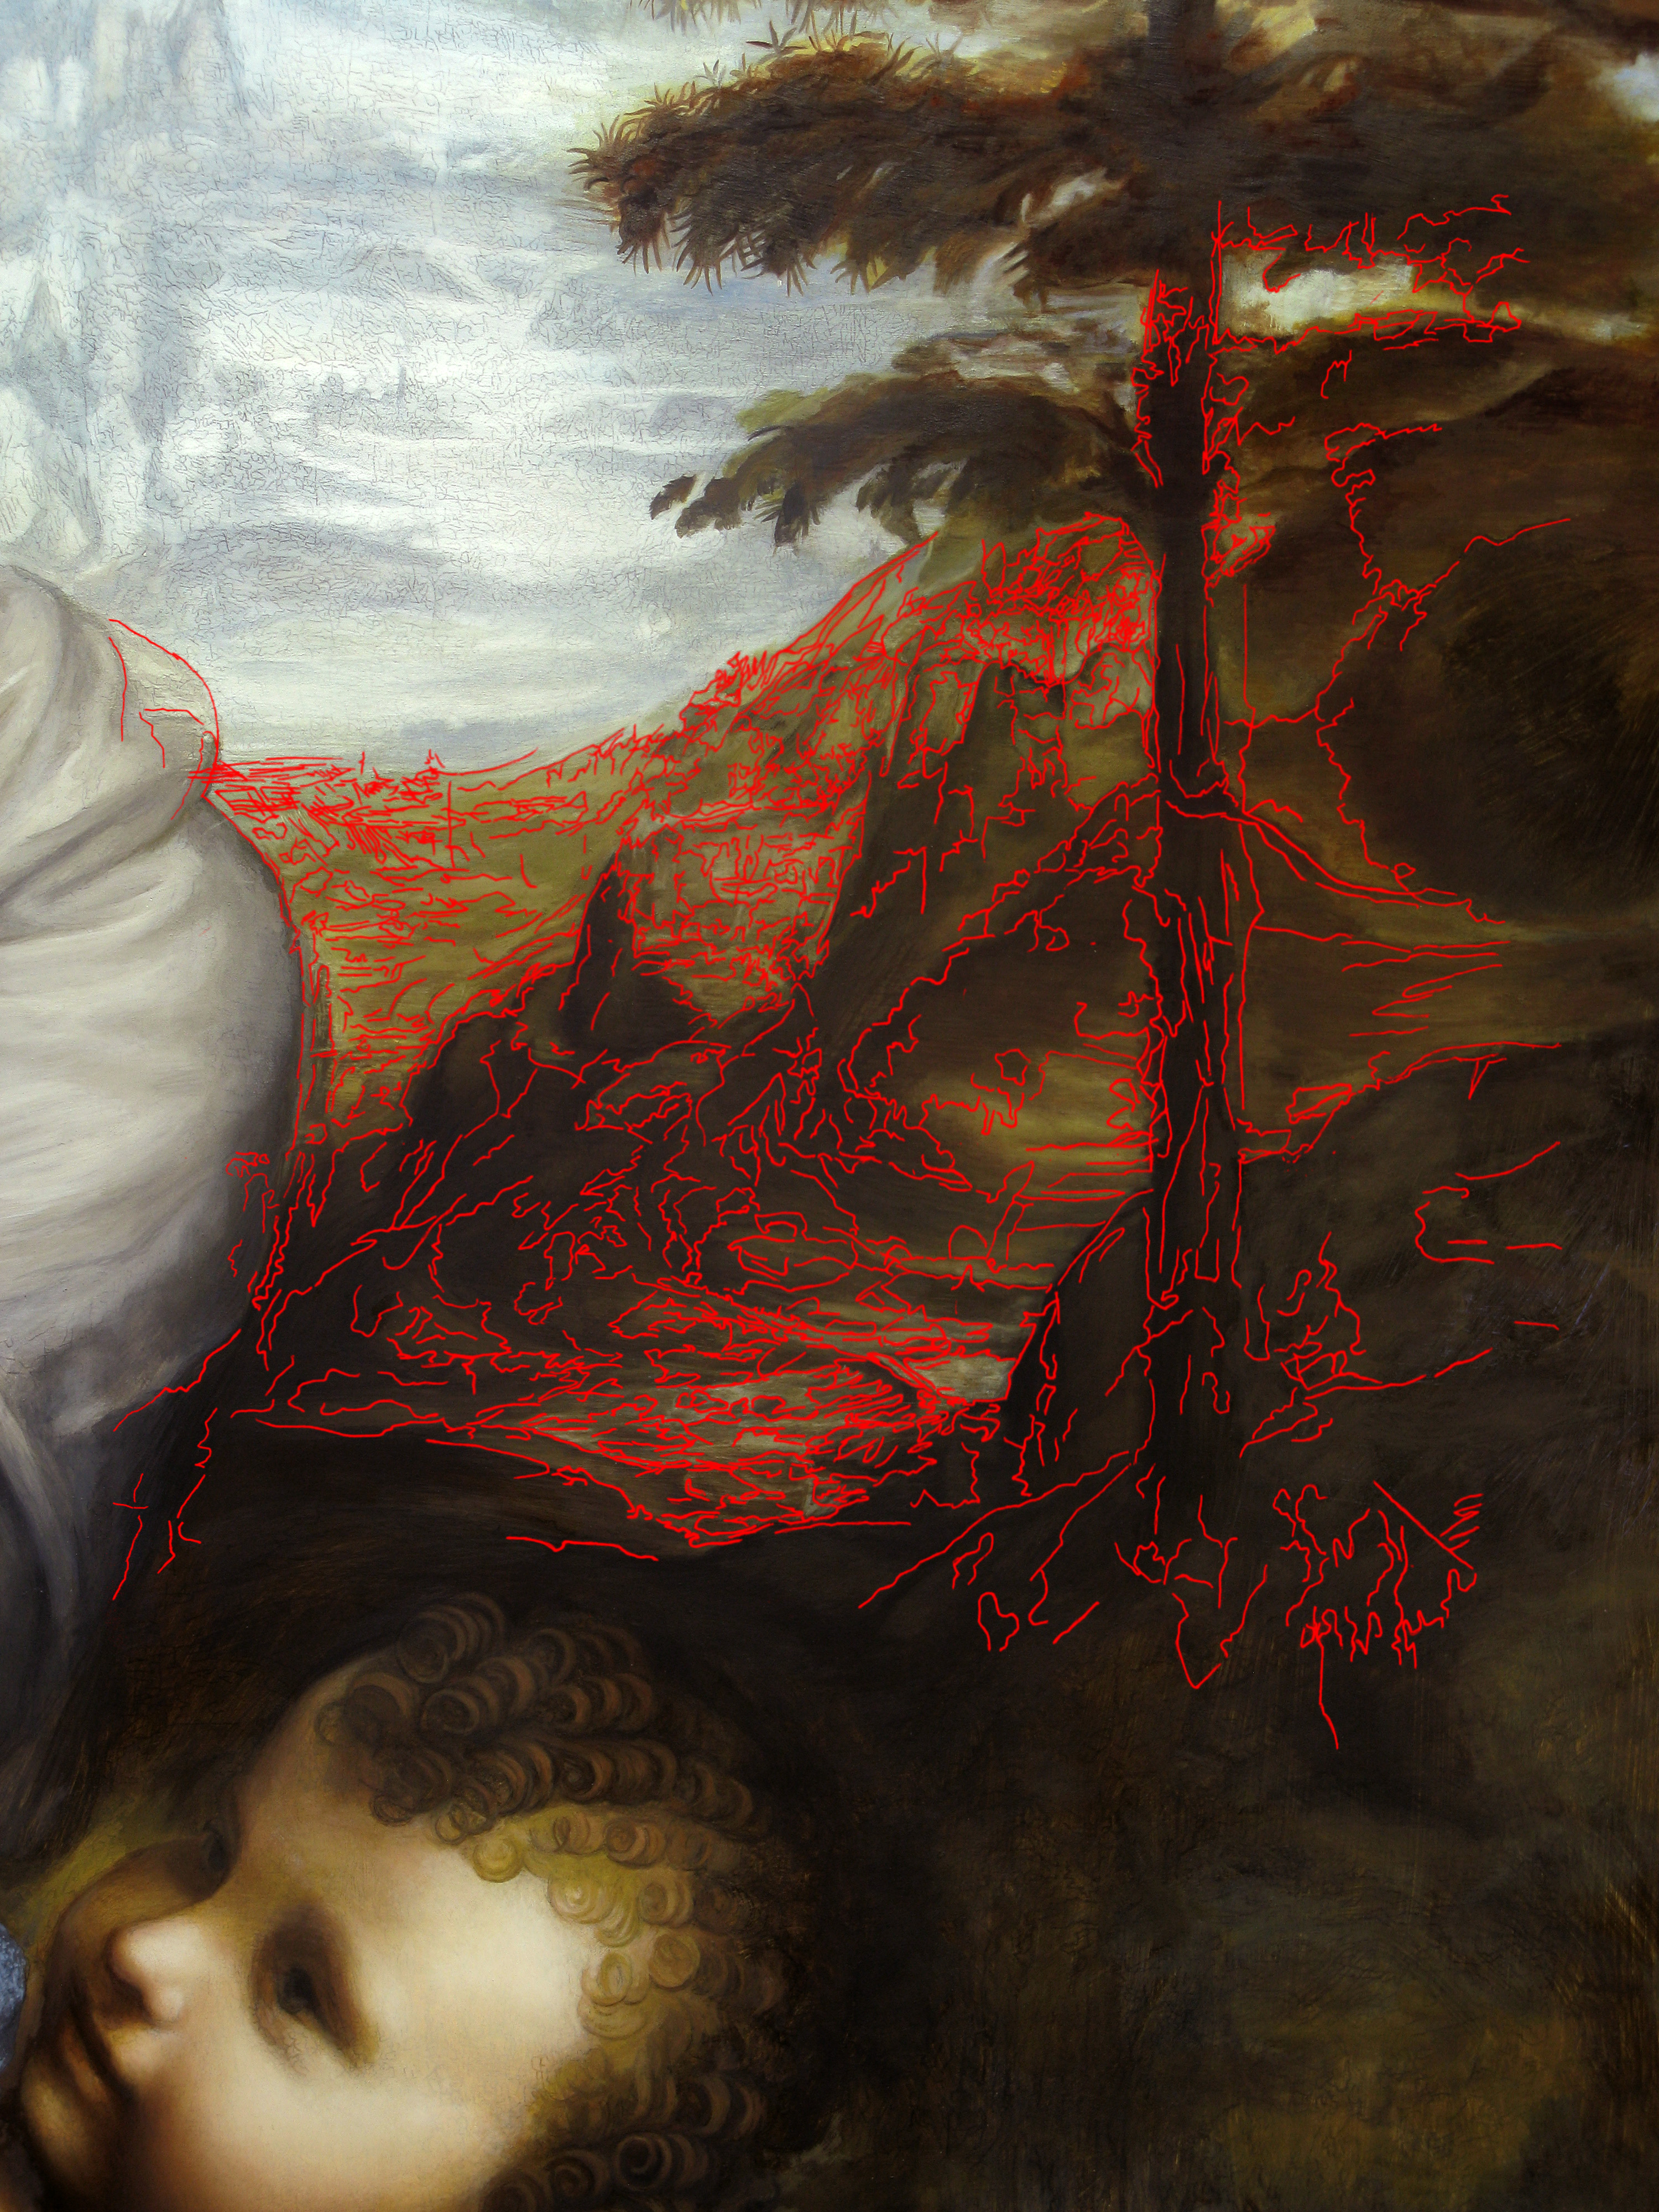
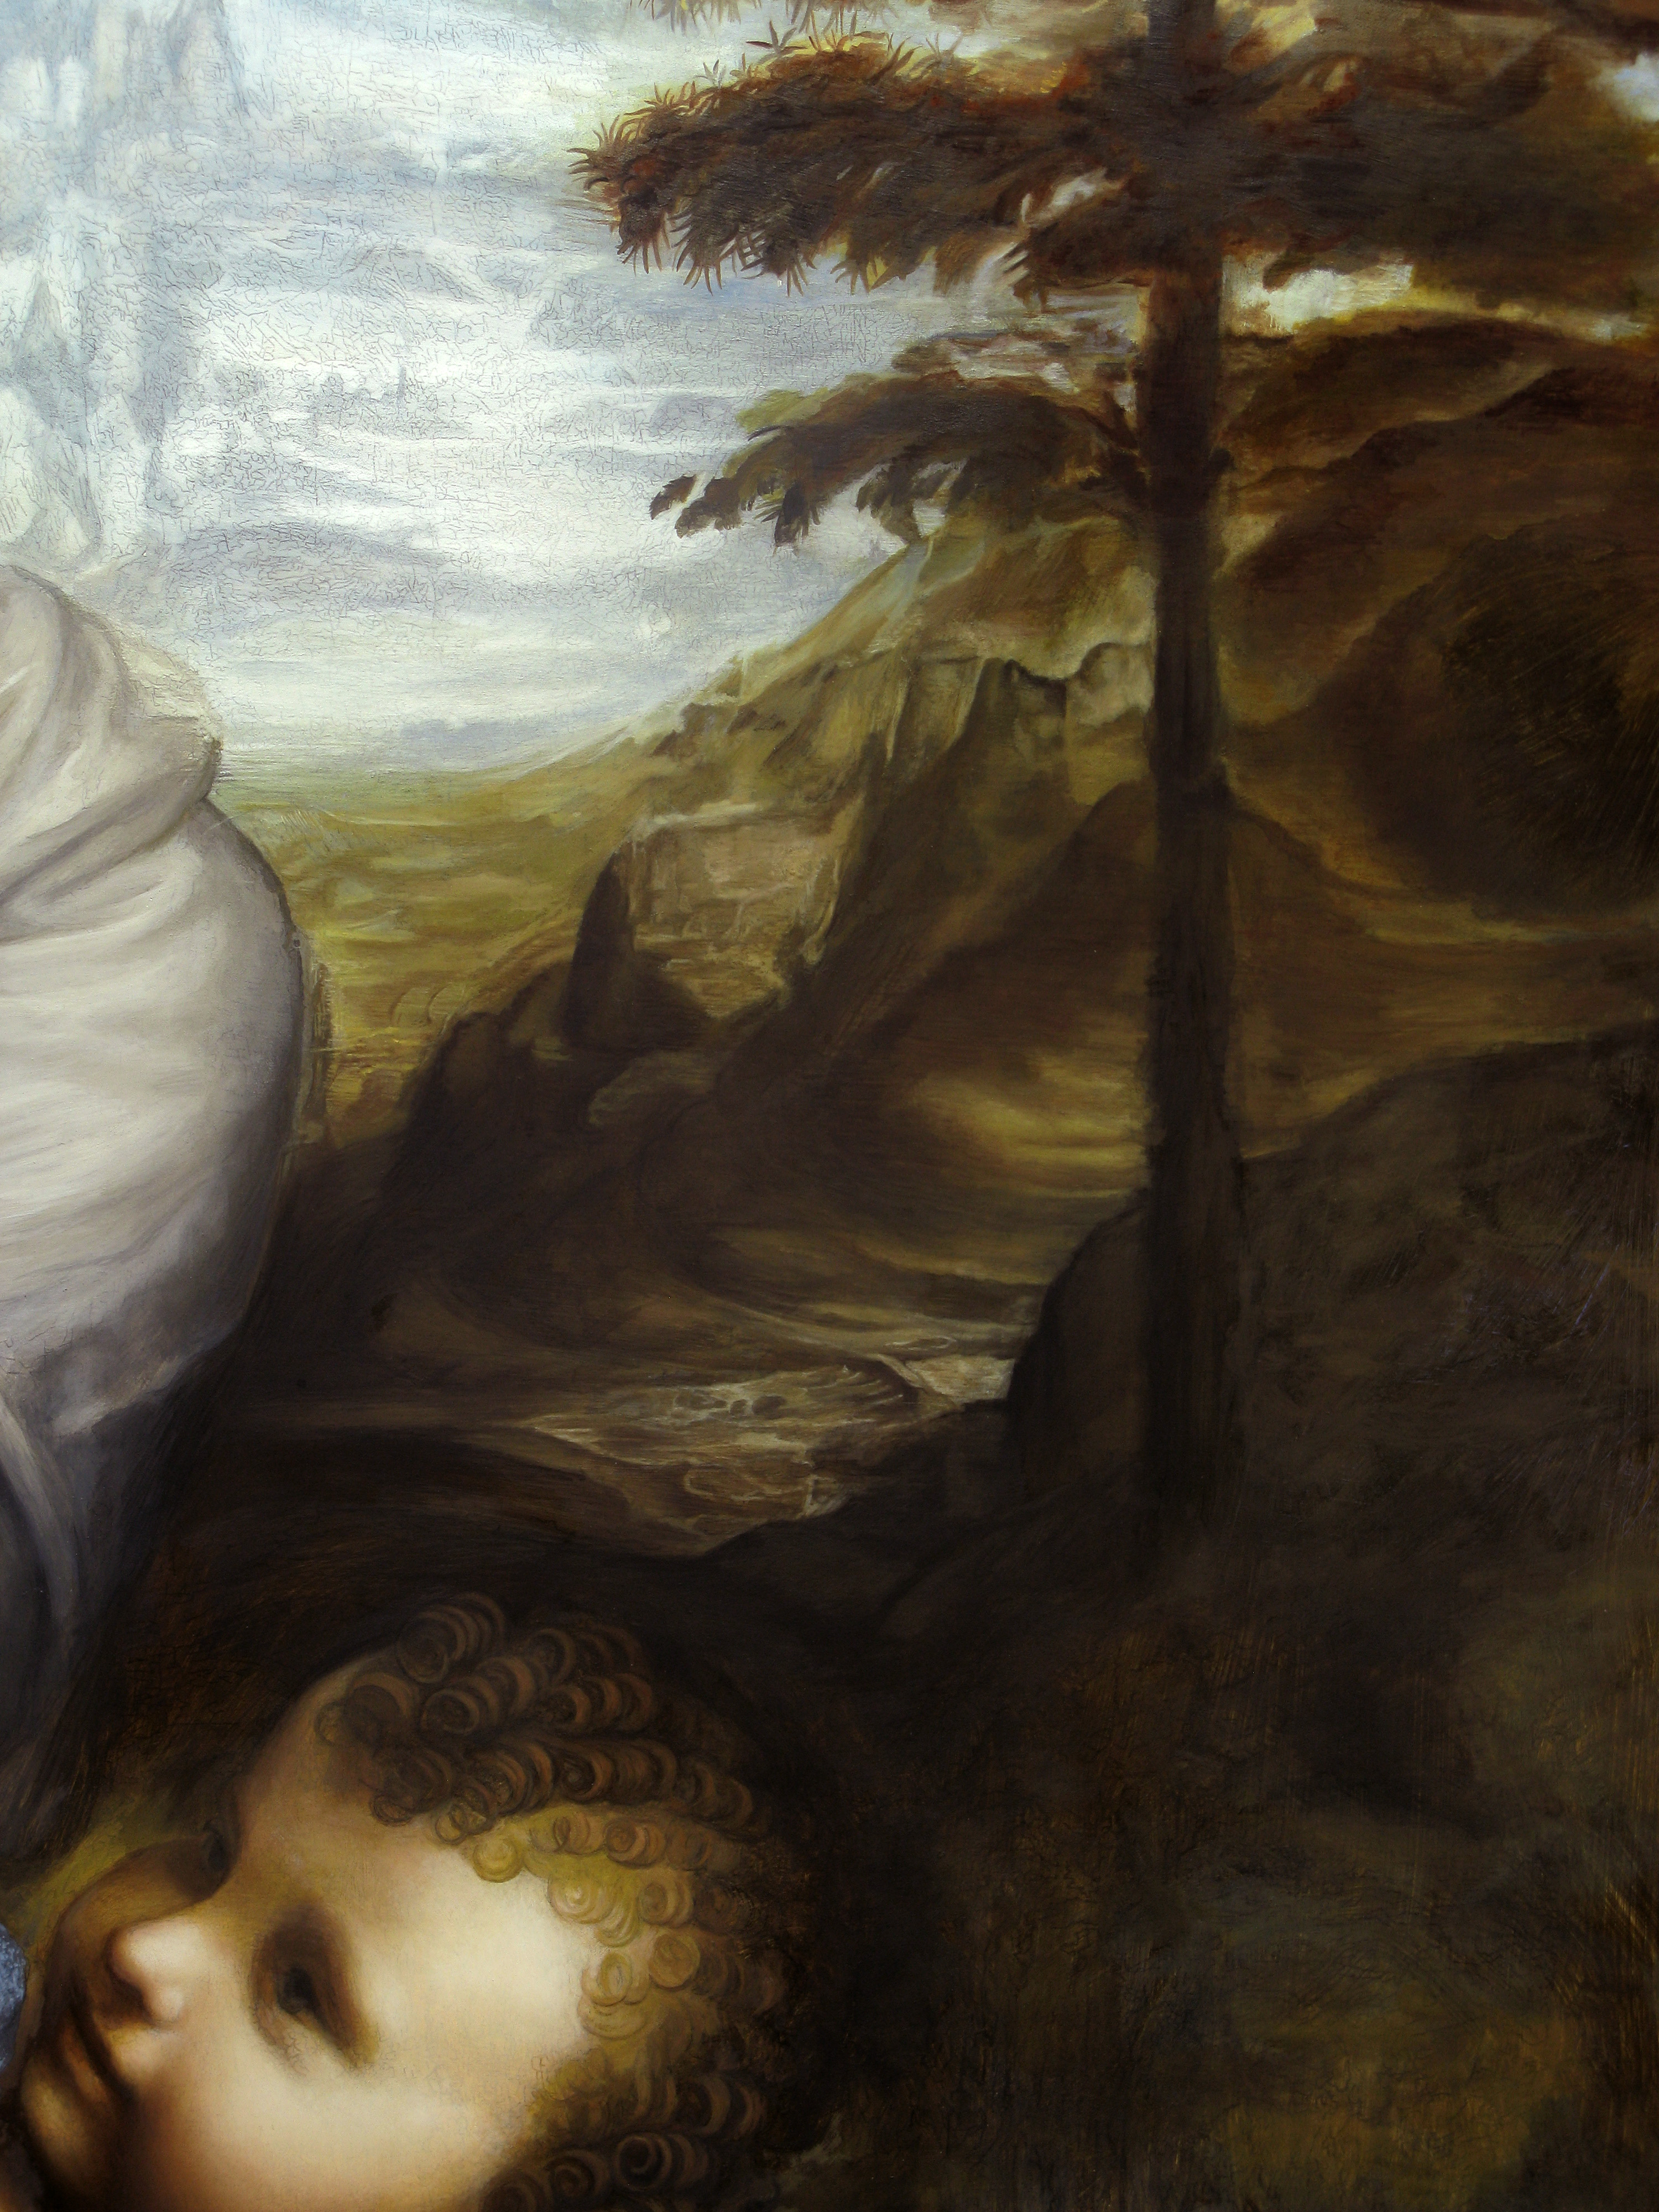
Based on this new documentation, I drew a series of vector paths to cover the entire surface of the panel, then to retreive all the details of the work including profils of the figures, the touch of painting and its cracks.
Sample of colour settings done from a picture of the painting before restoration (1), to reach the general balance now visible after restoration(3).
|
|
|
|

"Click" on pictures above to open them at full size in another window.
1. Before restoration (the C2RMF picture). An intense yellow varnish covers all the painting.
2. Colour balanced using photoshop setting tools. During this step, I could balance the "varnish effect", but the painting is still covered by many unsightly effects.
3. After restoration. The picture is unfortunately not available in a High resolution, then I had to create my own documentation from the 2012's exhibition catalog.
General process presentation.
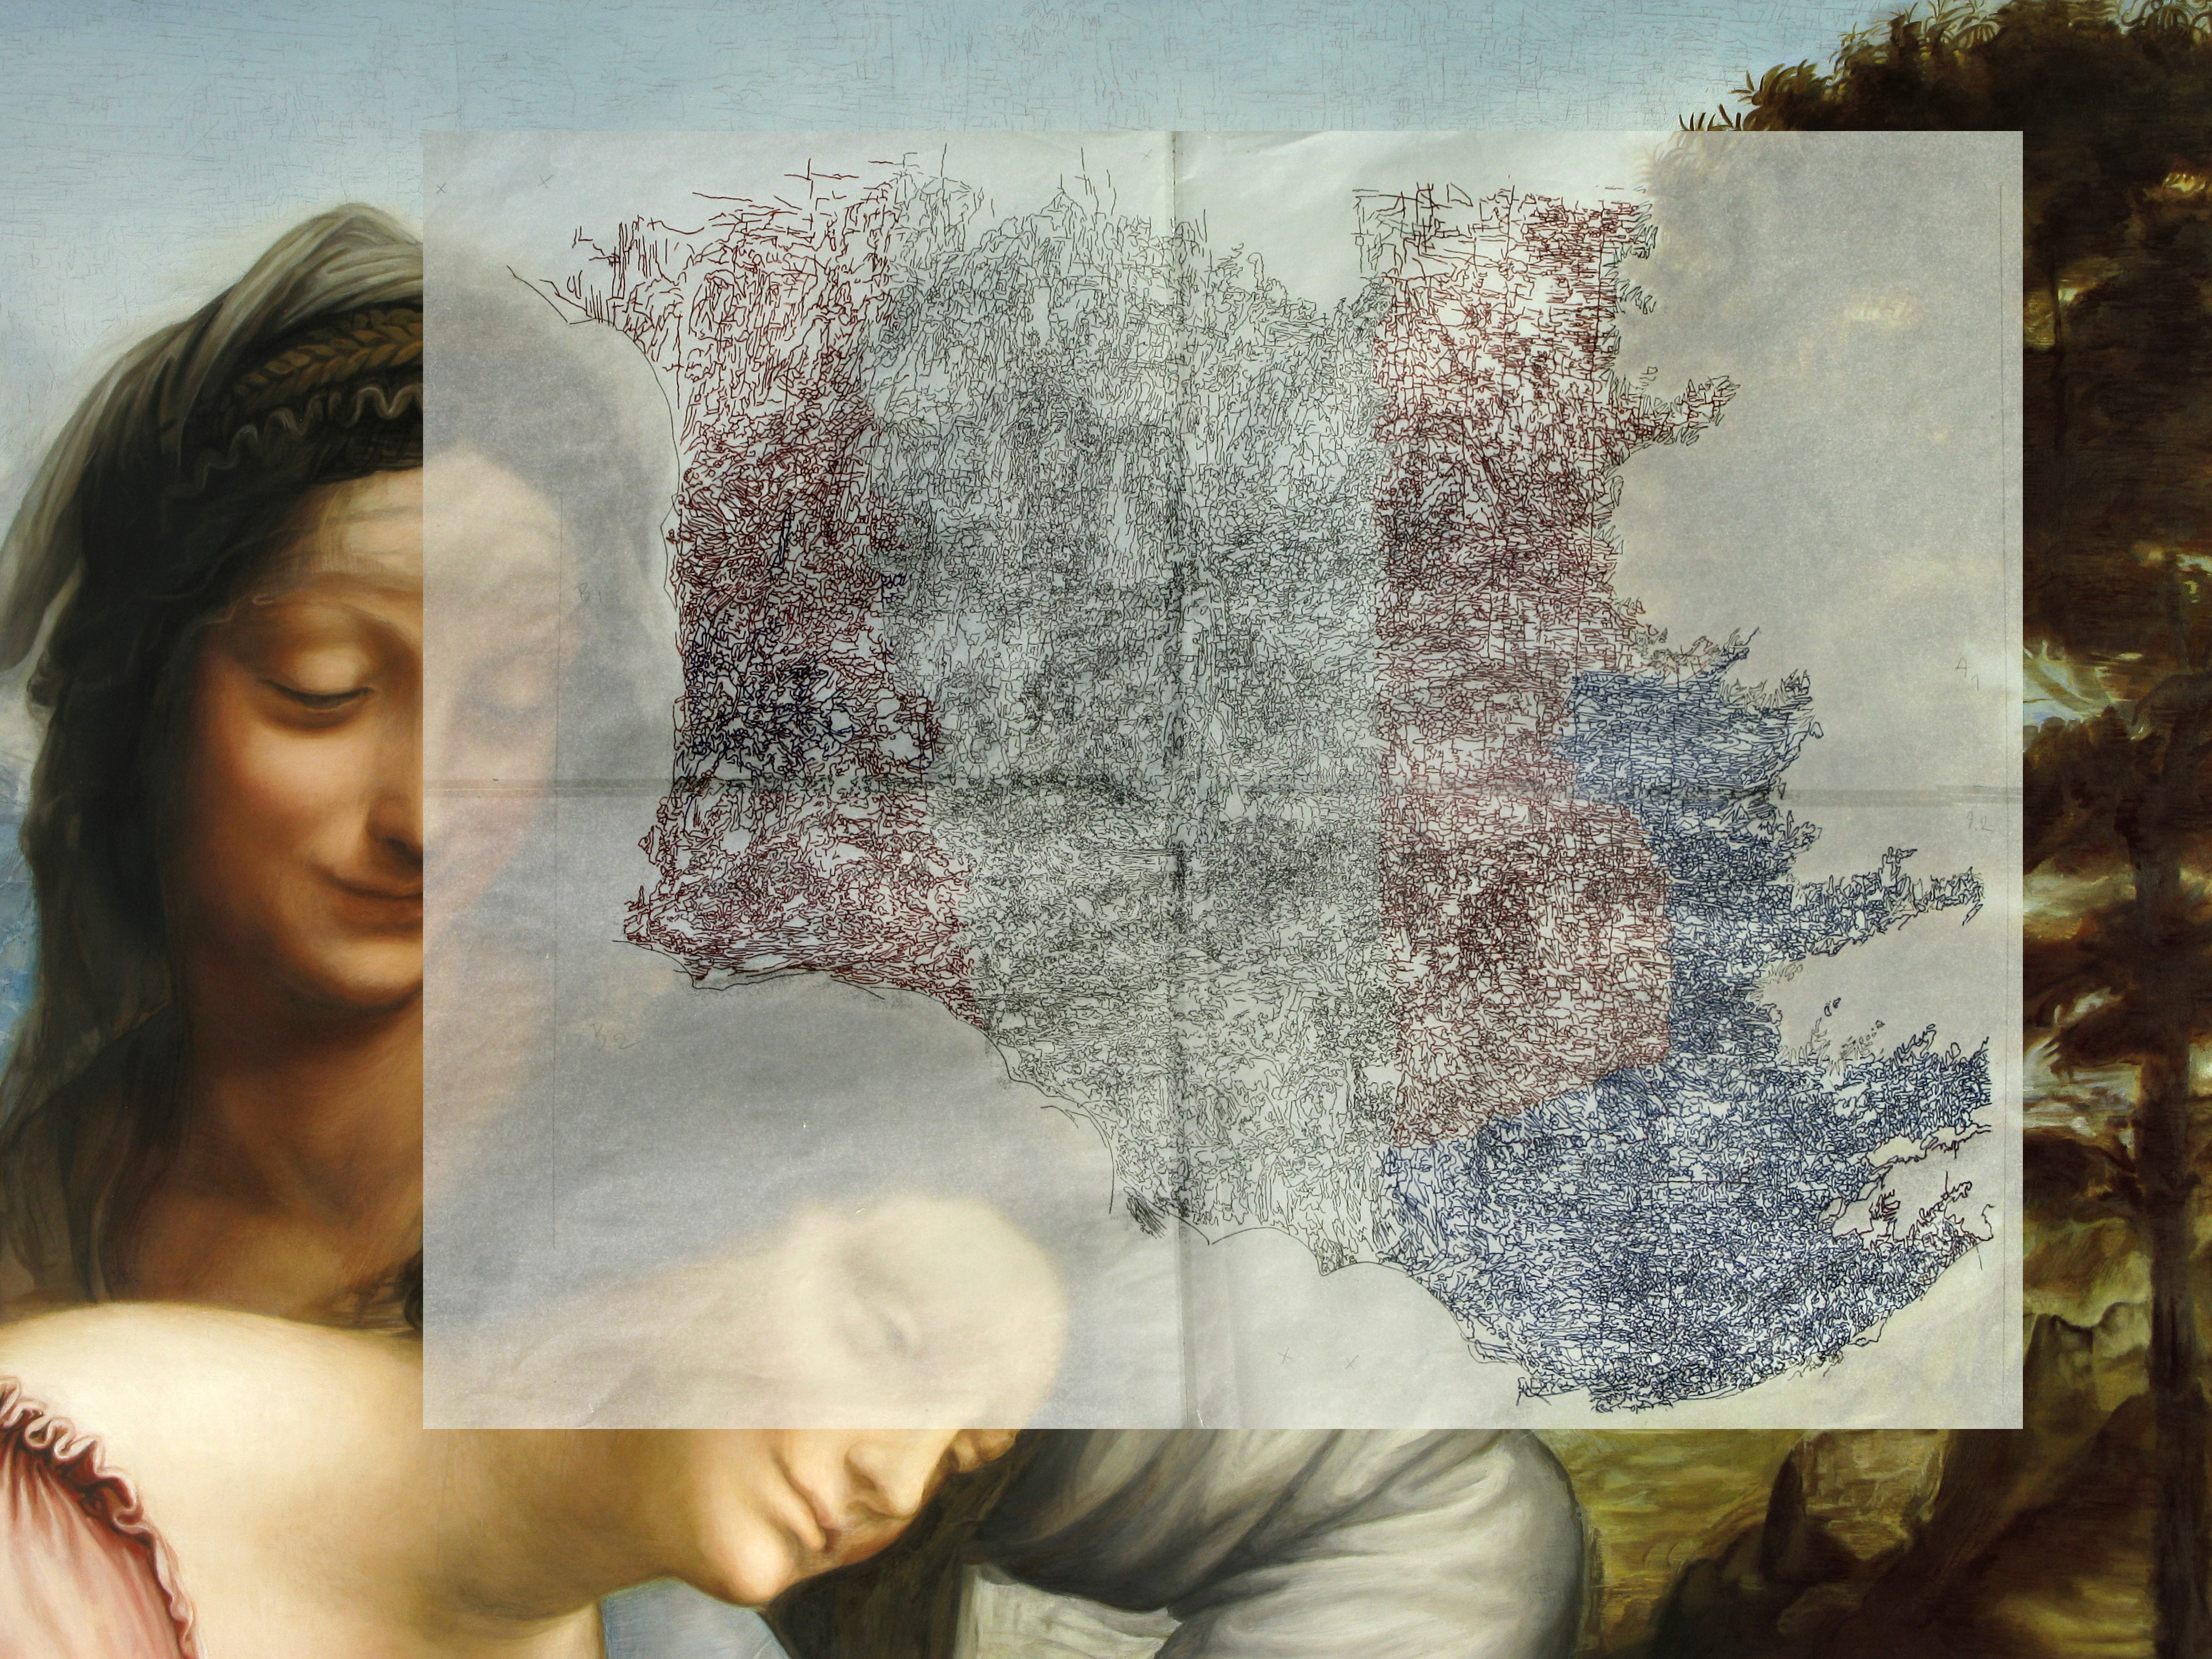
I. Sample of a document based on the C2RMF picture covered by layers of the 2012's book (4), creation of a vector path (5) for printing (6)
|
|
|
|


"Click" on pictures above to open them at full size in another window.
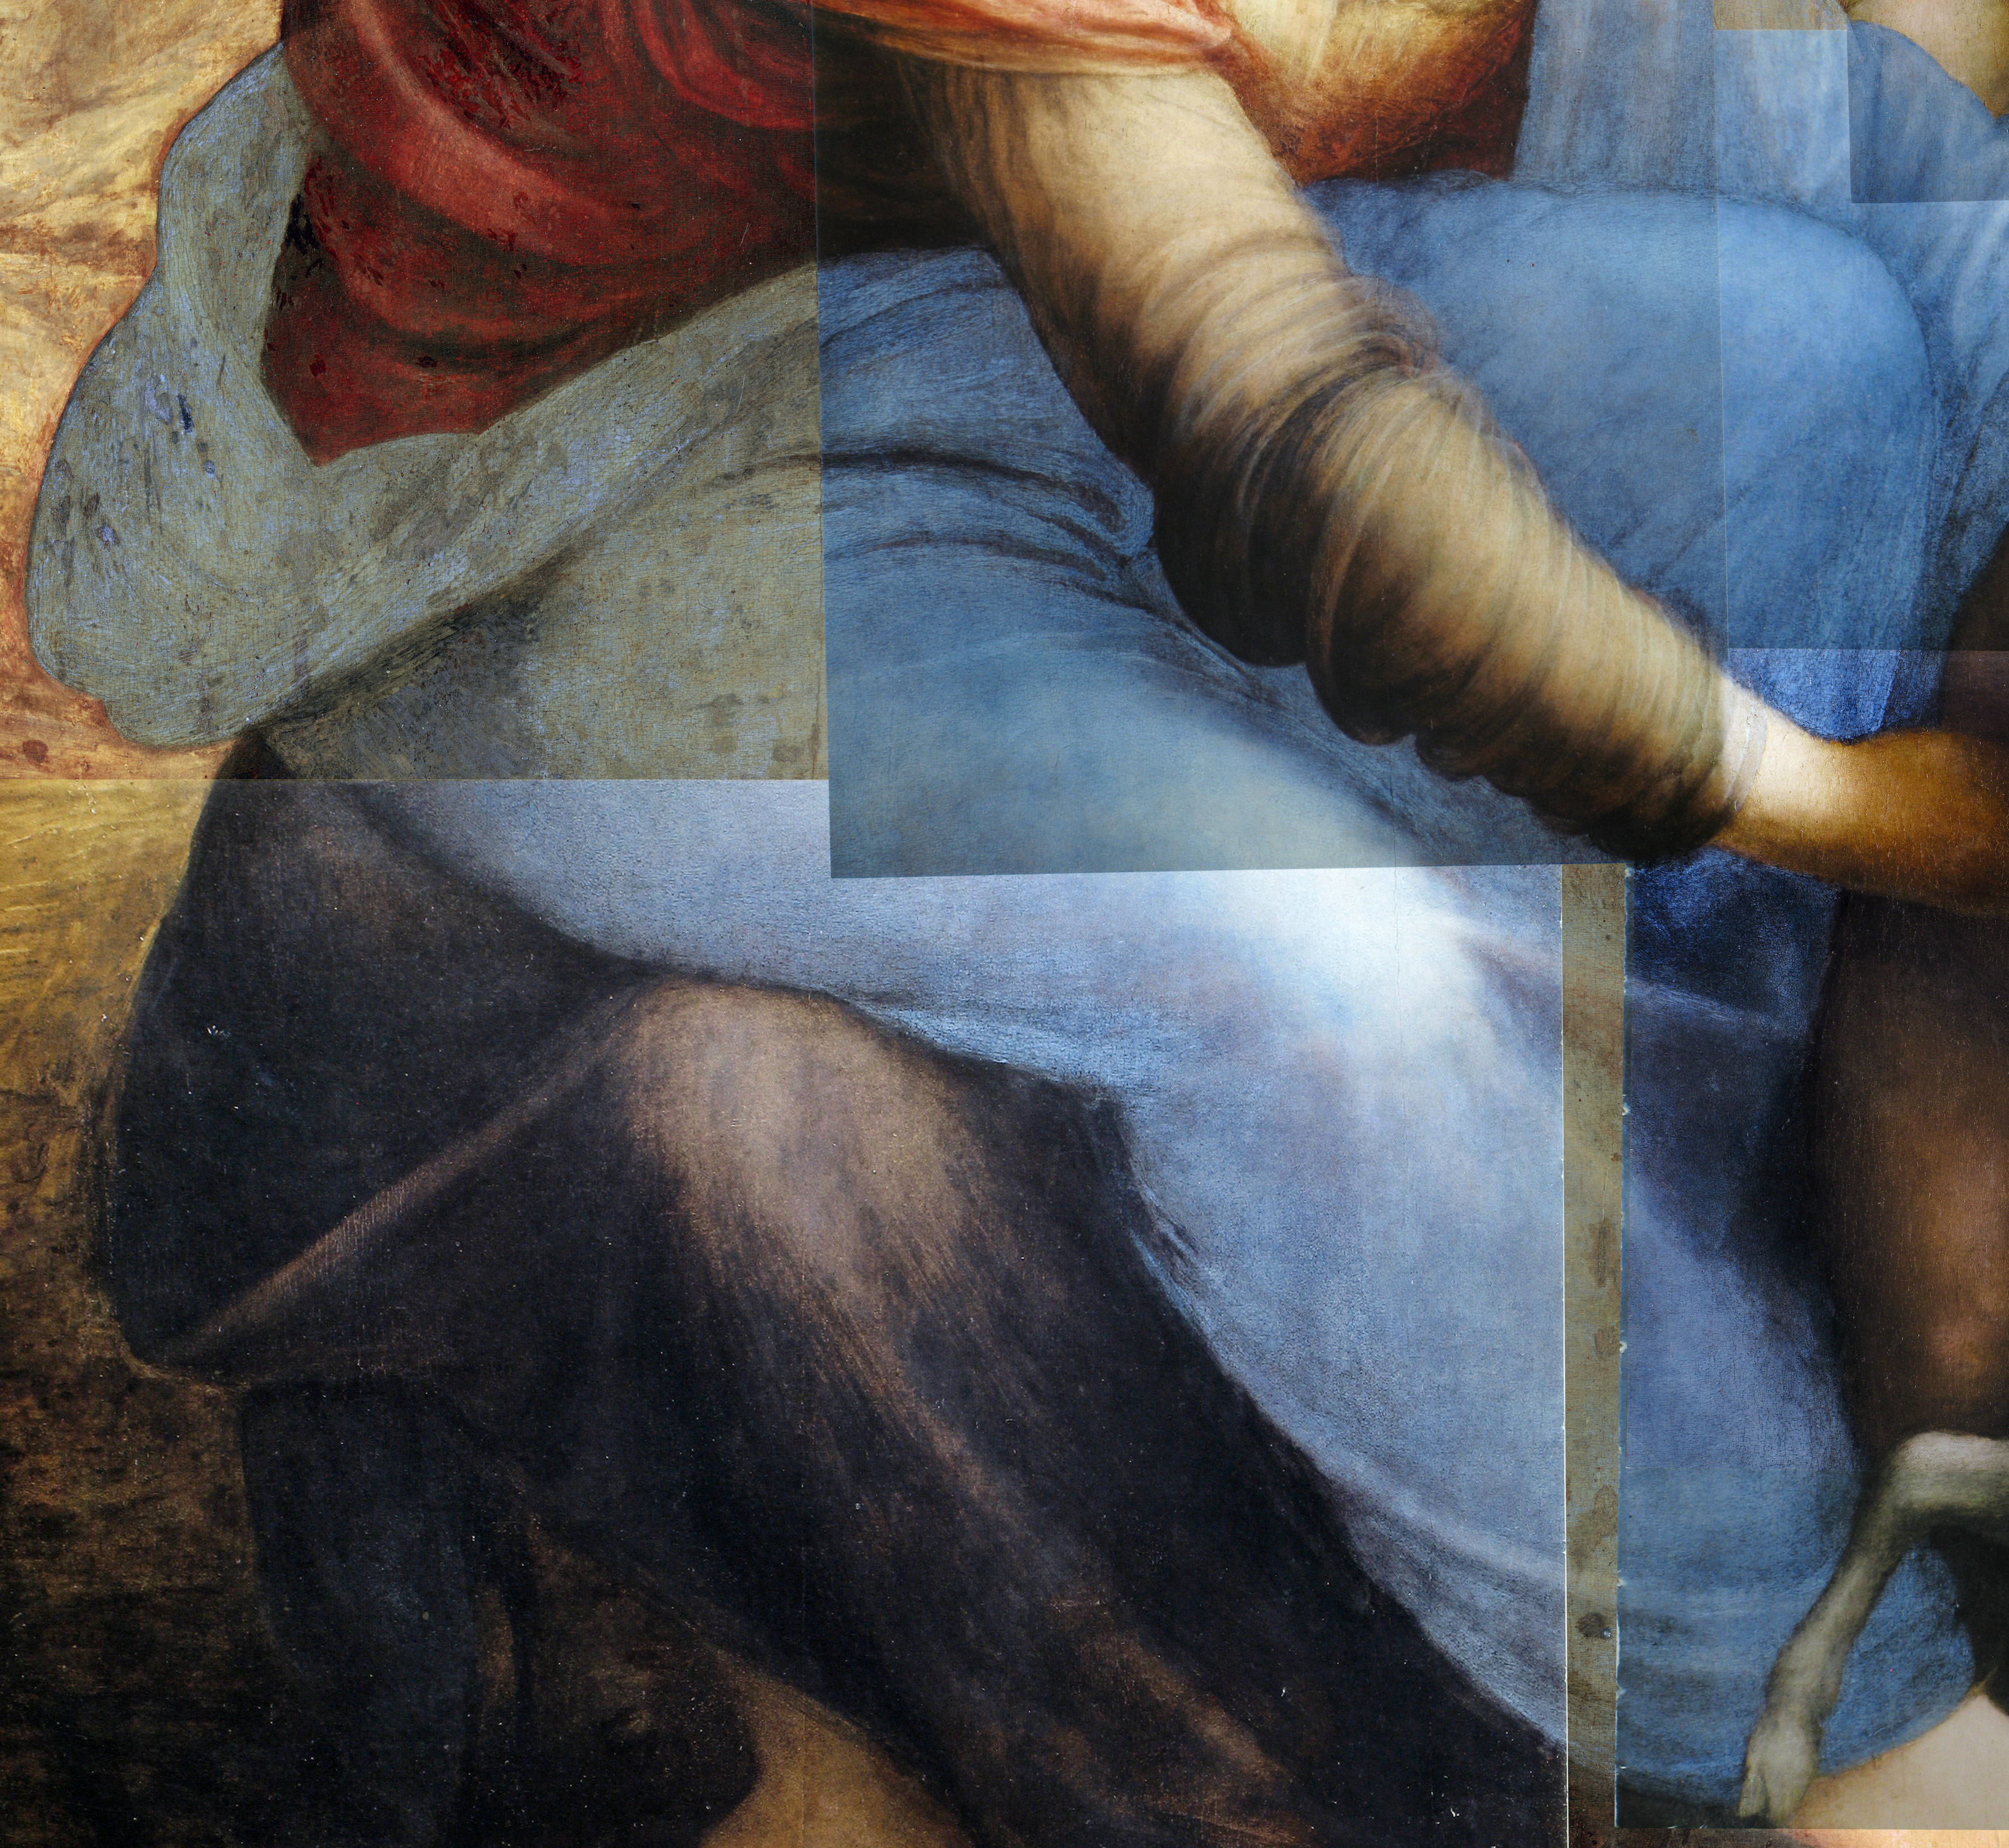
4. The C2RMF's picture (painting before restoration) covered by layers of the 2012's exhibition catalog. Most as possible, I wanted to use the 2012's catalog as document, but it doesn't cover the entire surface of the panel. On this puzzled picture we can see the lack of it. Also pictures of the 2012's catalog are not all the same size. Then I used the C2RMF high resolution picture as a pattern to rescale everything.
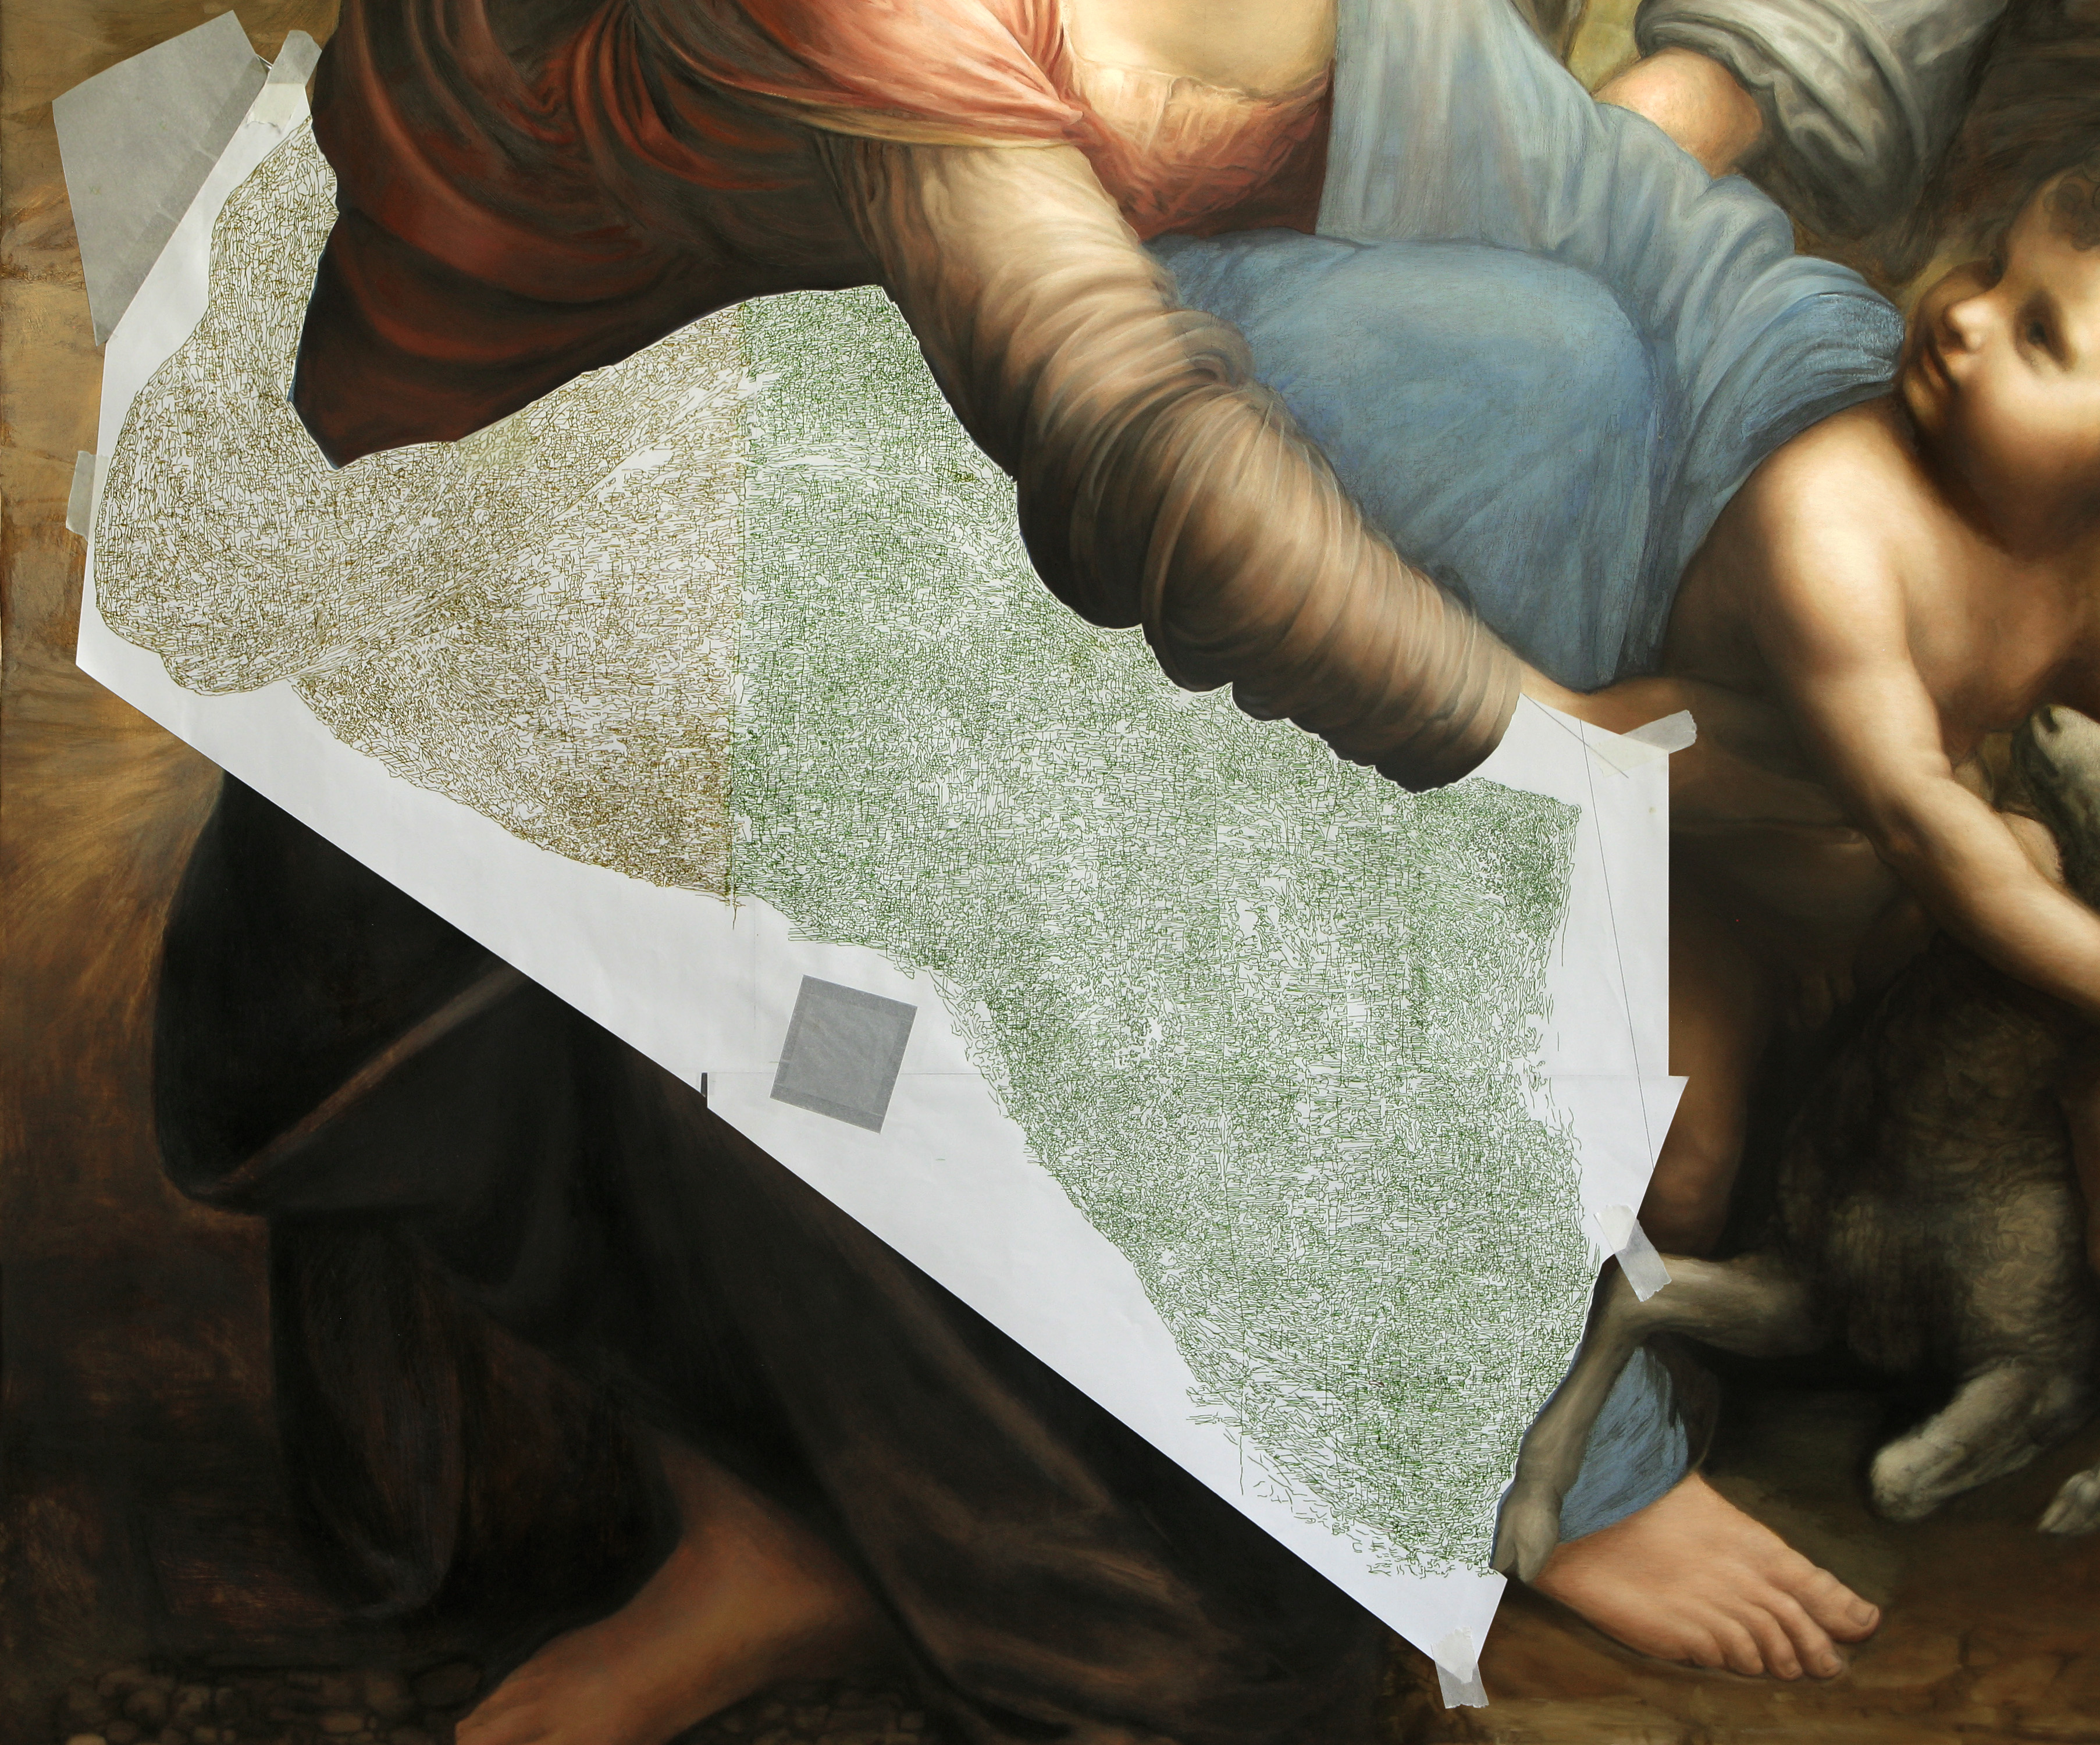
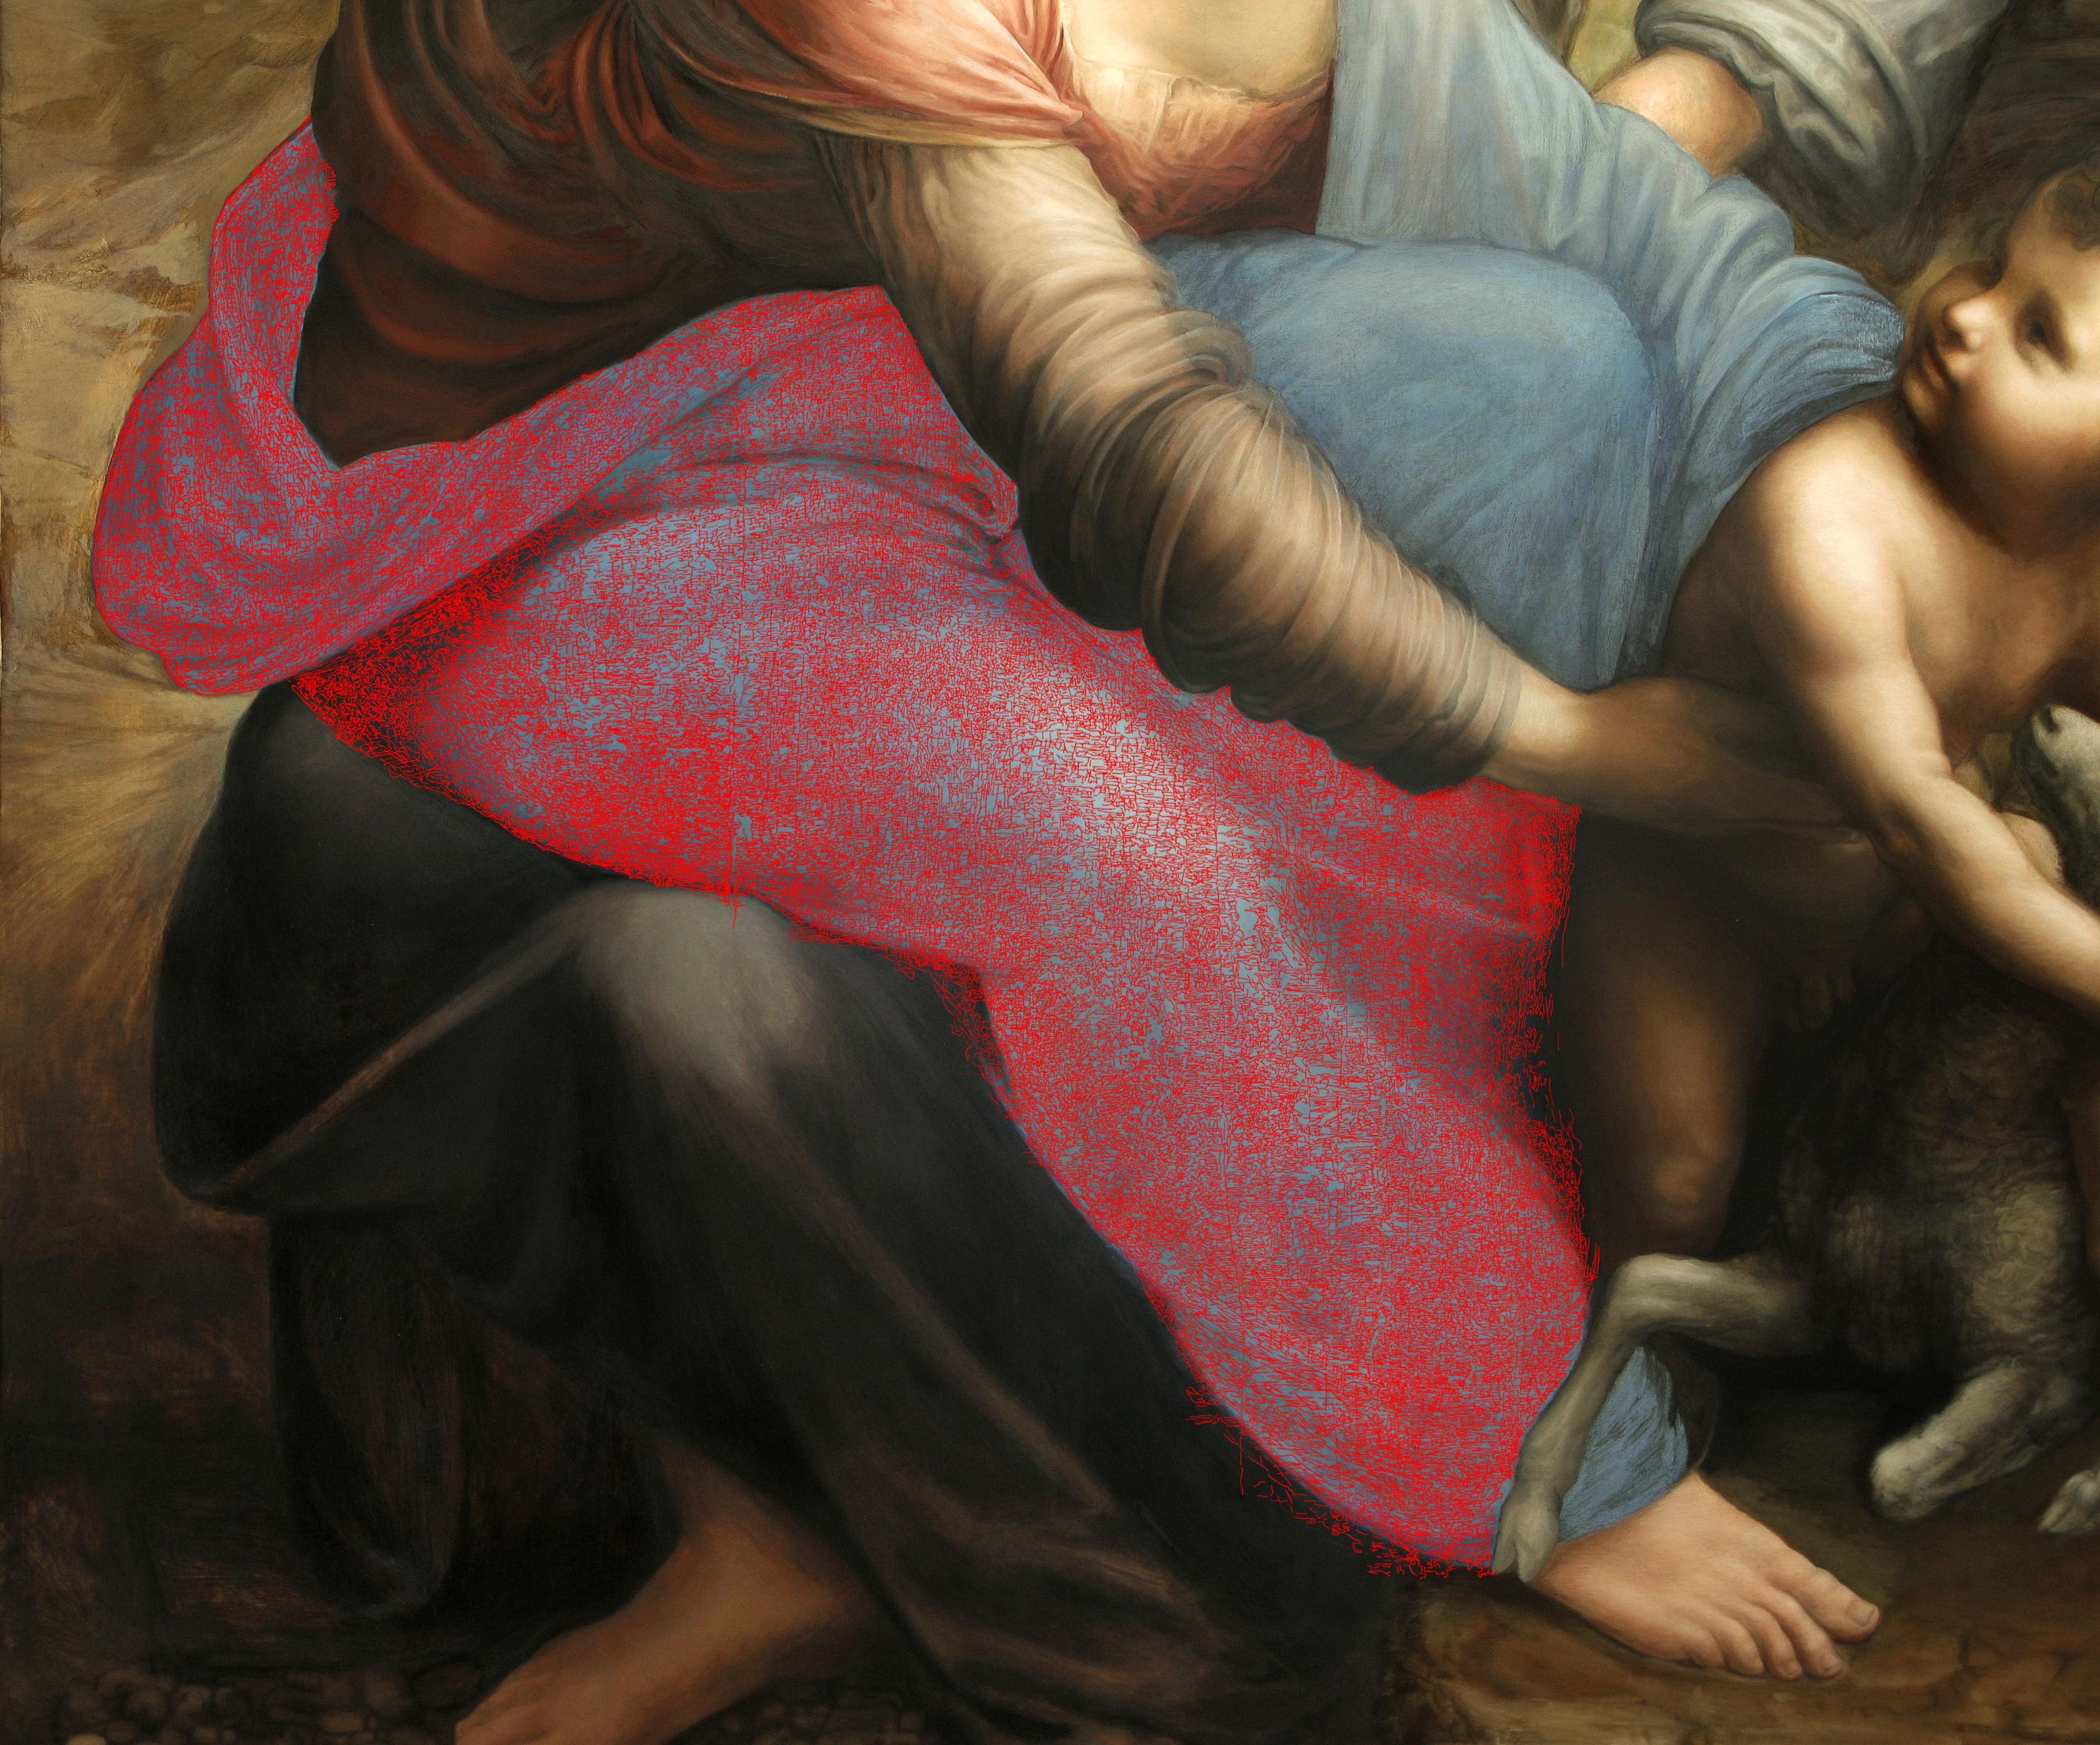
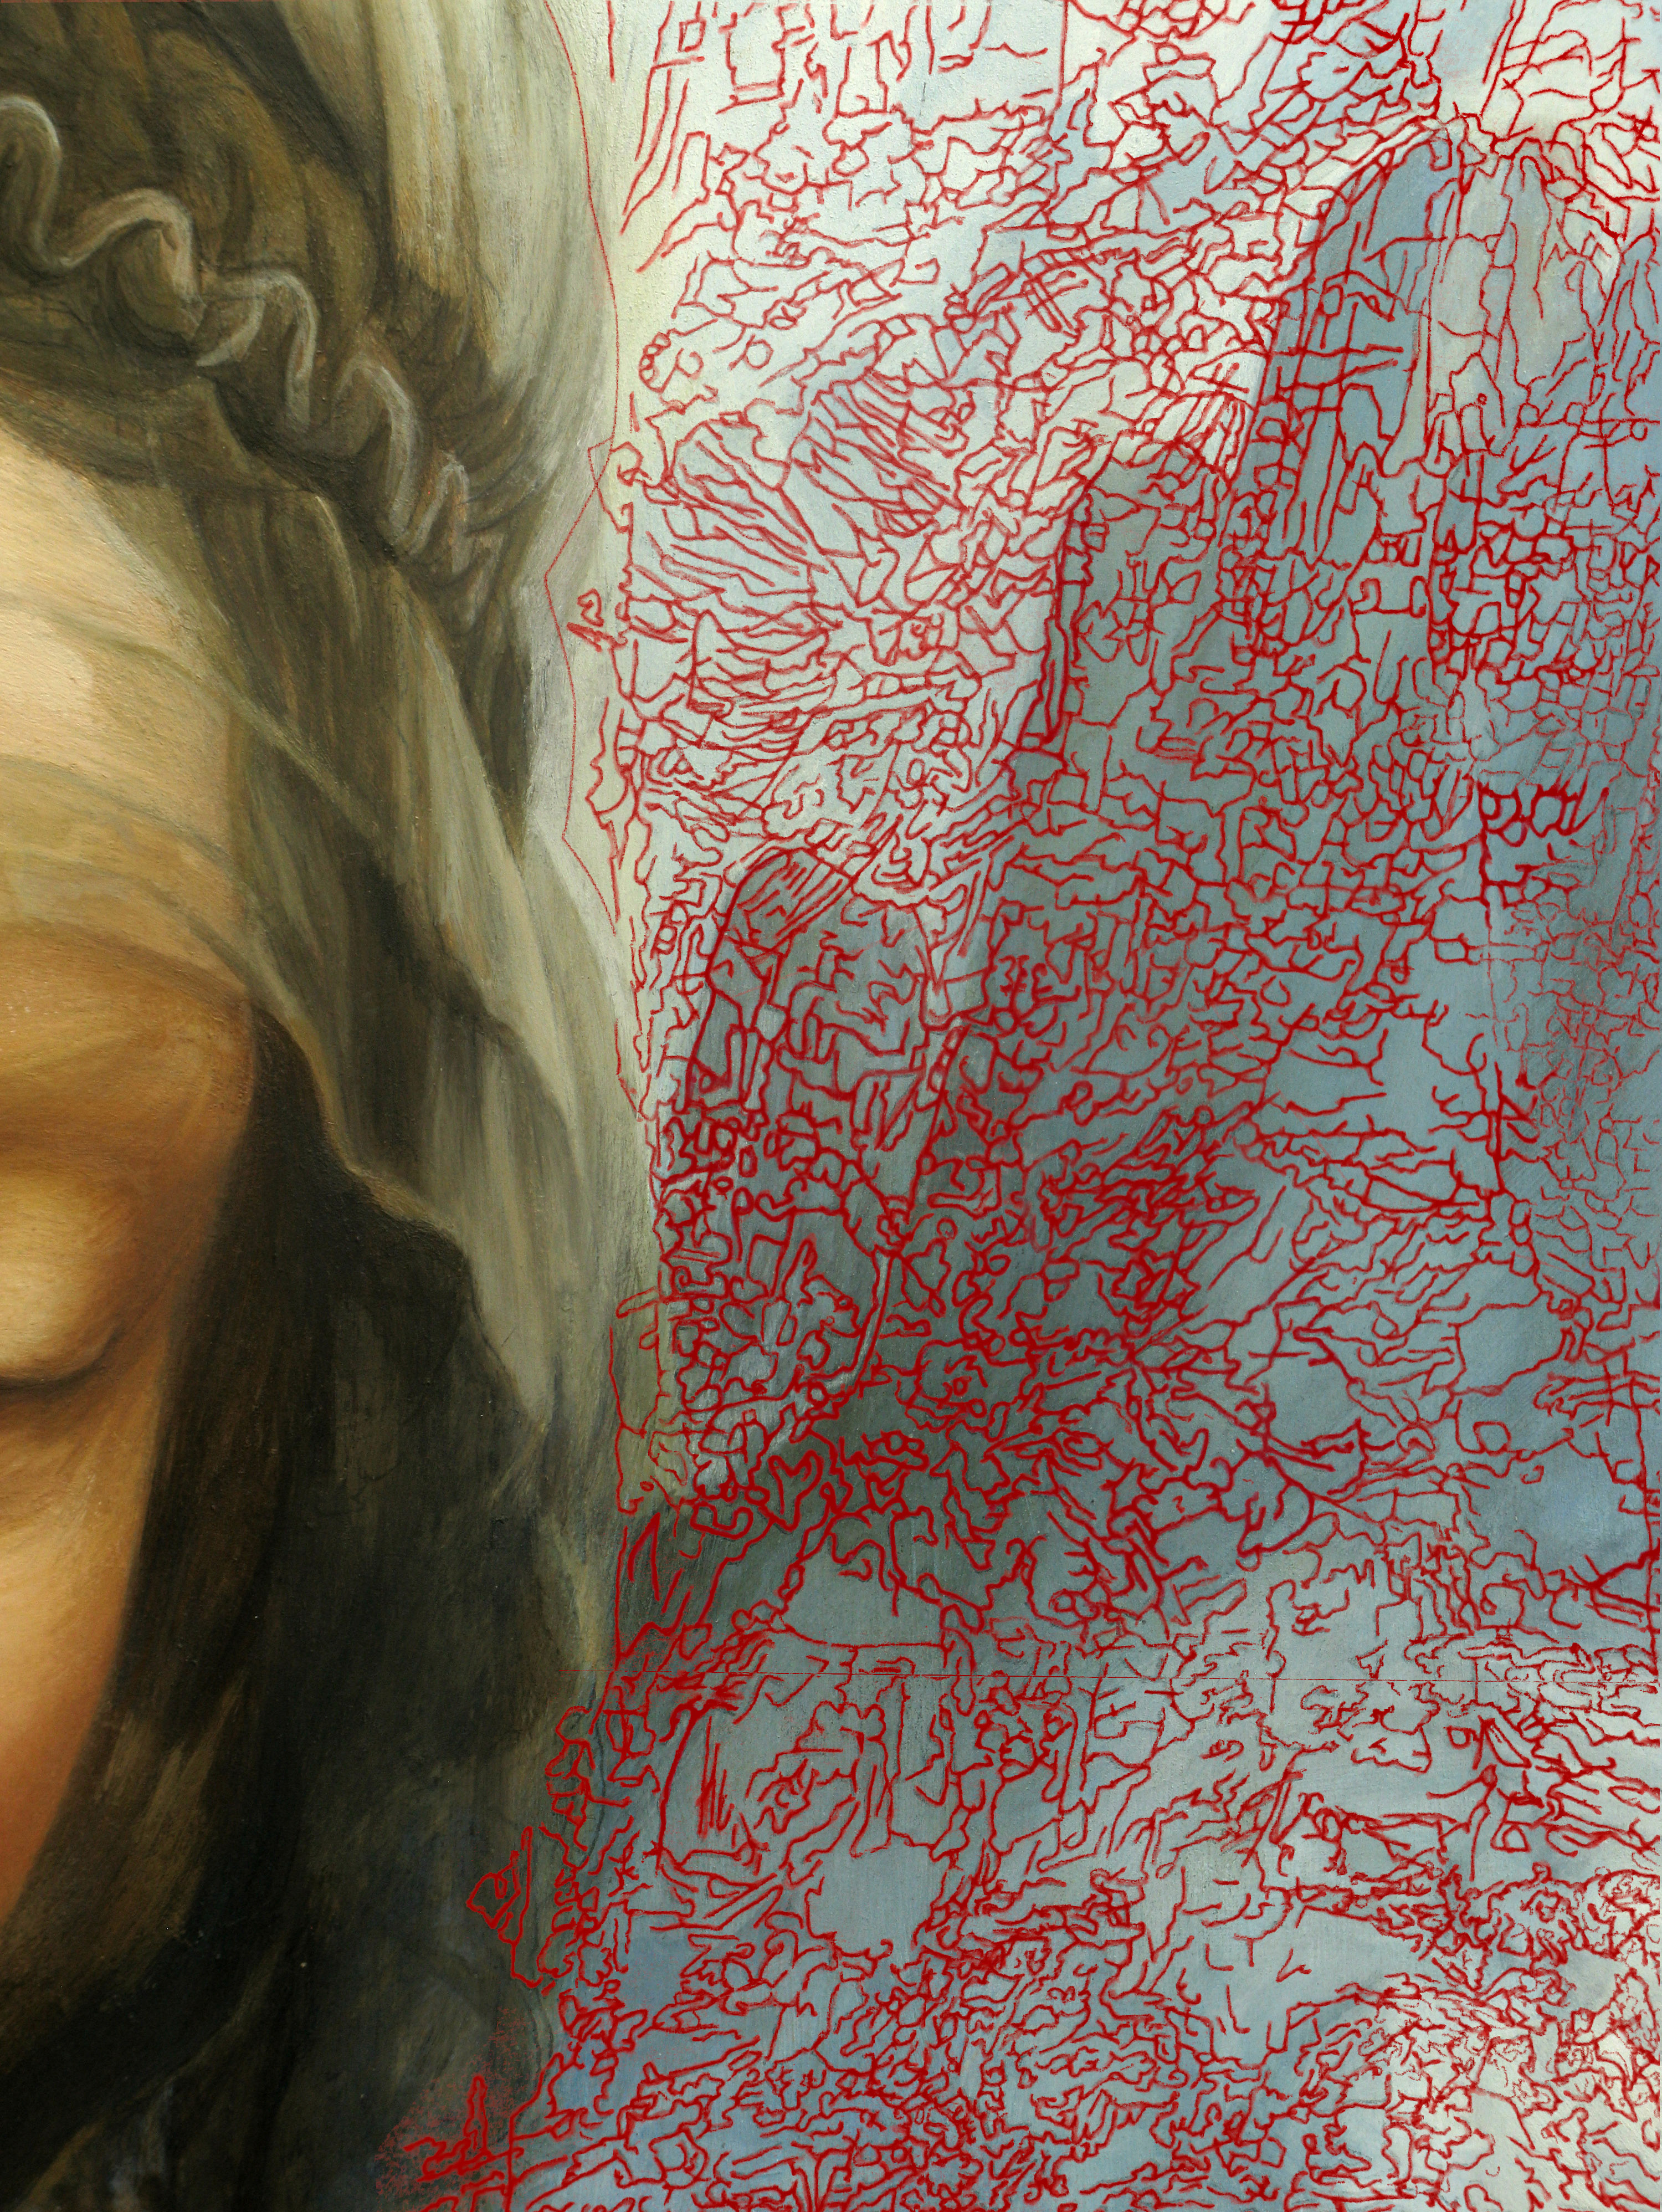
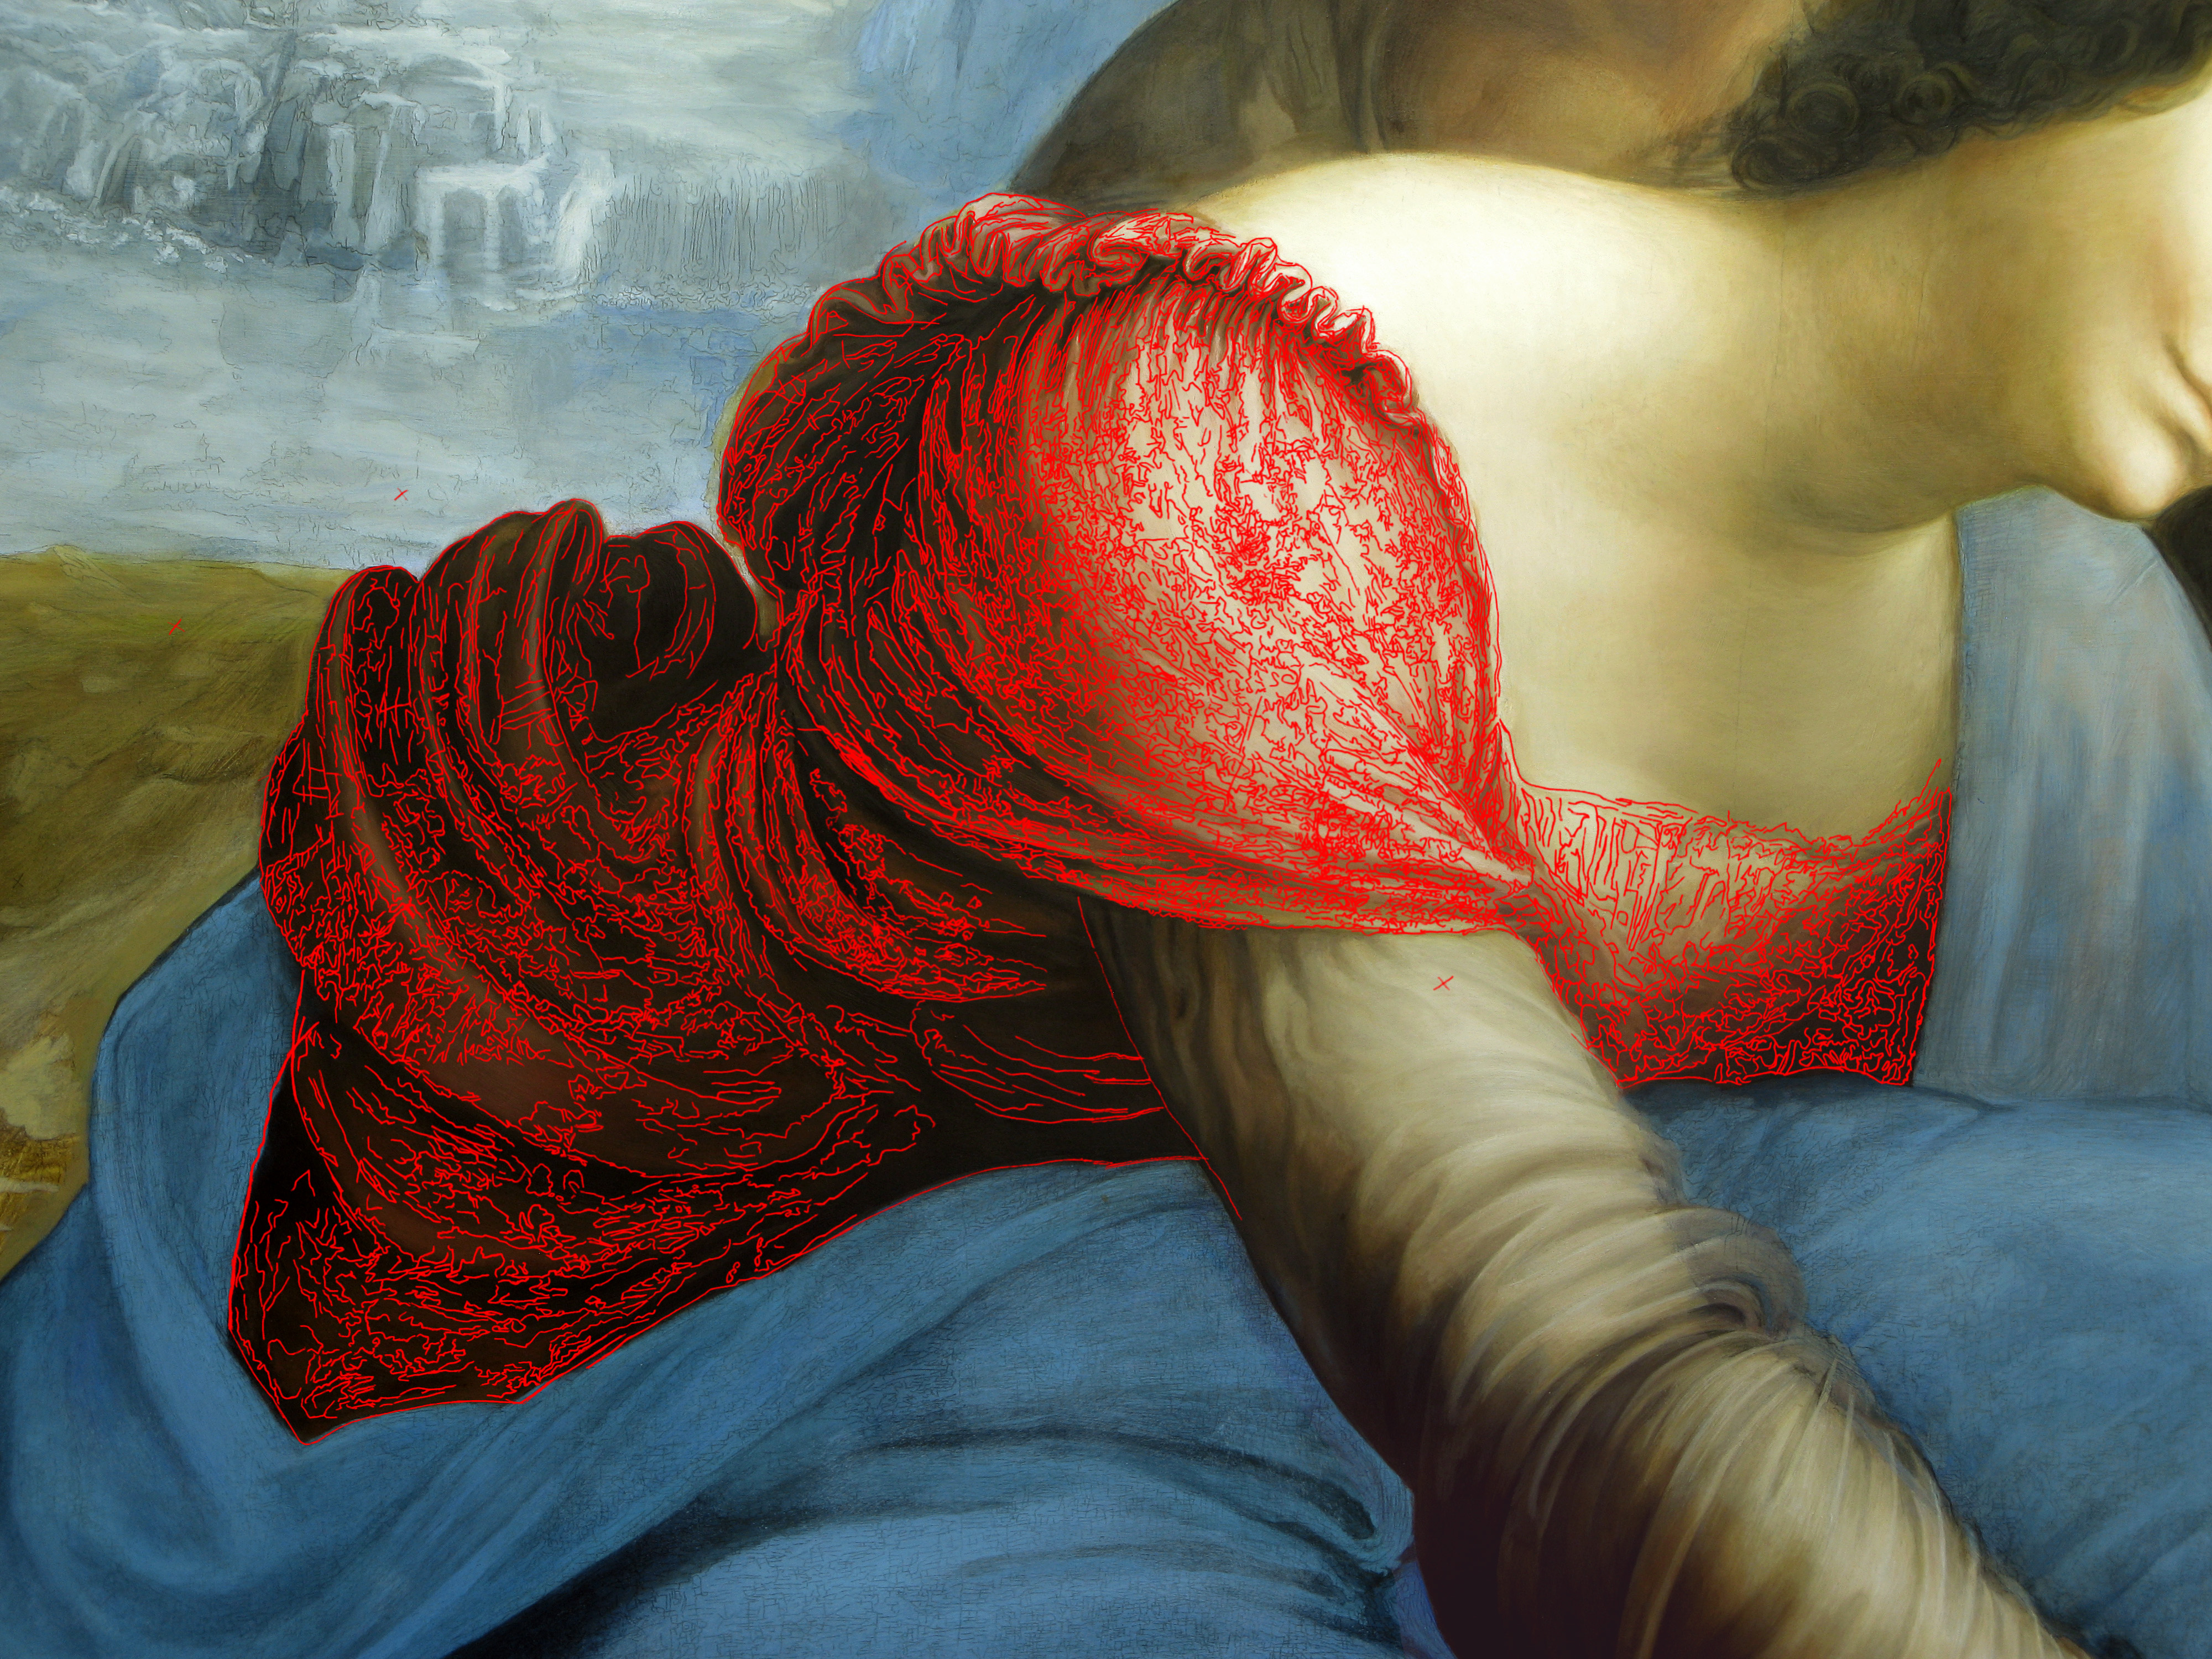
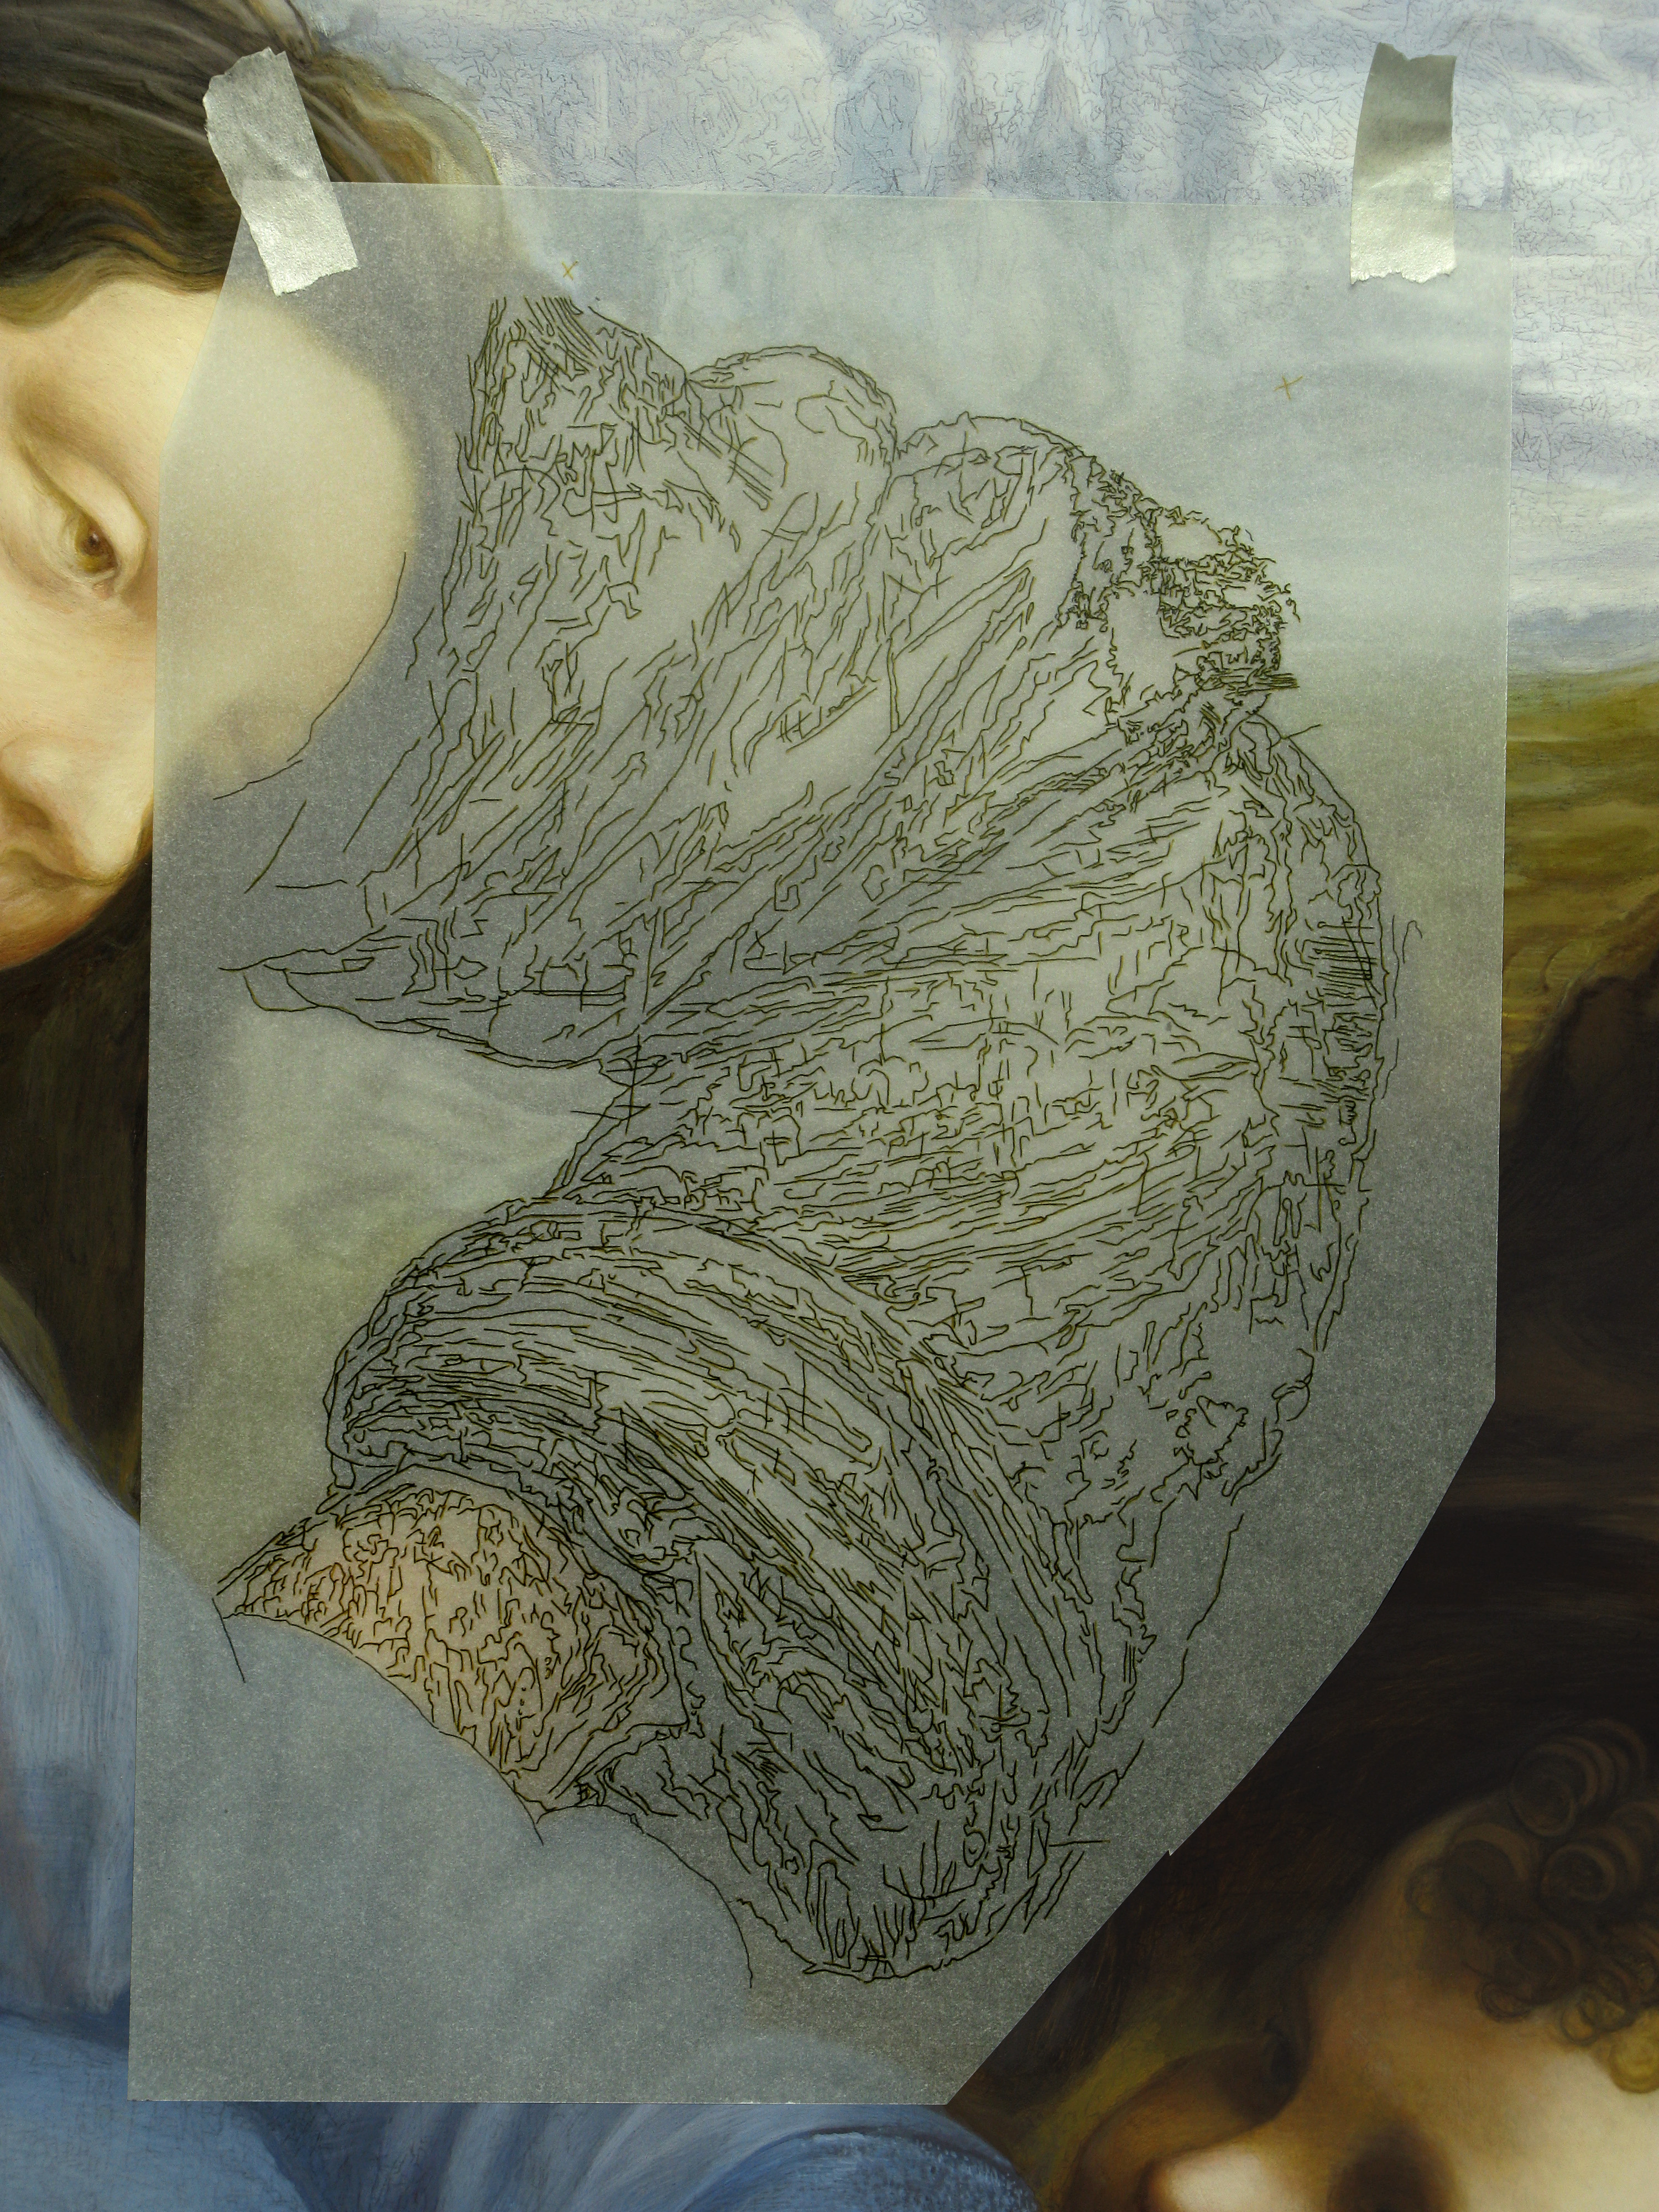
5. This document shows the vector path which covers the dress of the virgin. In this sample, the path reproduces the cracks of the original painting which are extremely many in this part.
6. The vector path has been reported on a separate document, ready to be printed at the same size of the original painting.
|
|
|
|
"Click" on pictures above to open them at full size in another window.
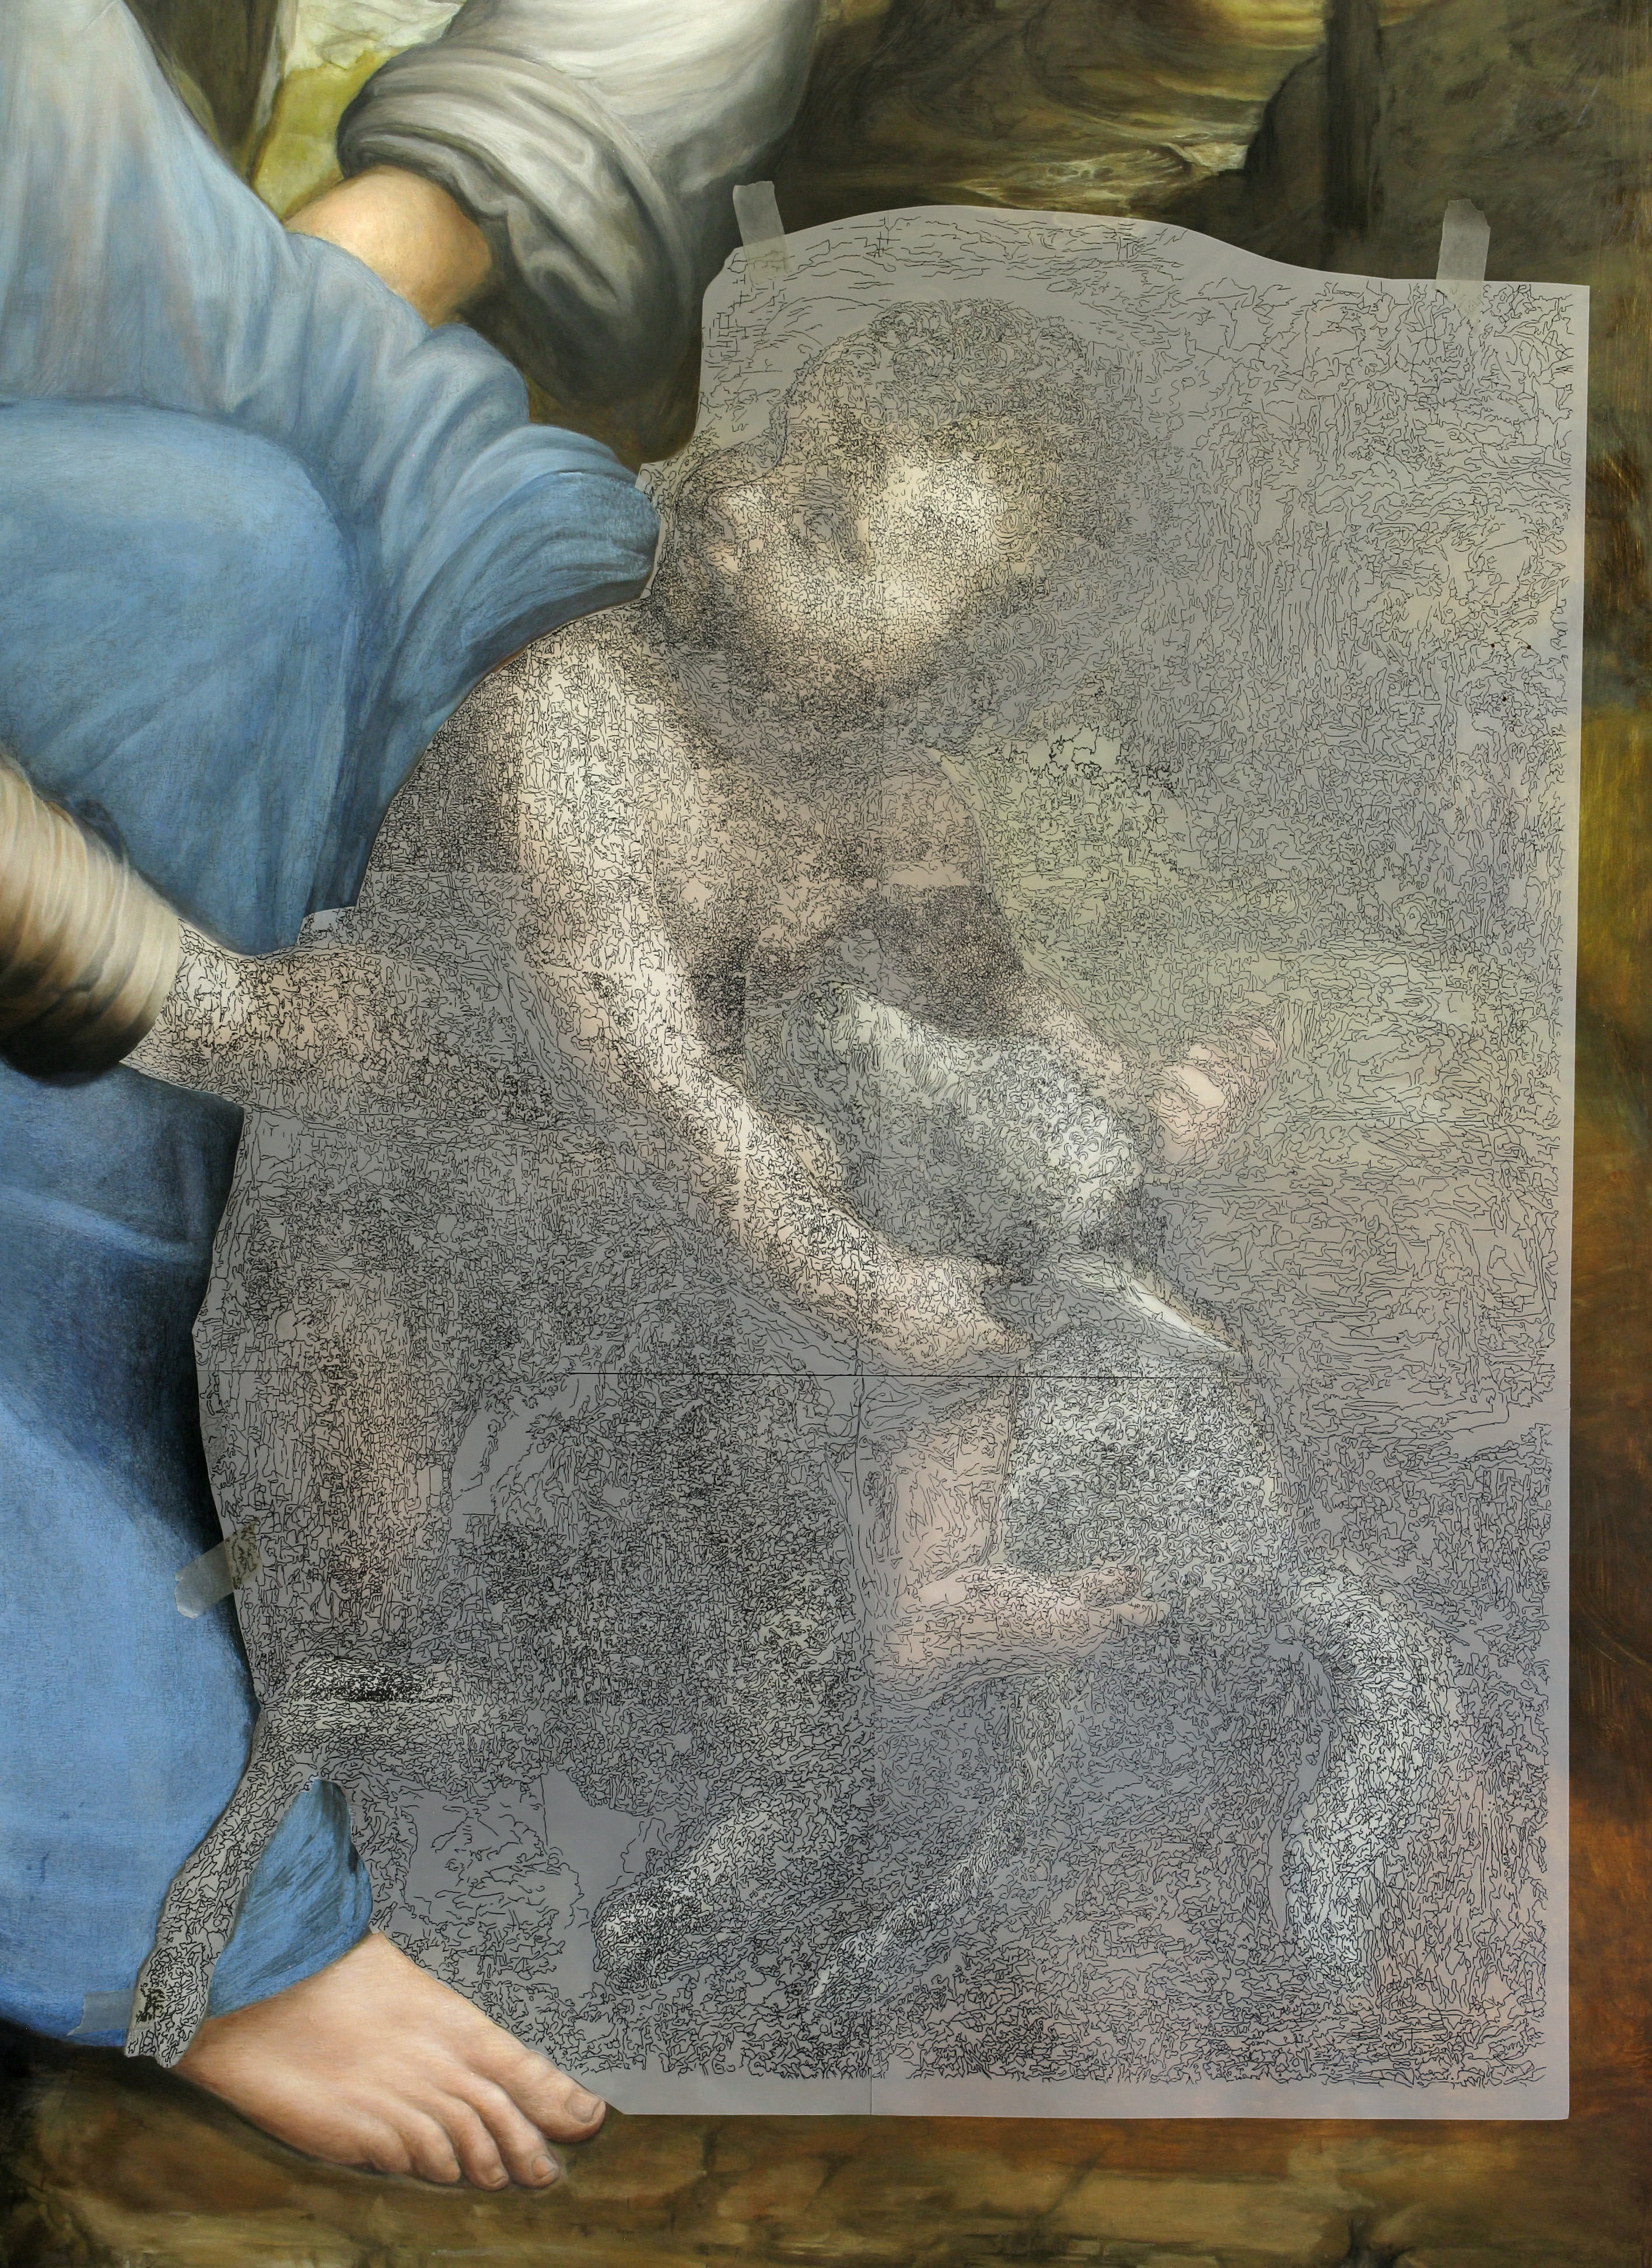
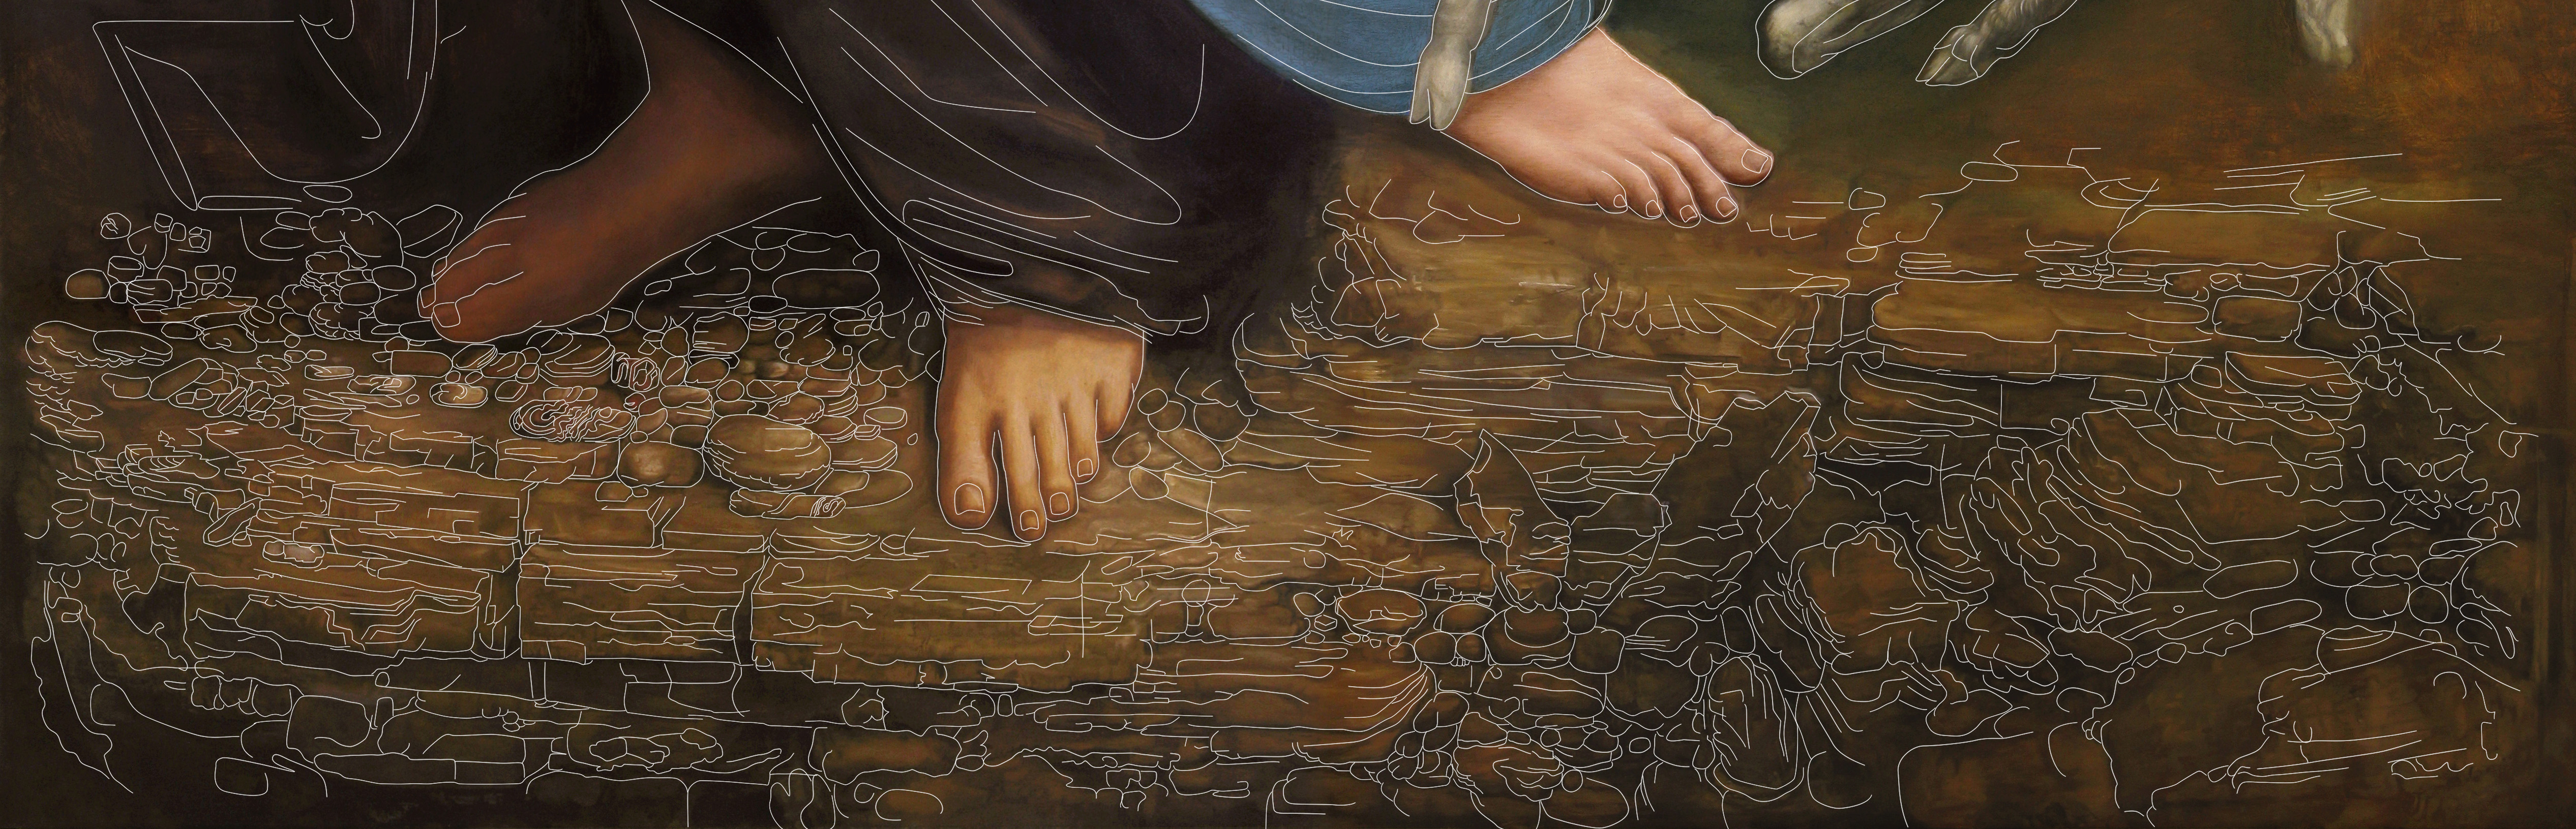
7. The printed vector path has been mounted on the panel. Depends of sizes, some of paths have been printed on tracing paper, to help its correct matching with the painting. Benchmarks have been also drawn to be able to replace the path again if needed.
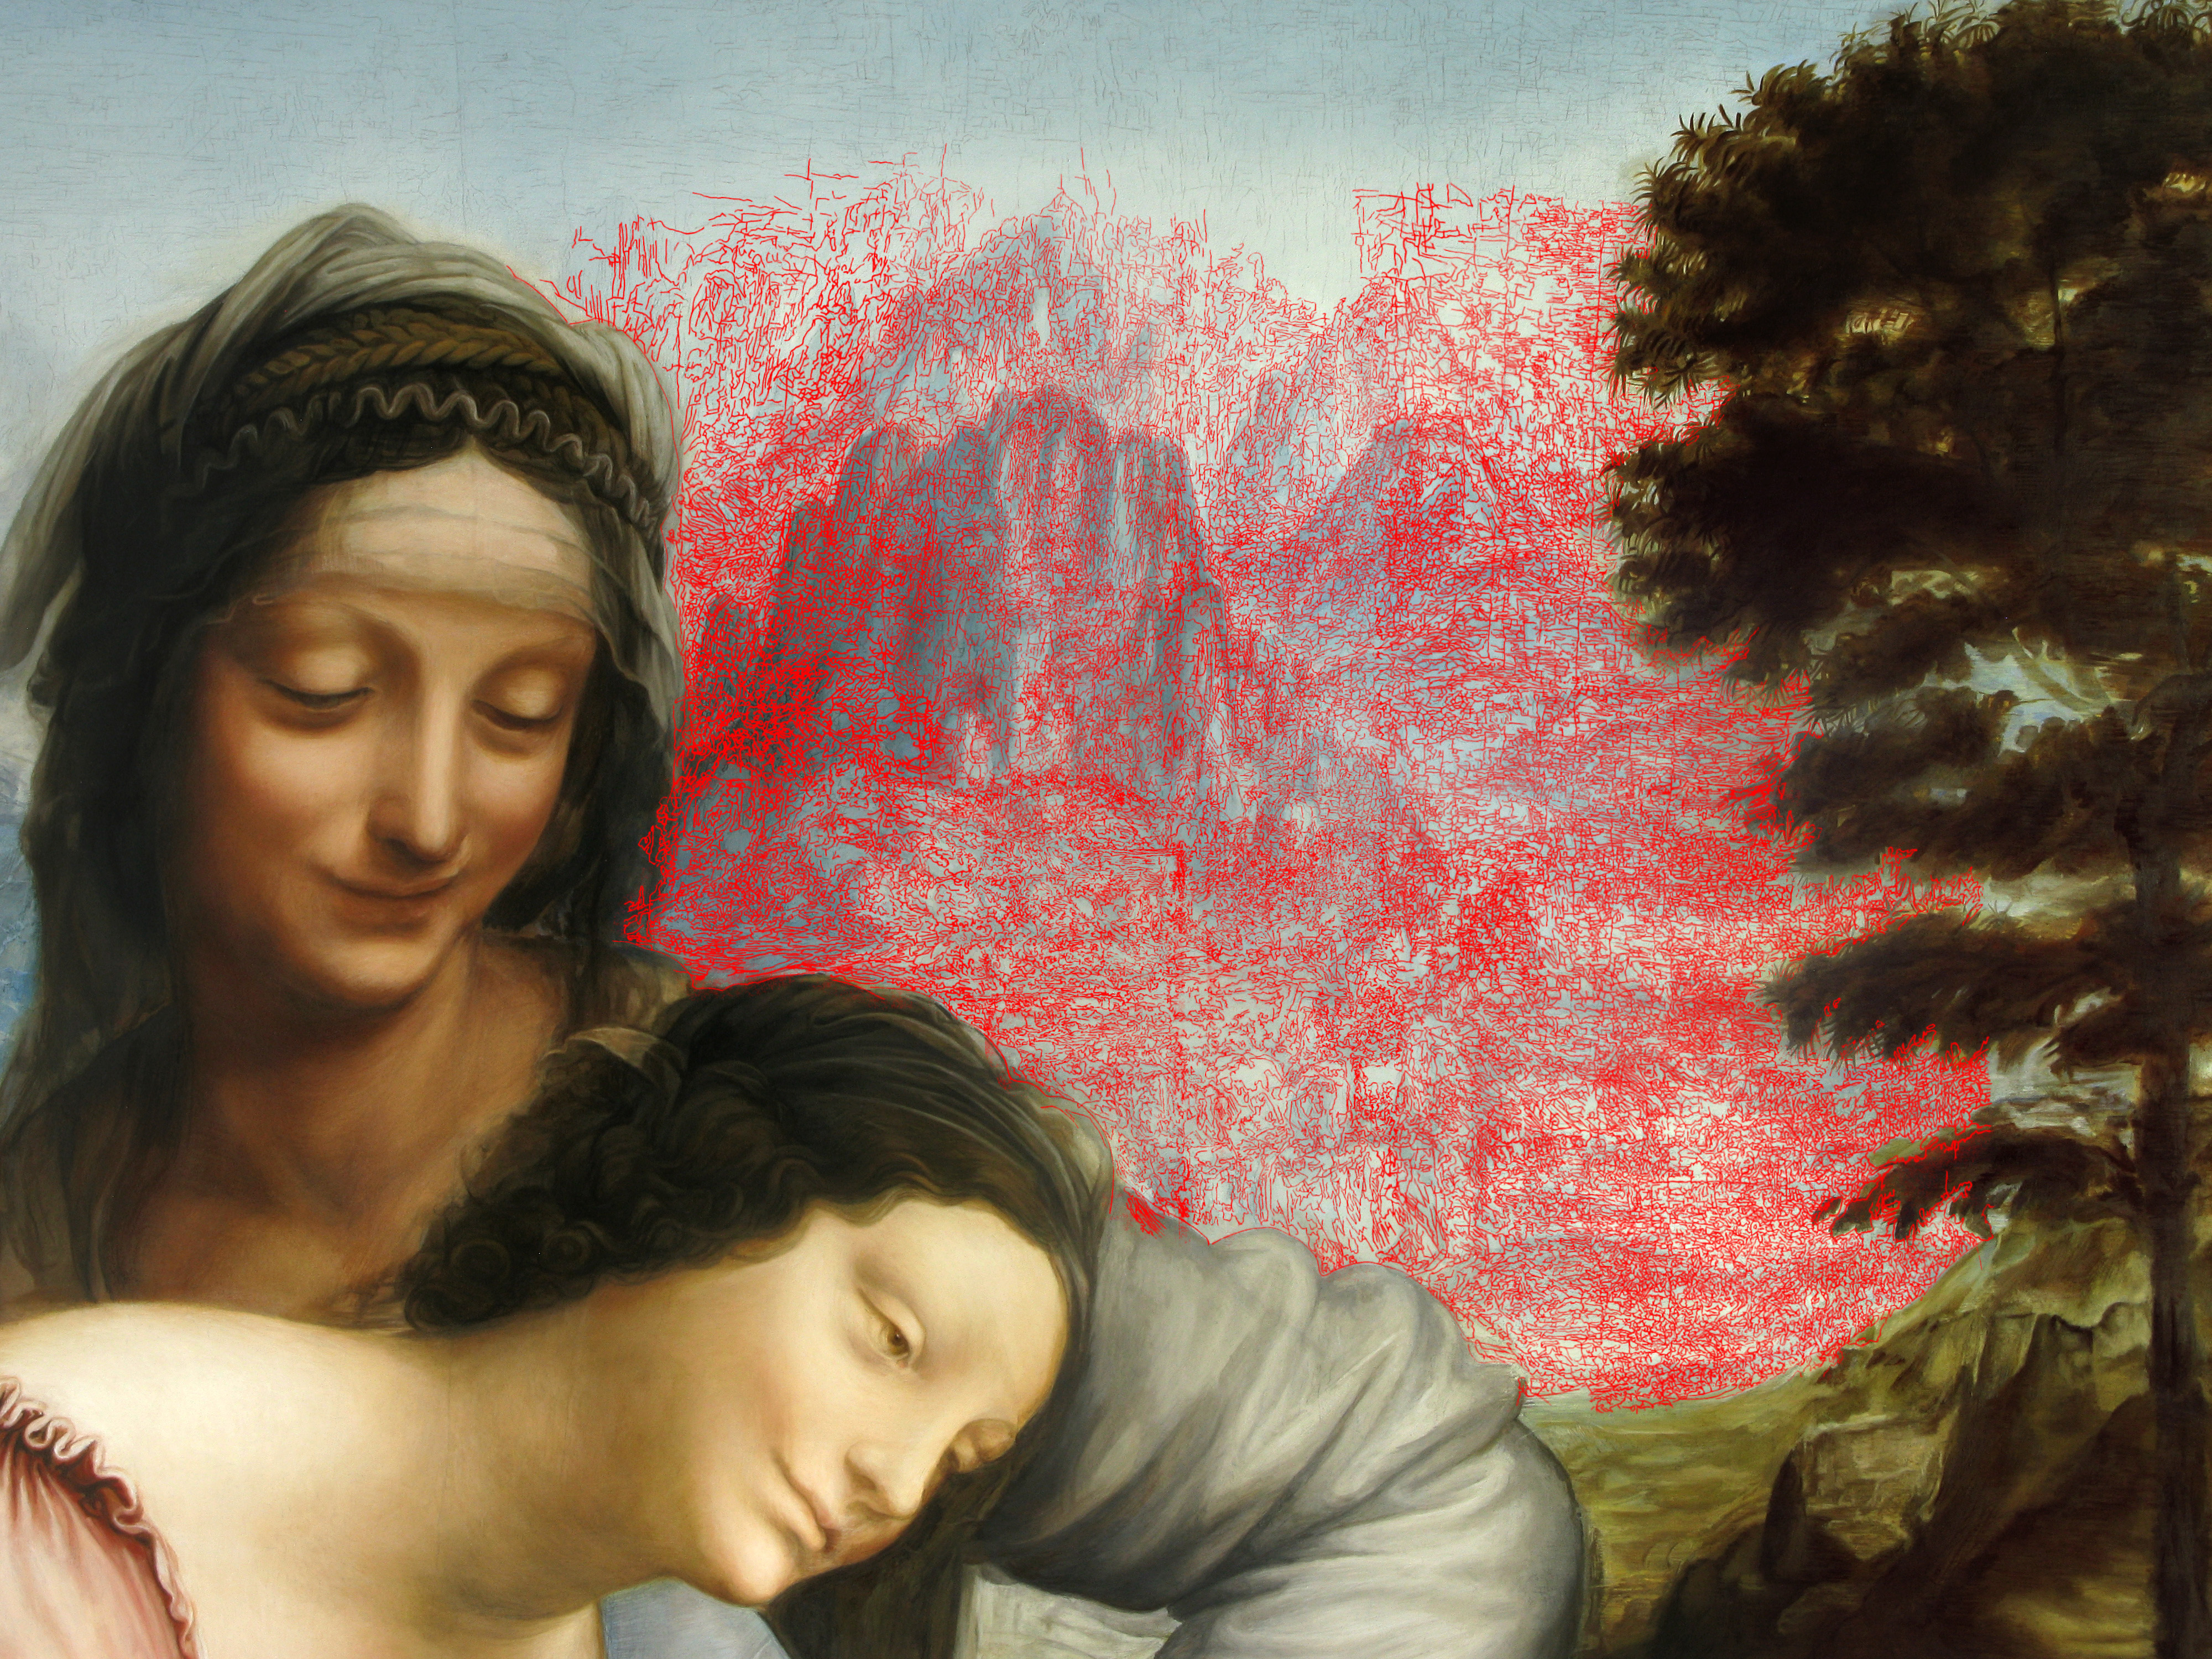
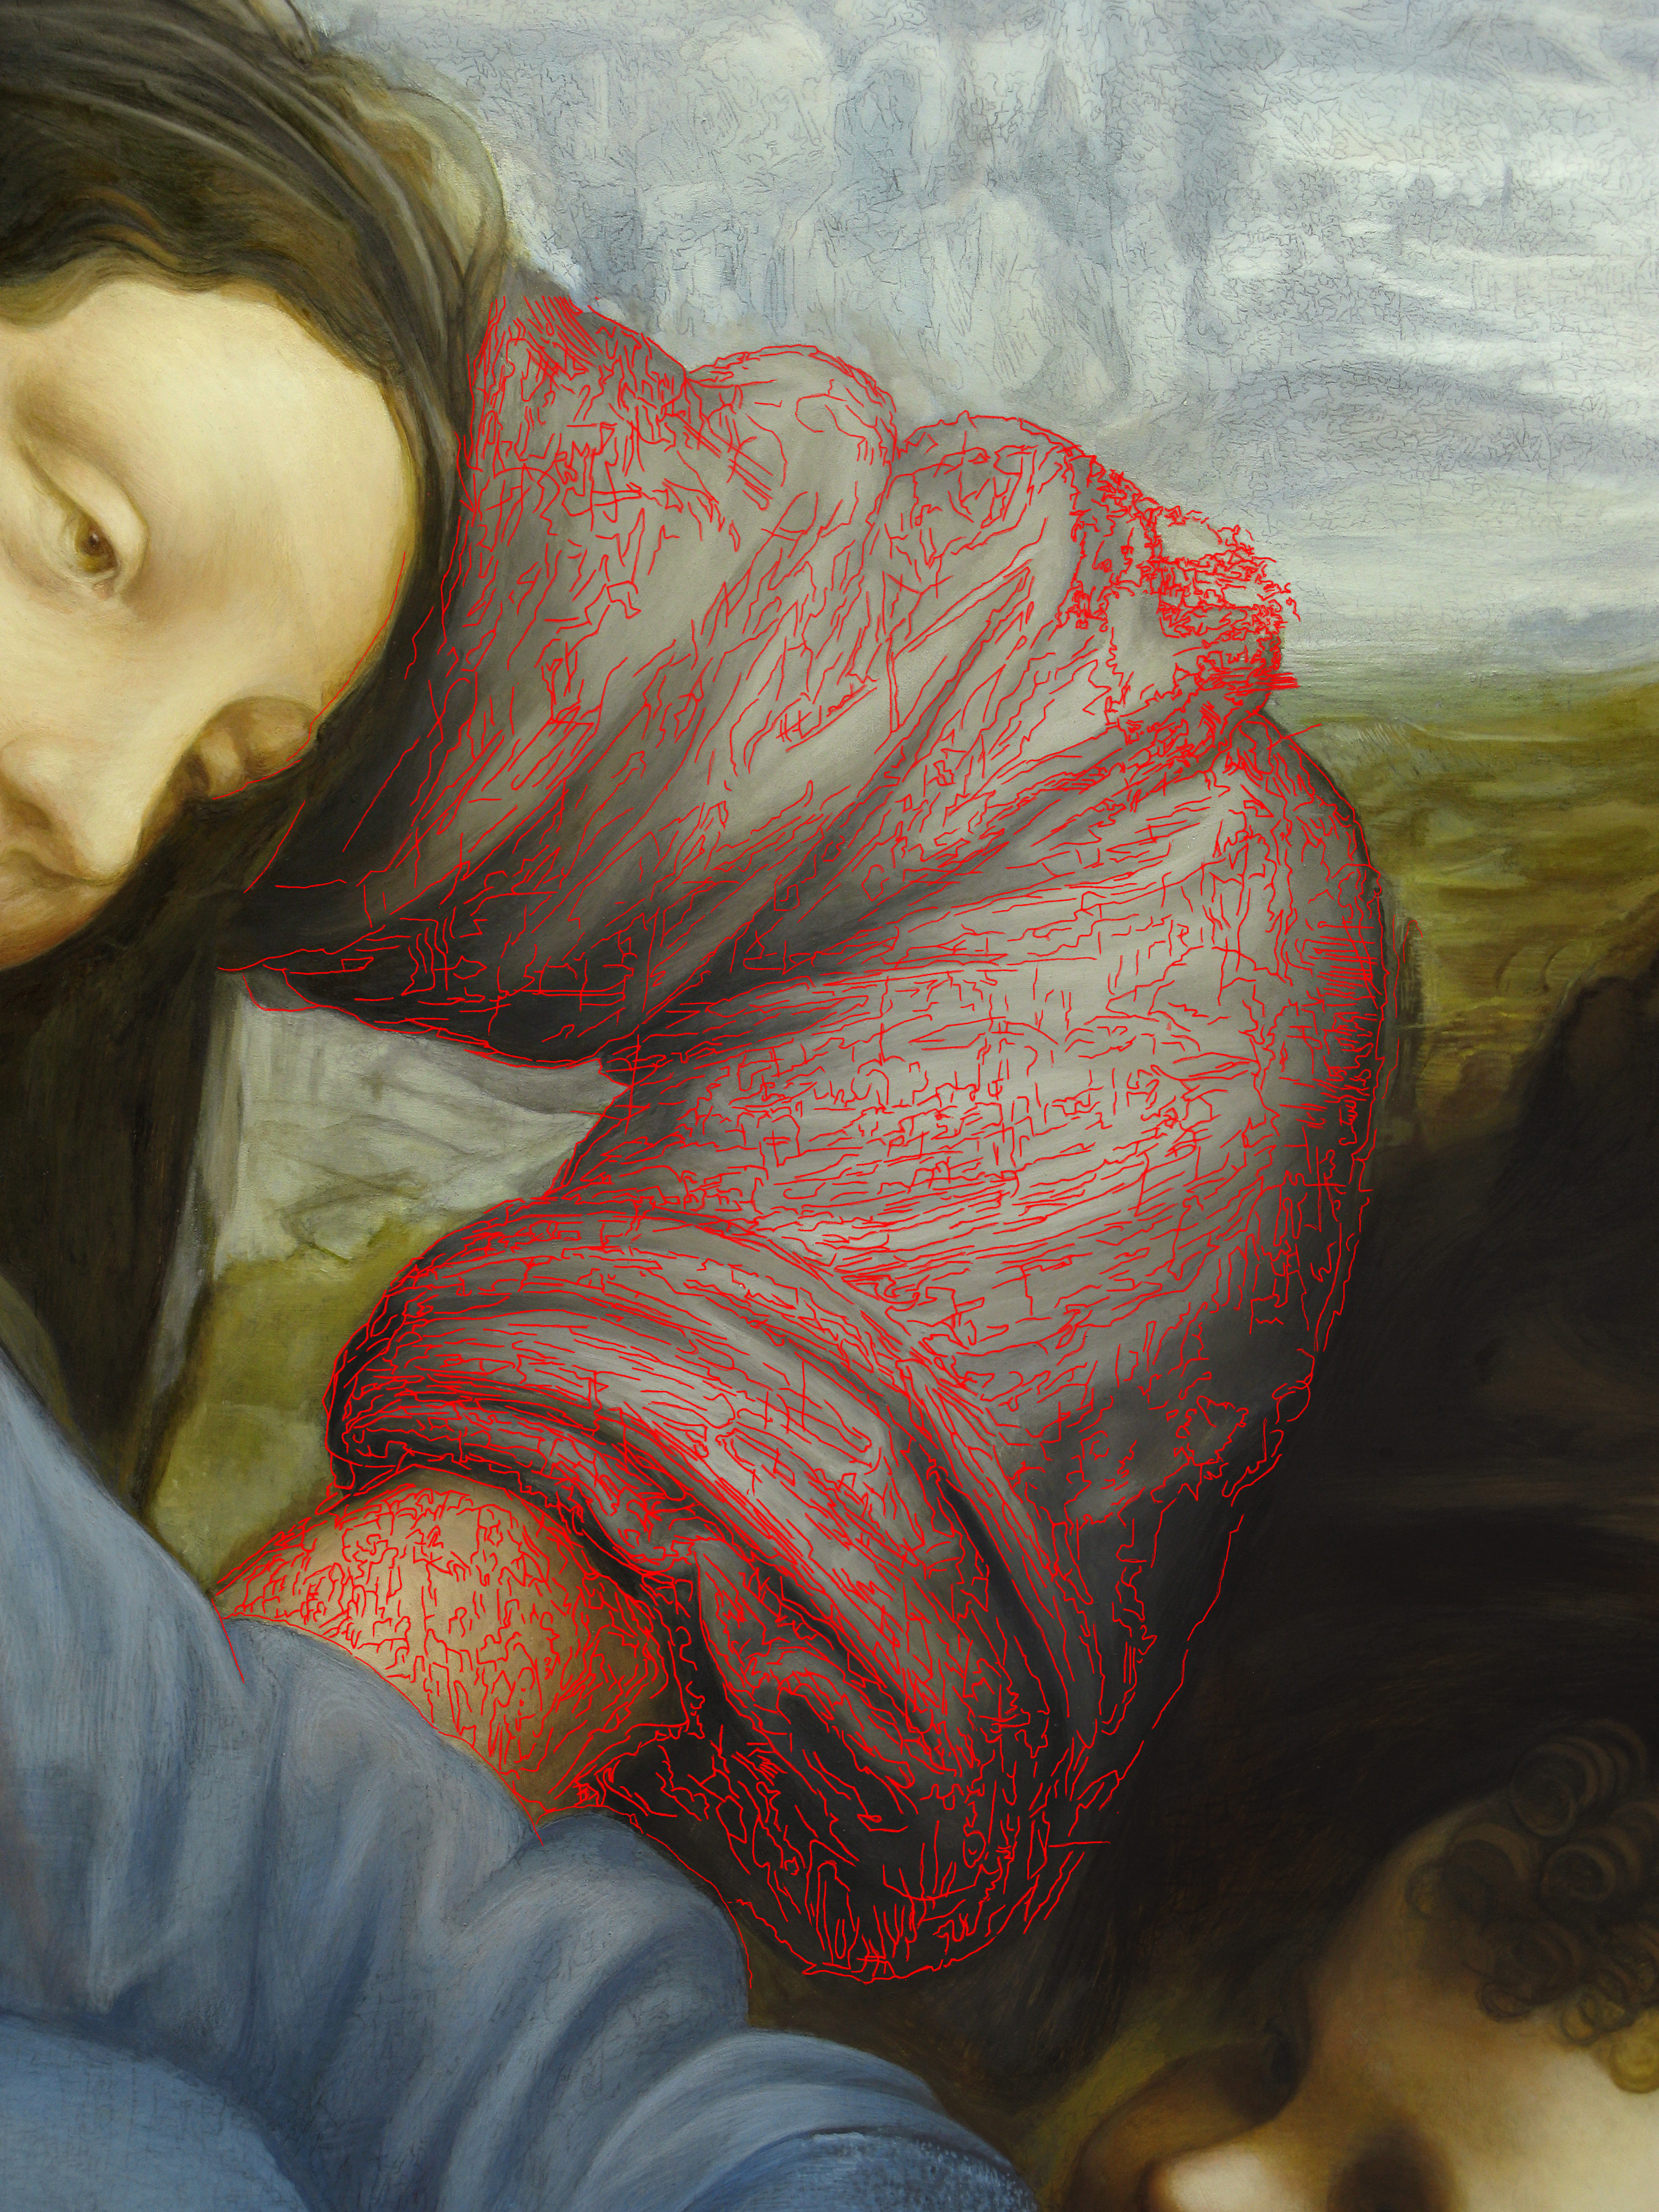
8. The path (highlighted by red colour) has been reported on the painting. This step has been done by using carbon paper.
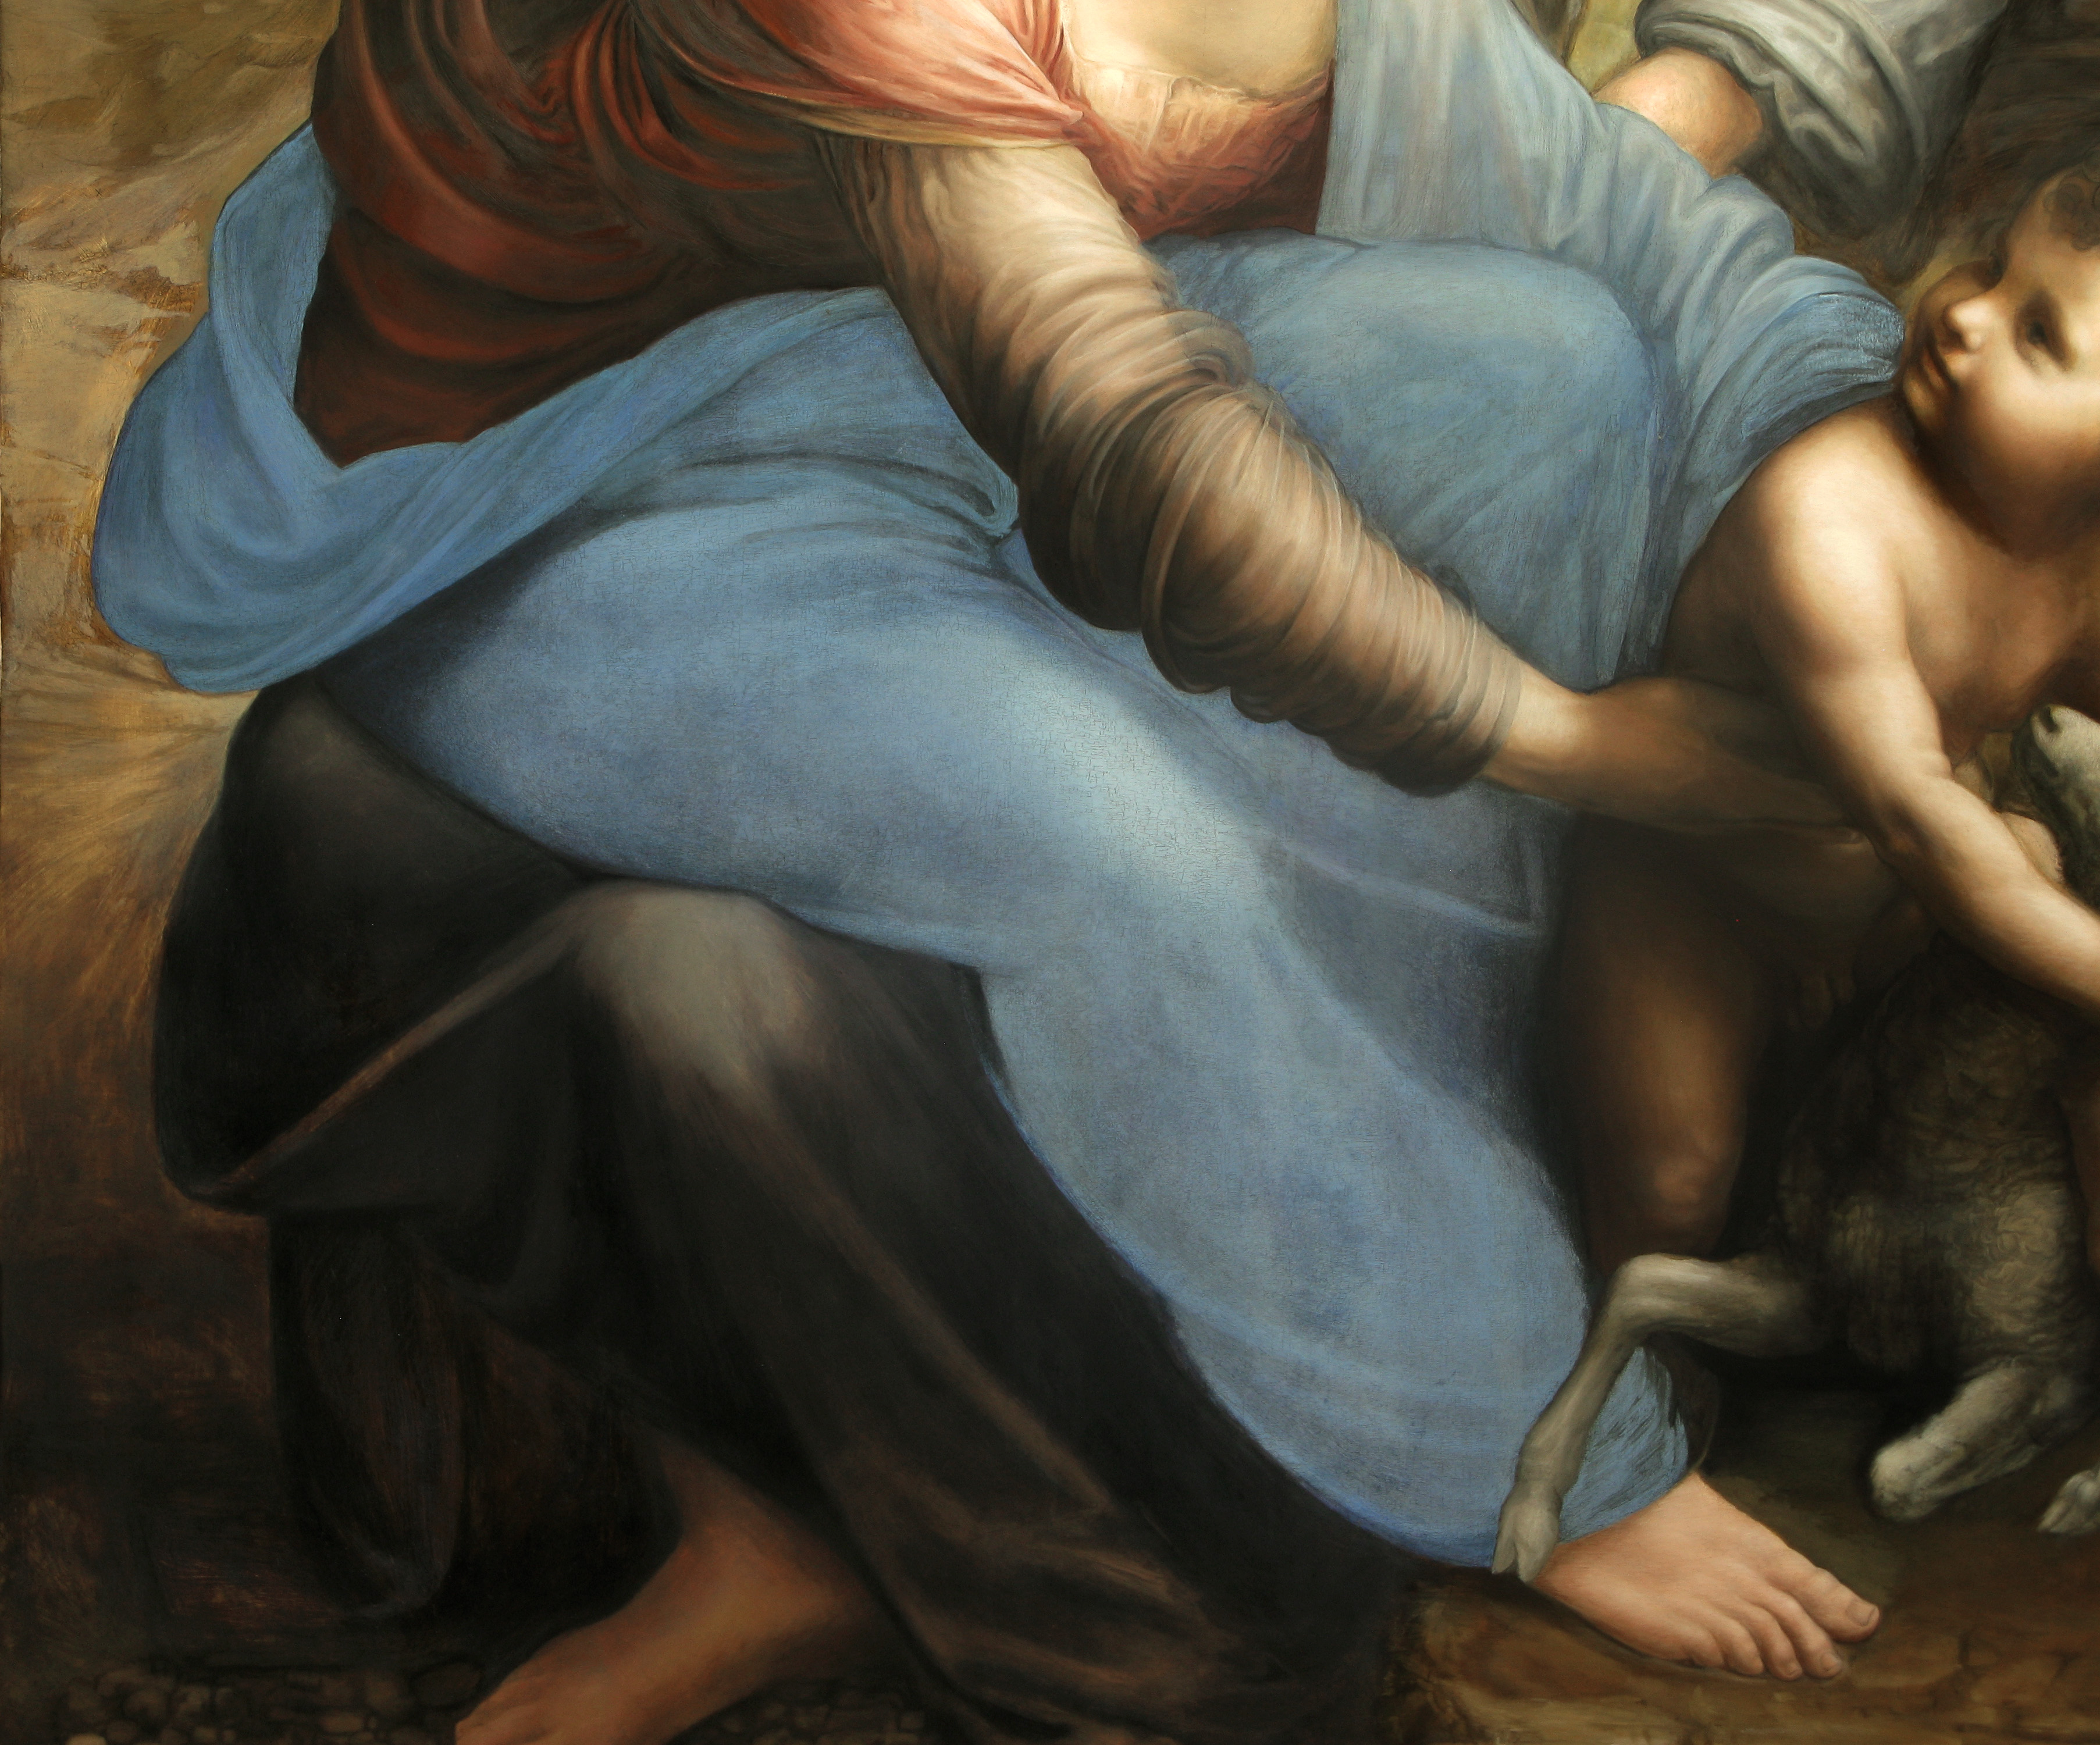
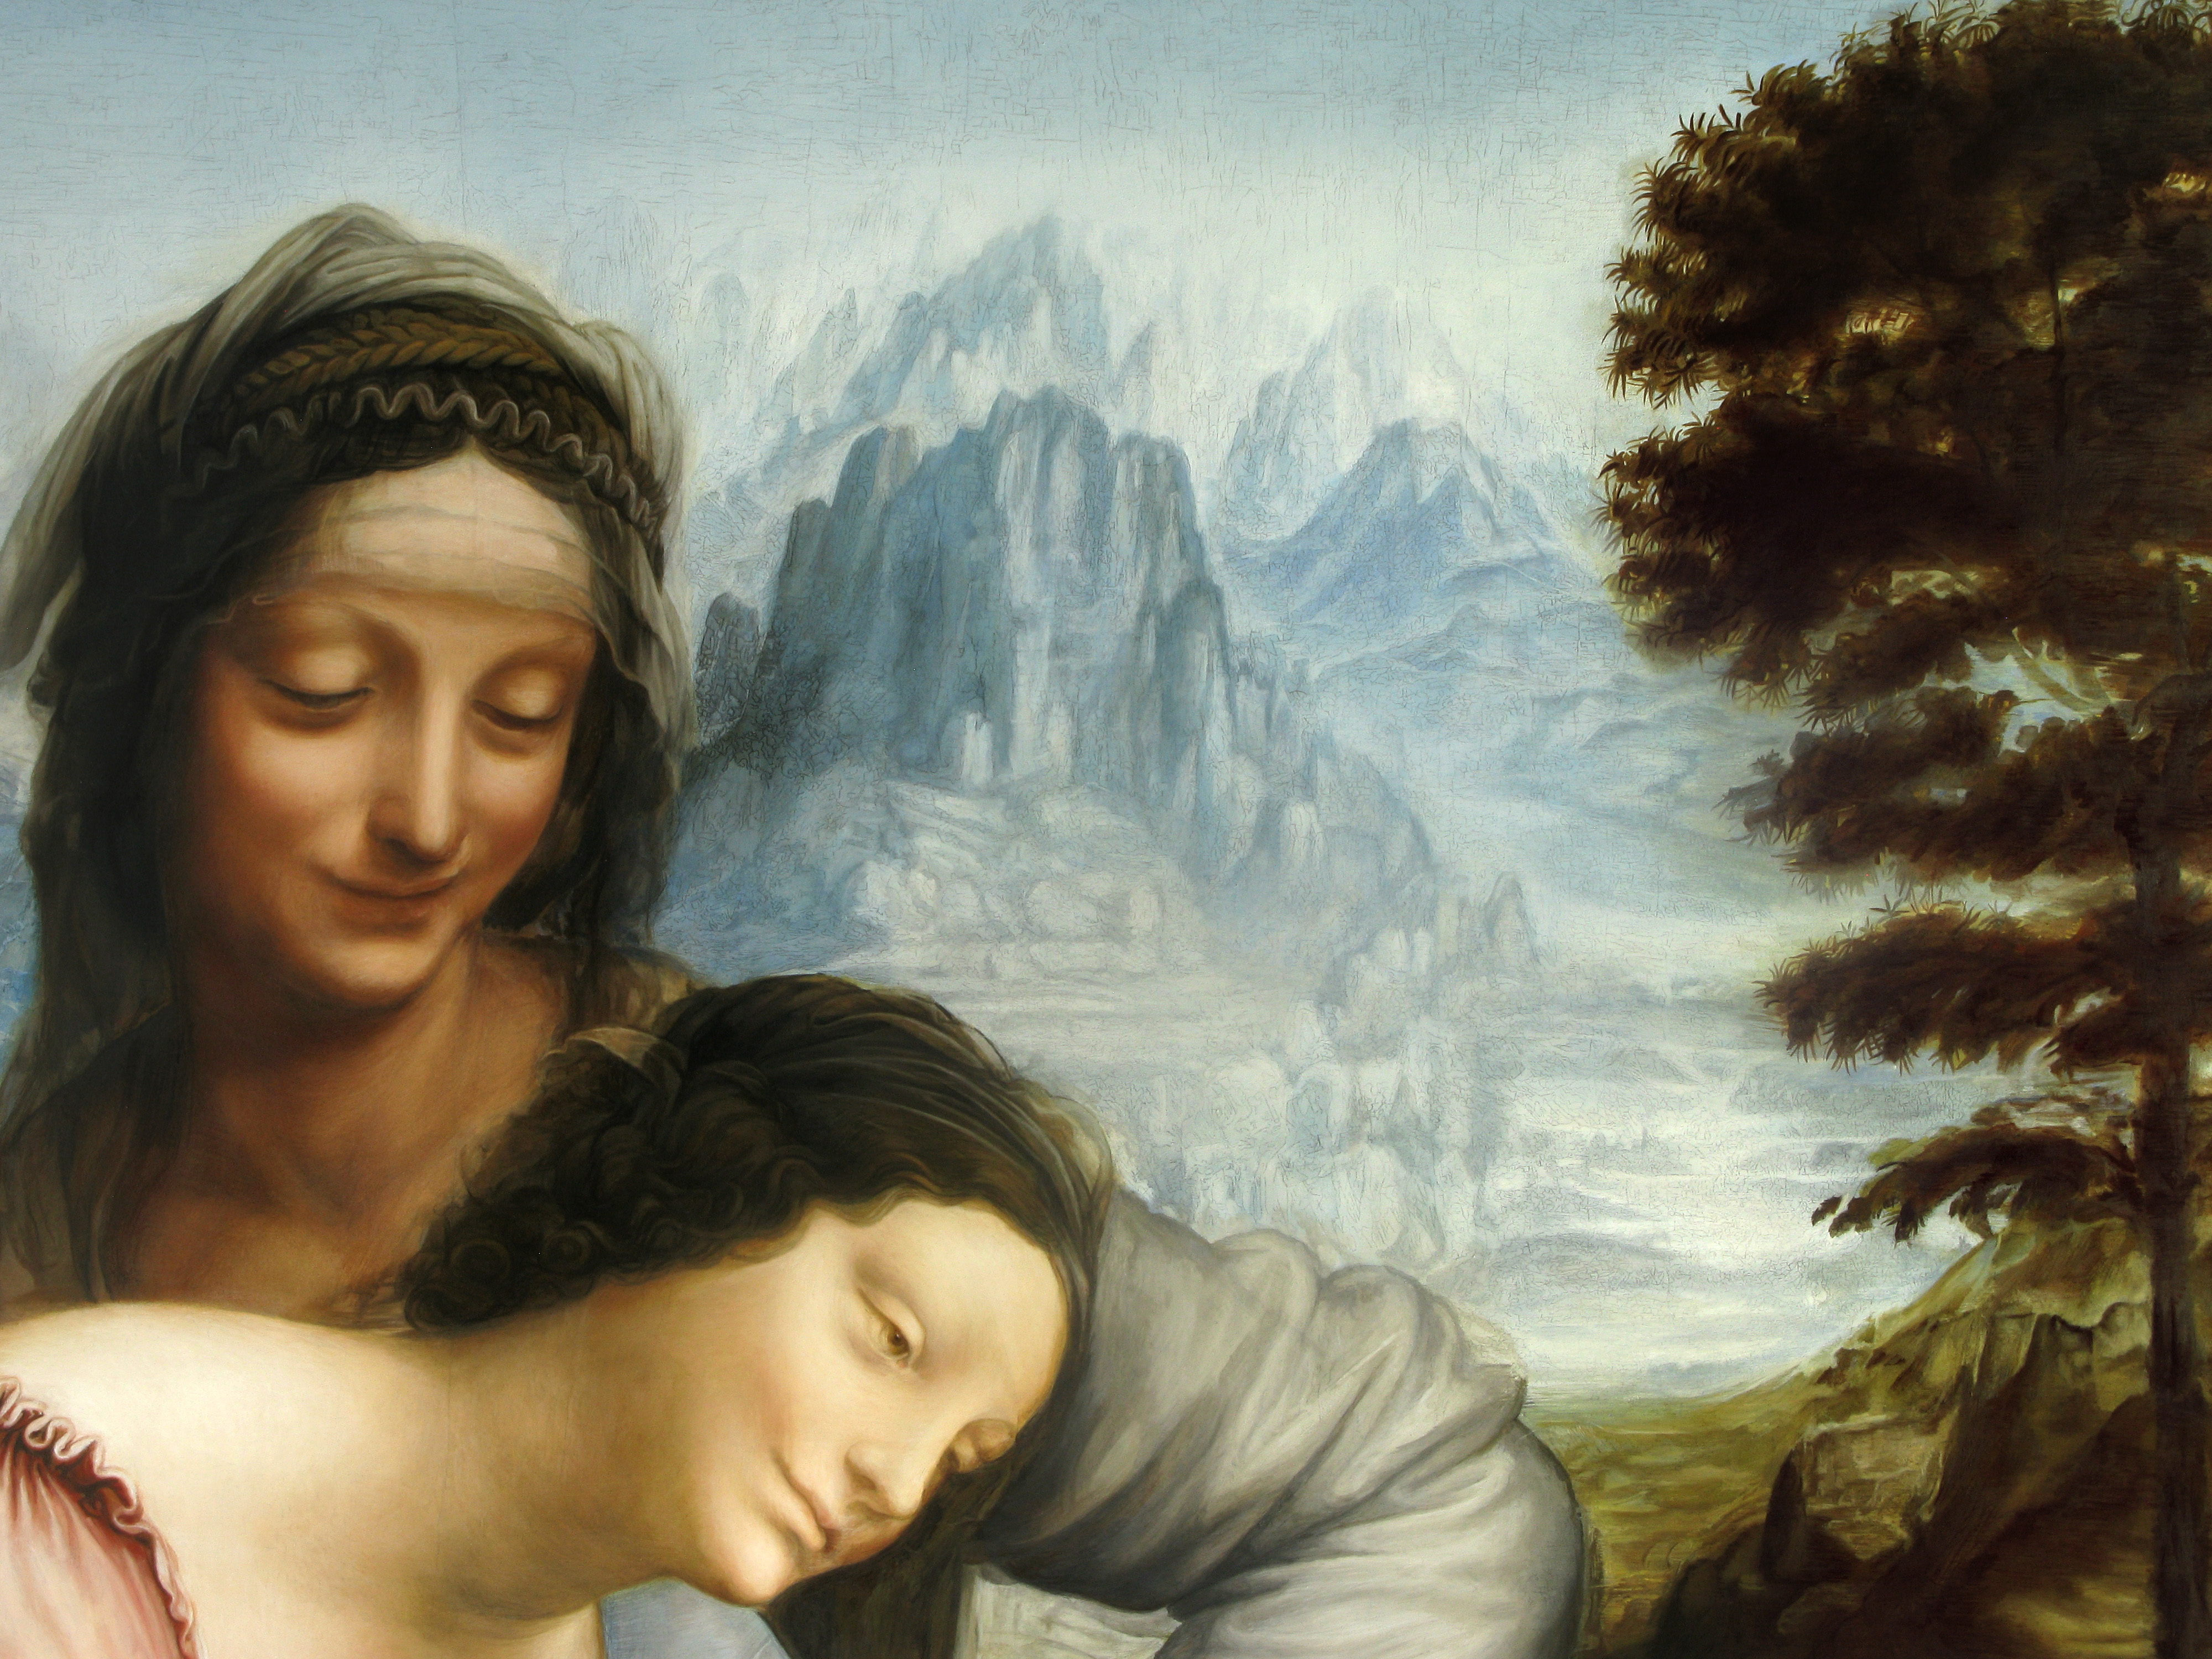
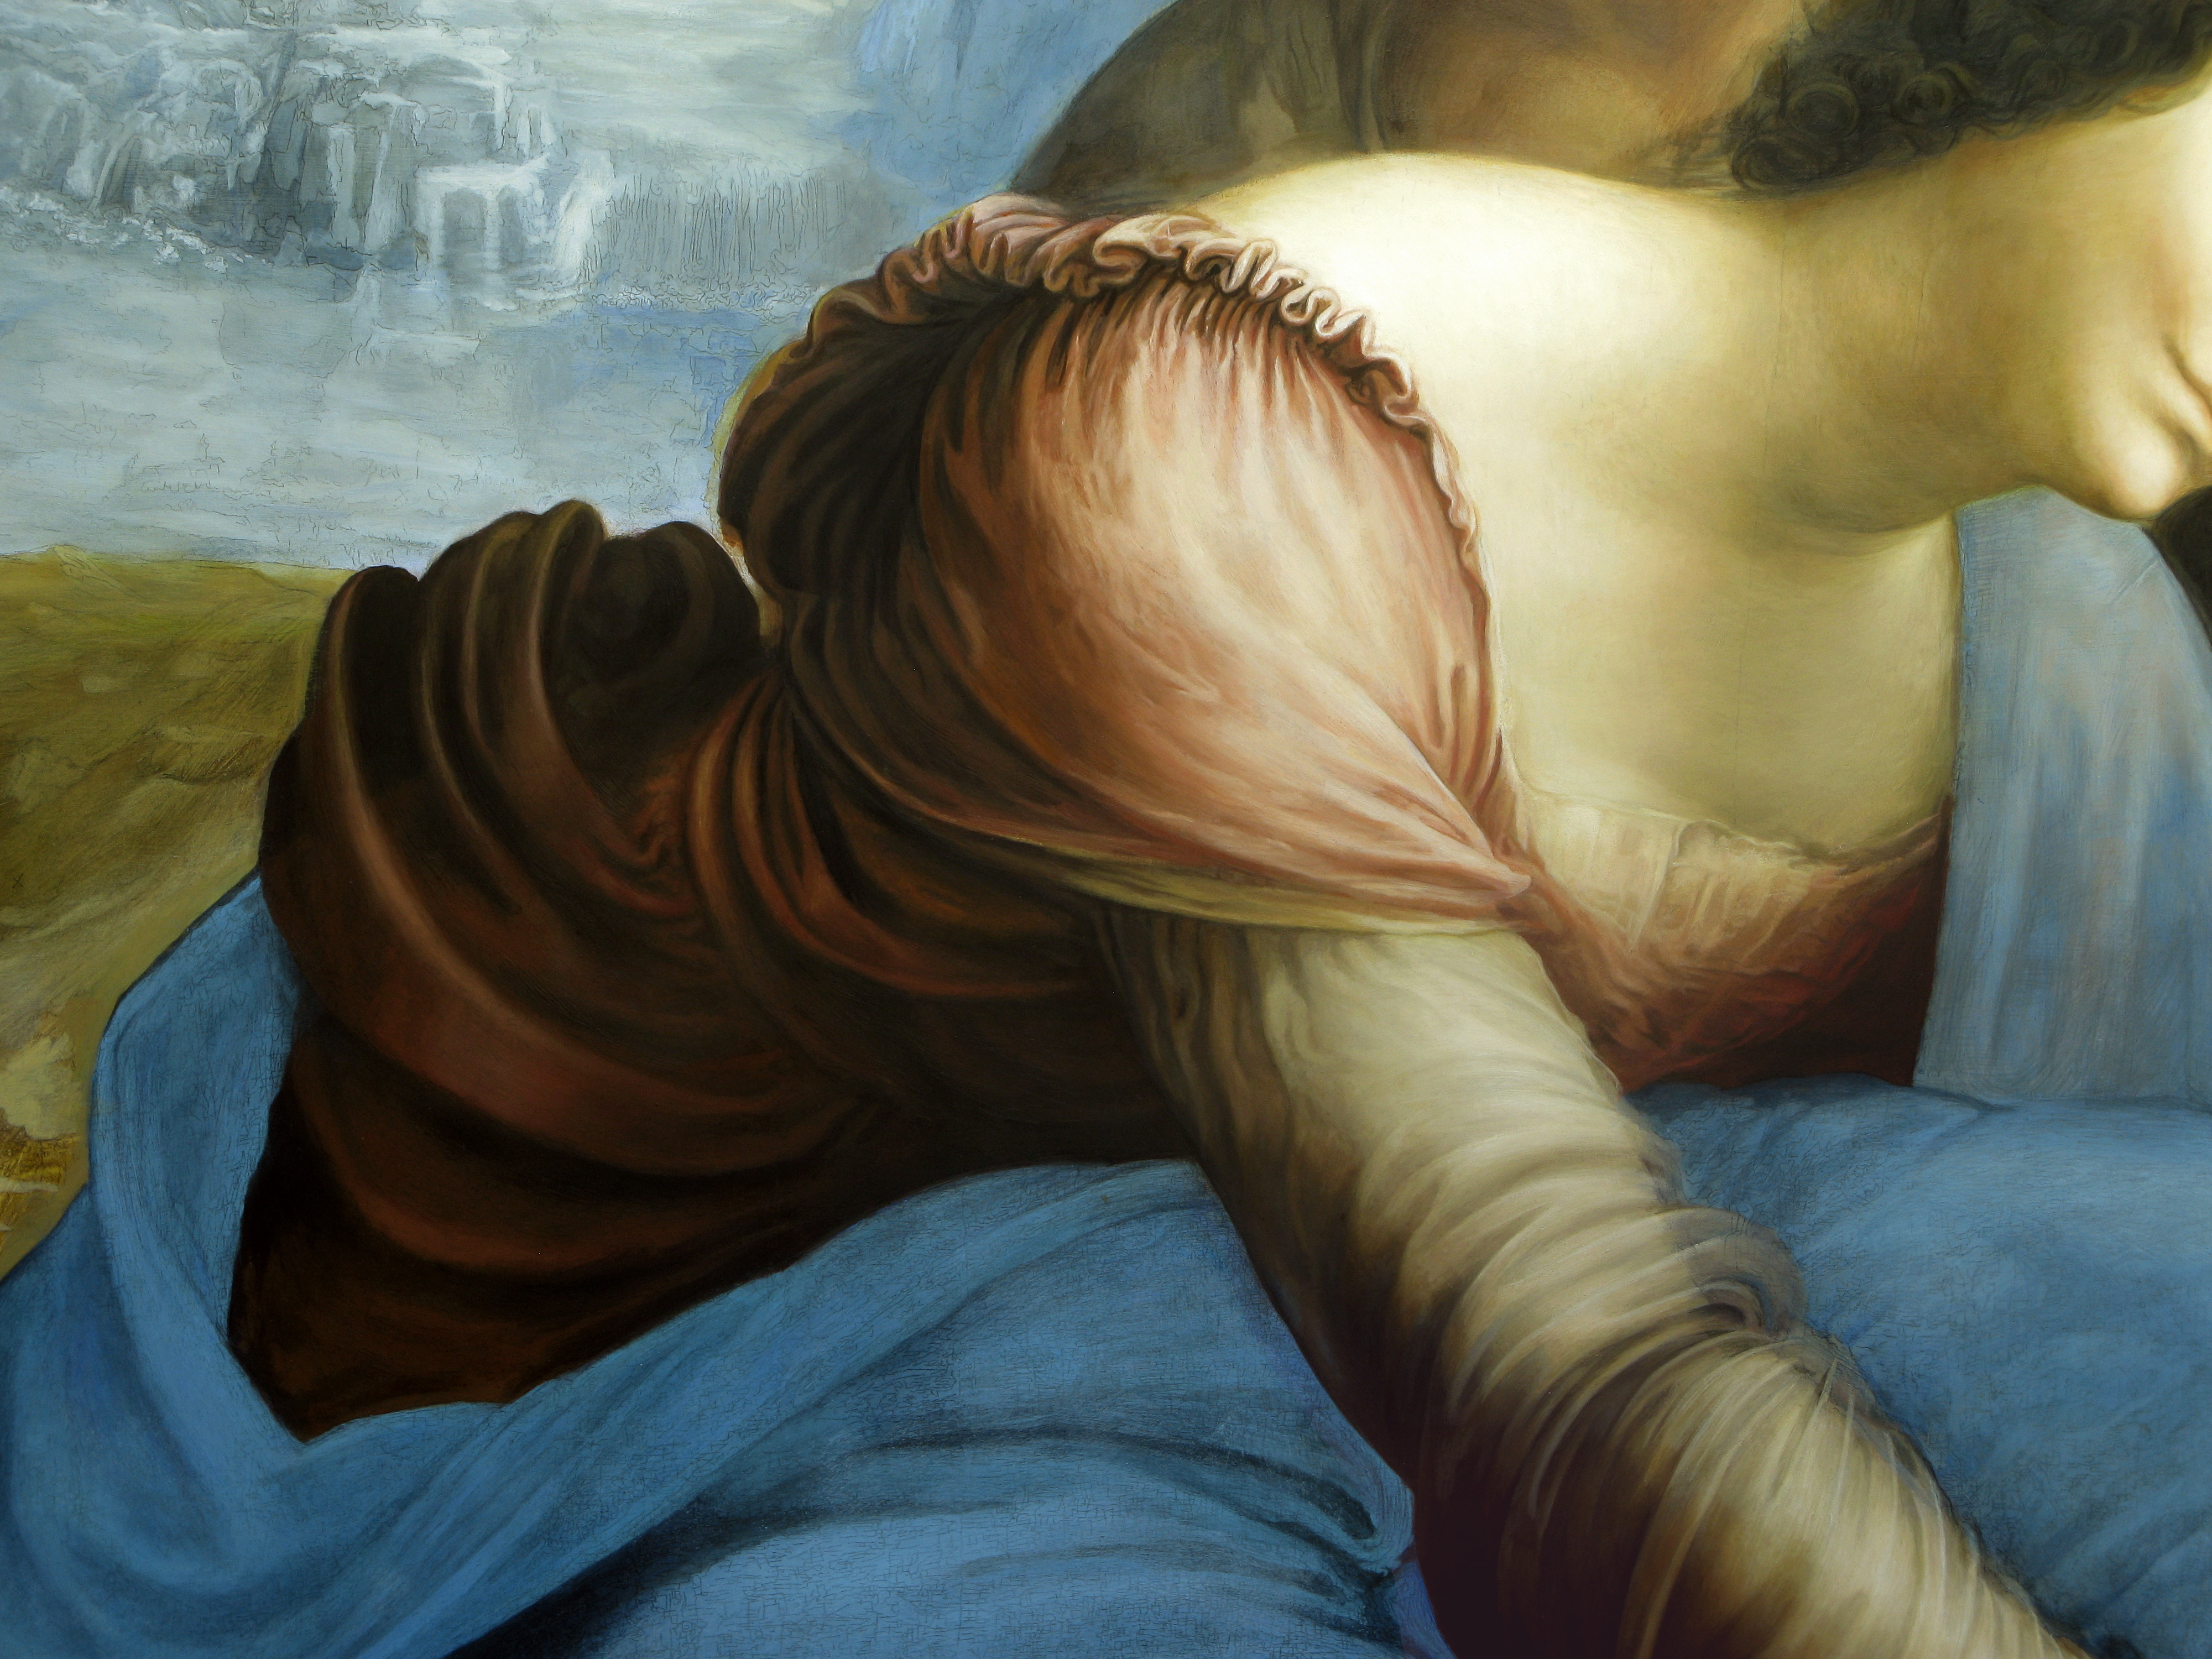
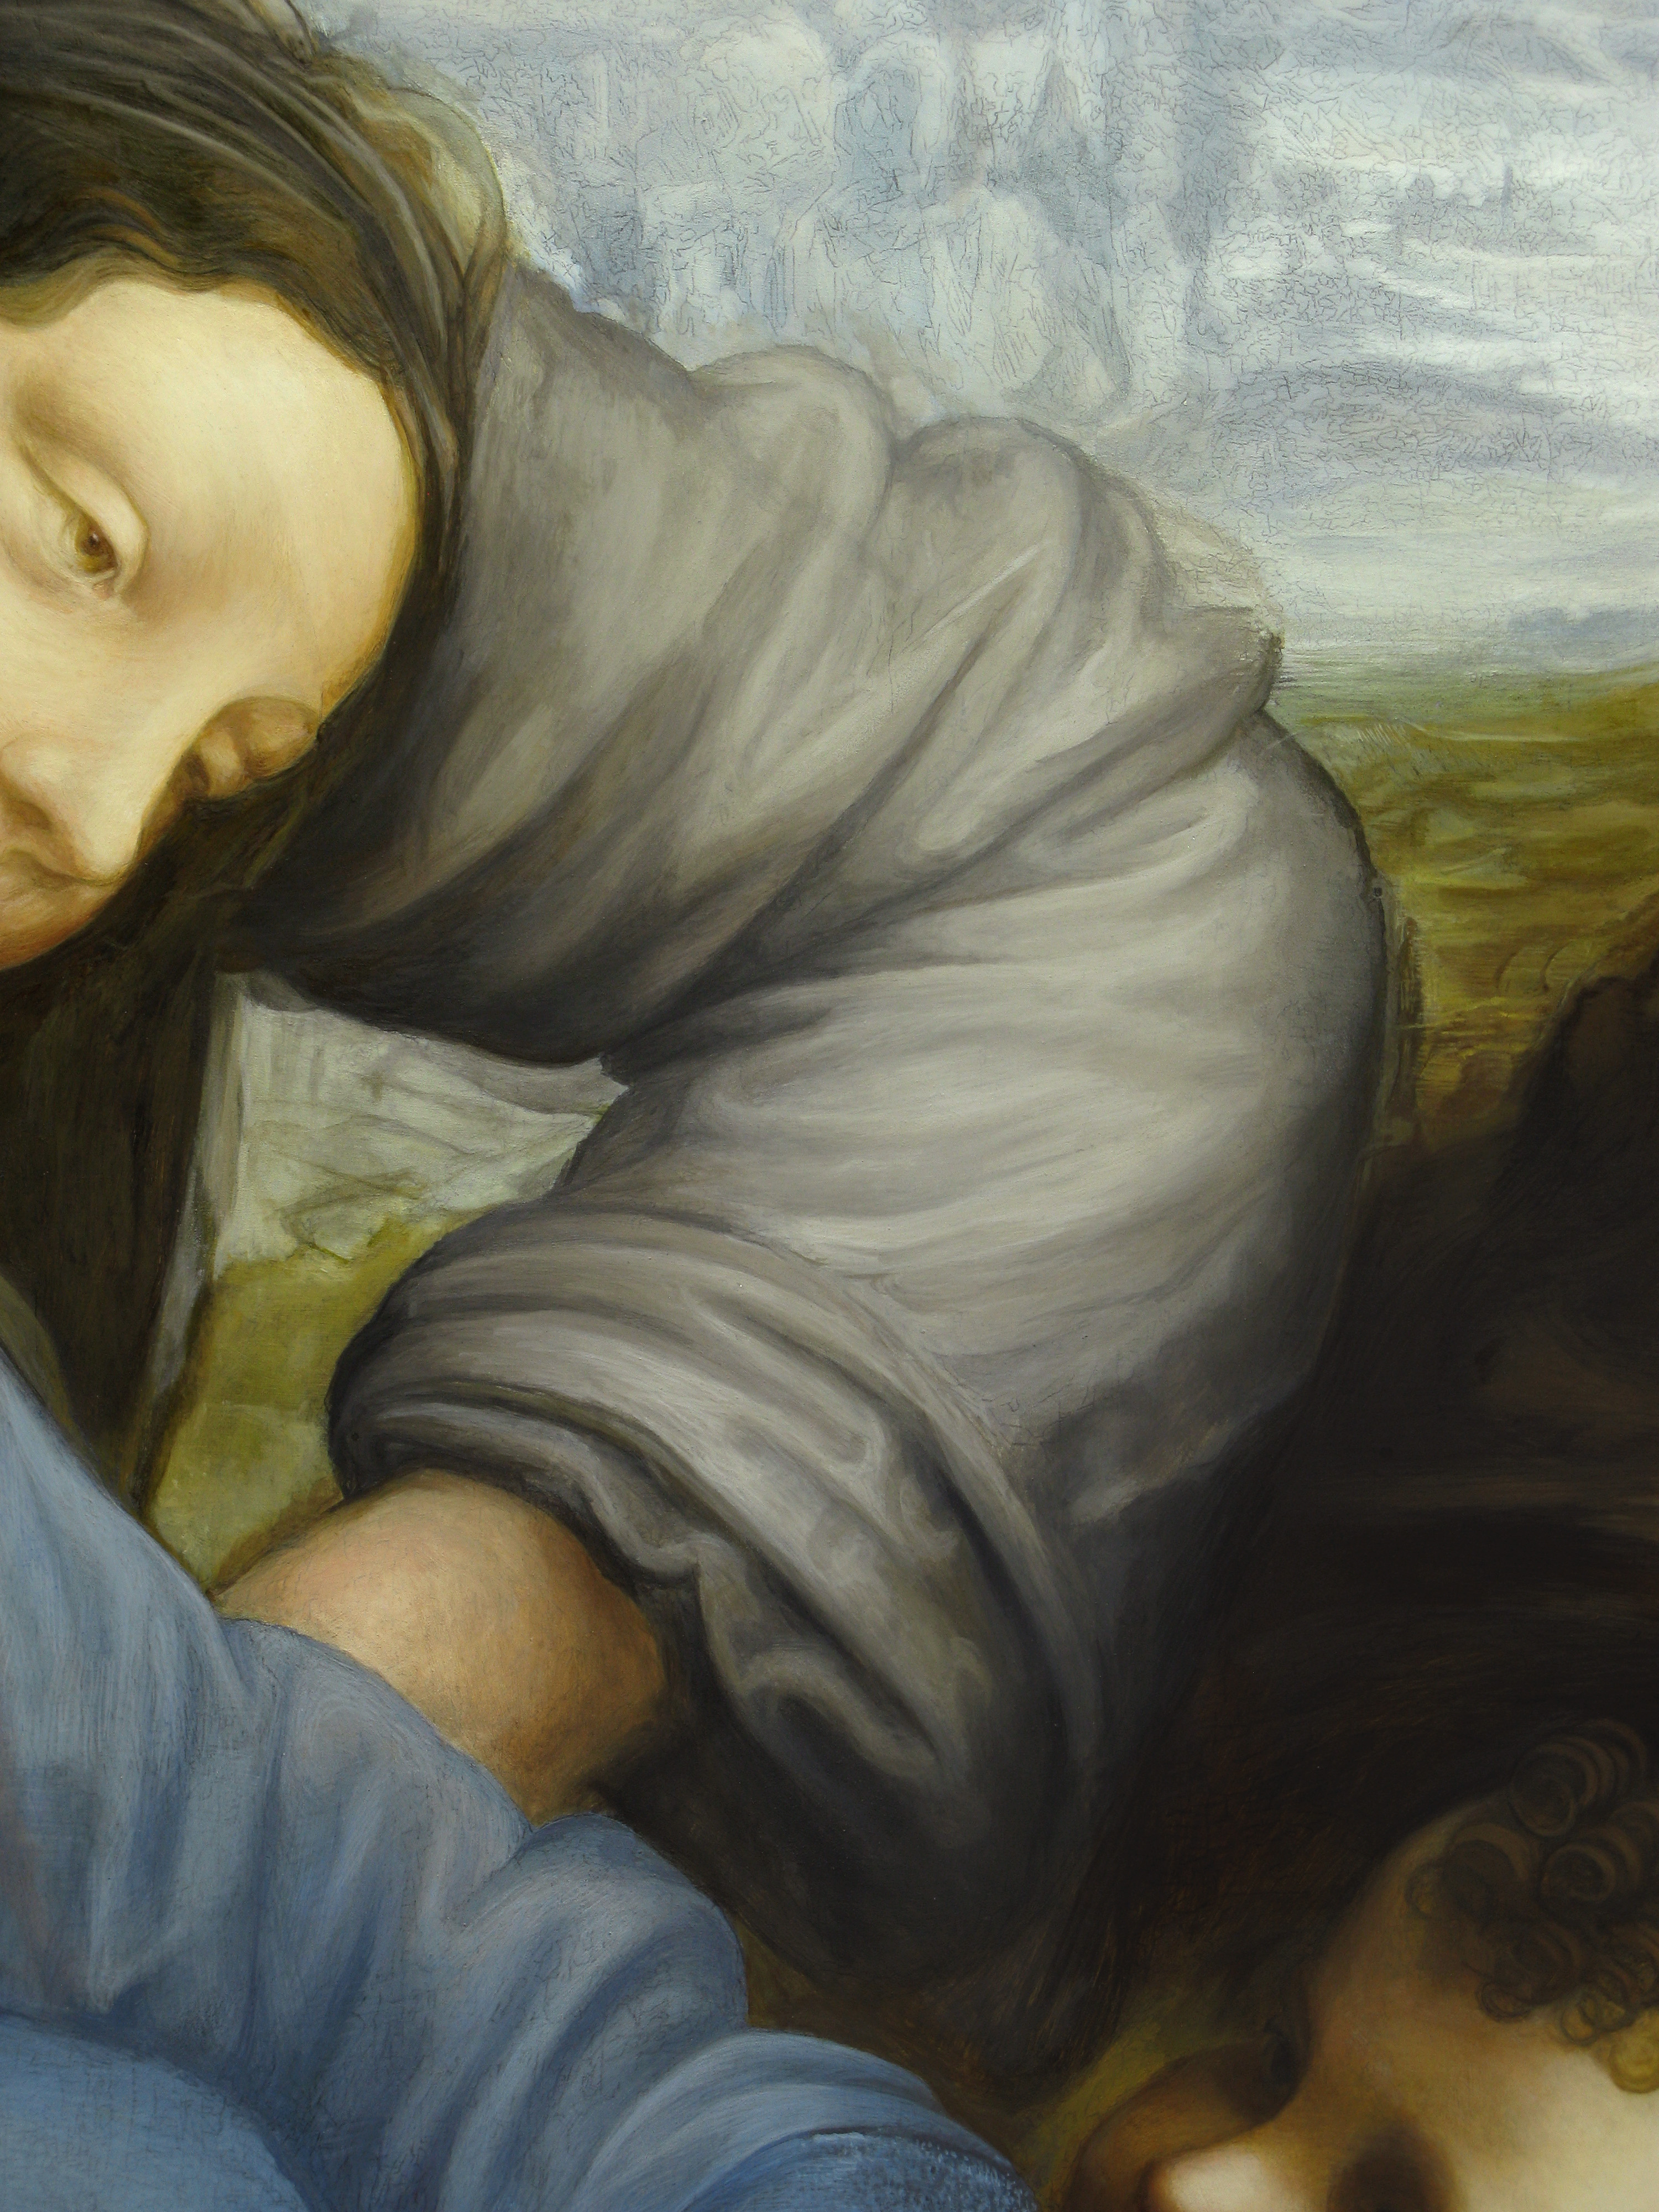
9. The path (black lines) has been covered by different layers of oil painting. Its appearance has been controlled to manage the visual perception of material effects as we can see on the Leonardo's work. The path is also used as benchmark to help the completion of the painting details.
Bellow, samples of documents representative of this process:
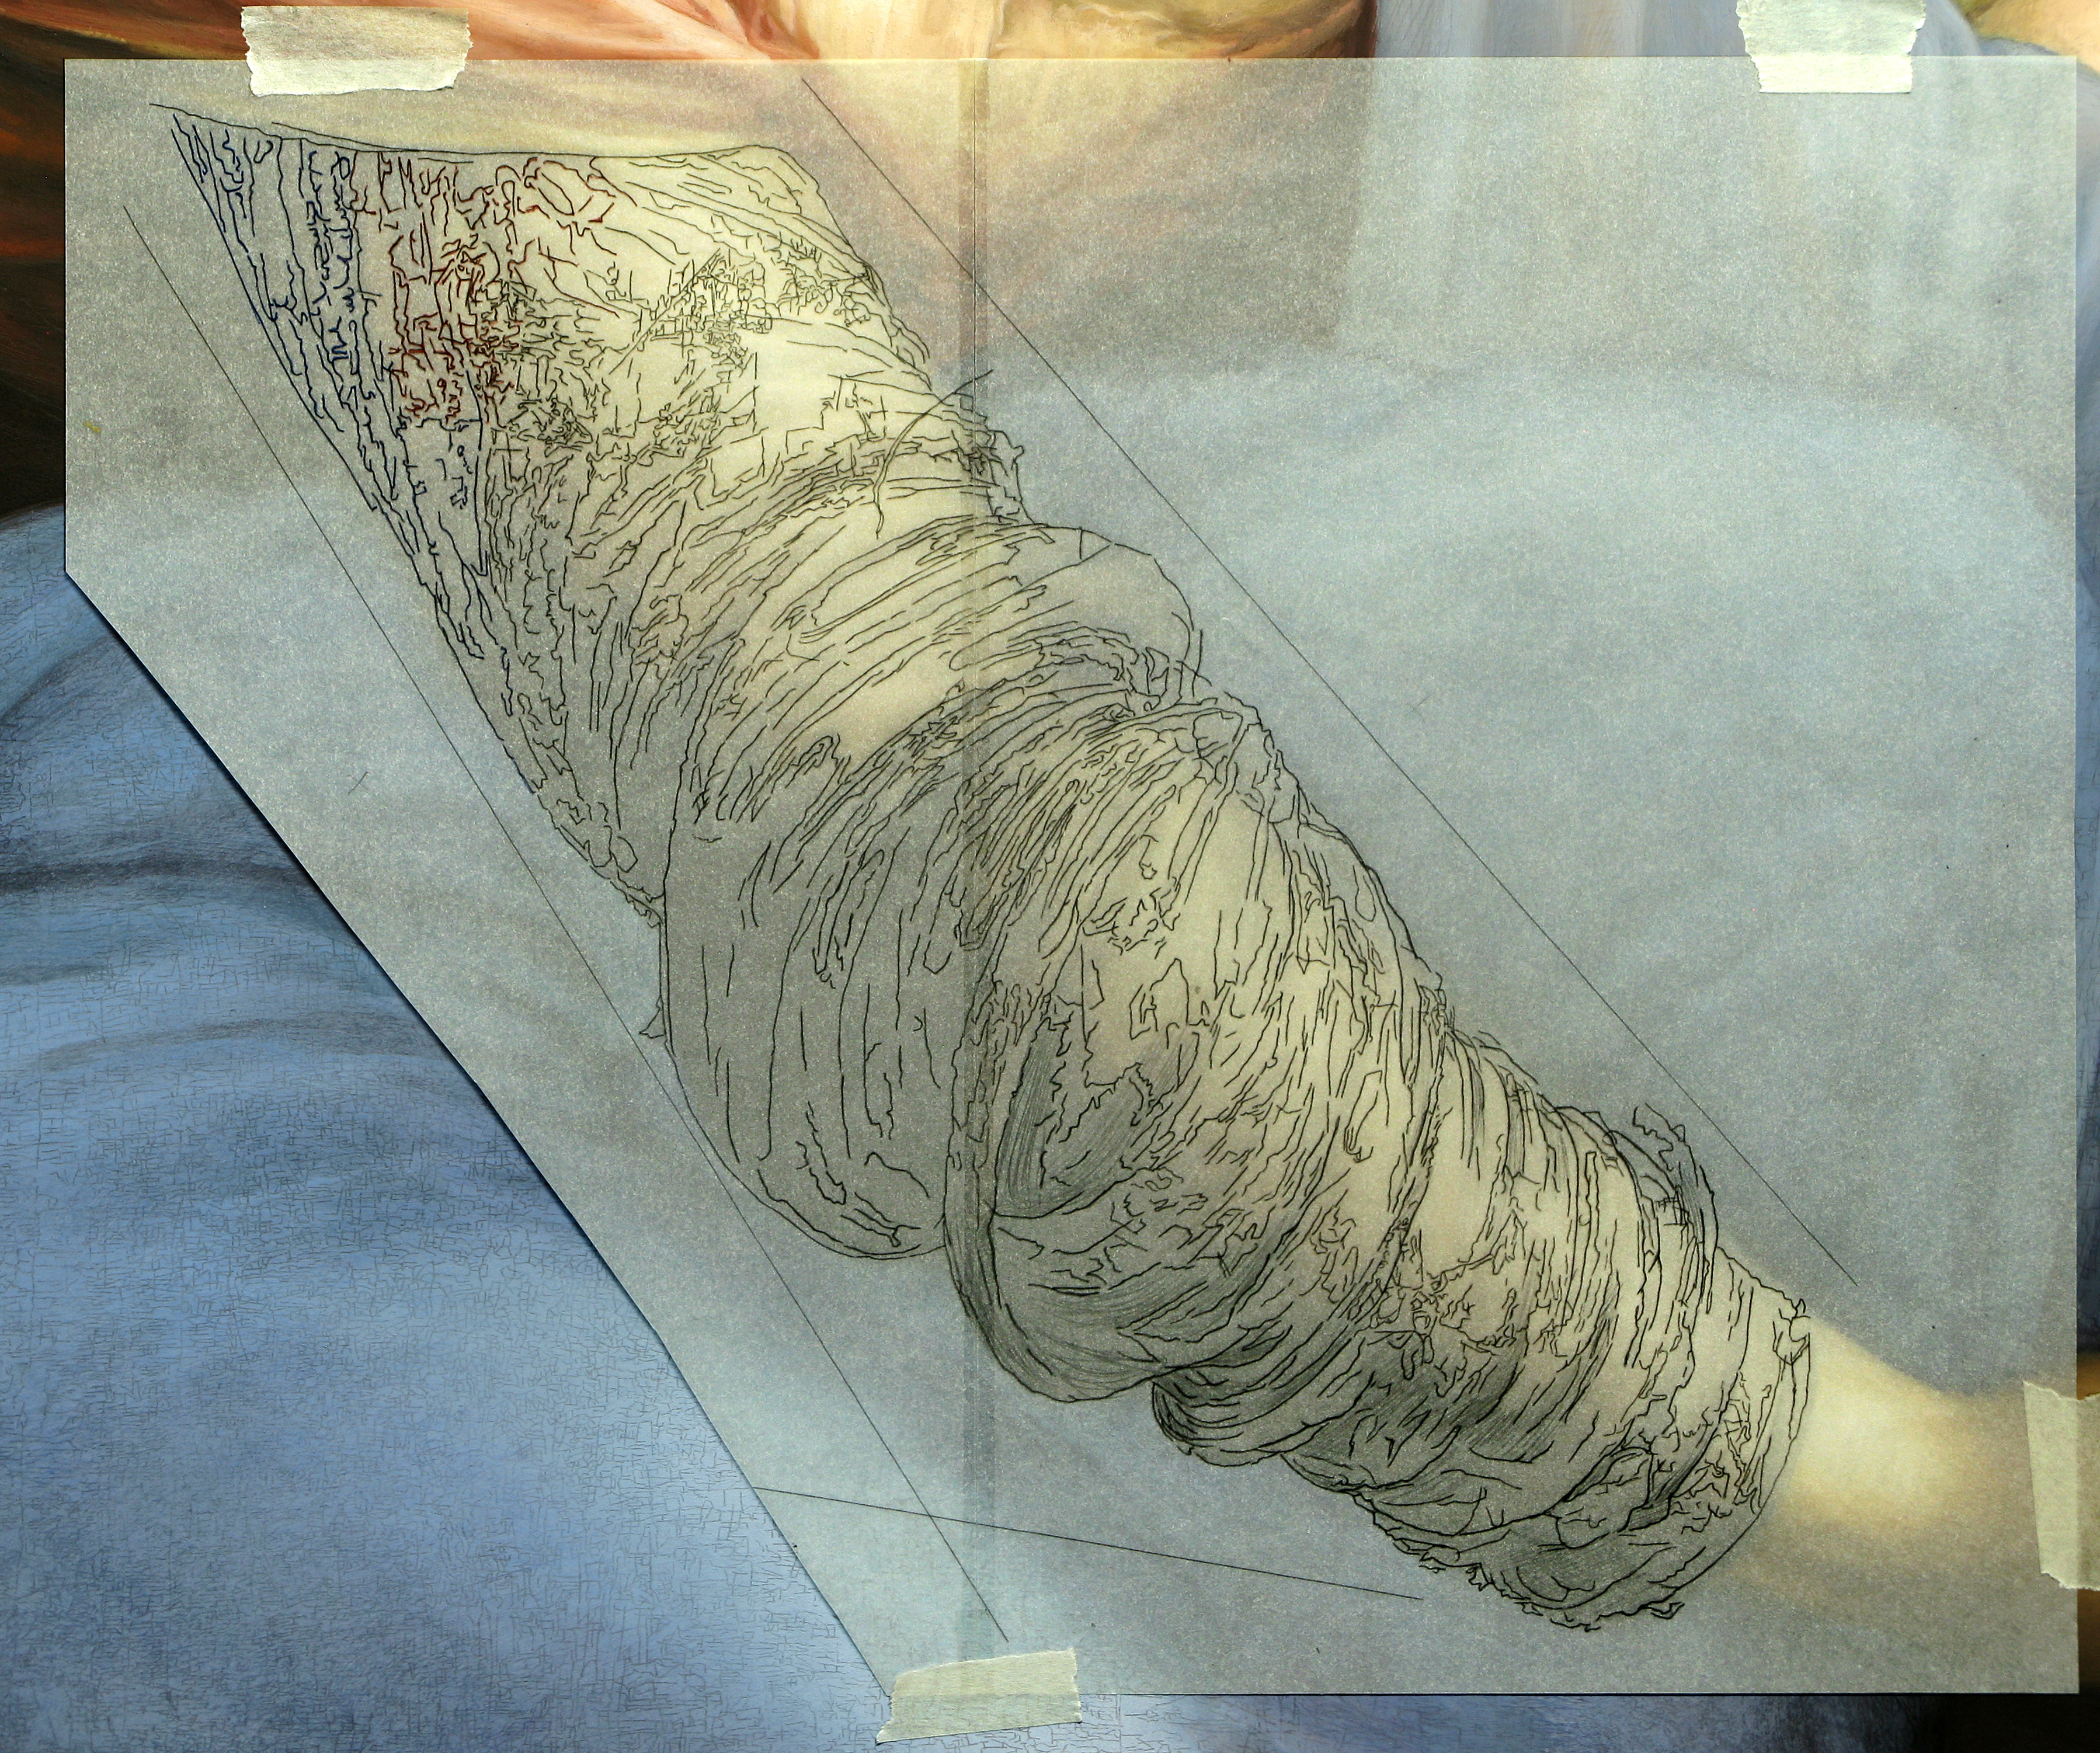
A. Path printed on tracing paper, mounted on the panel to be reported.
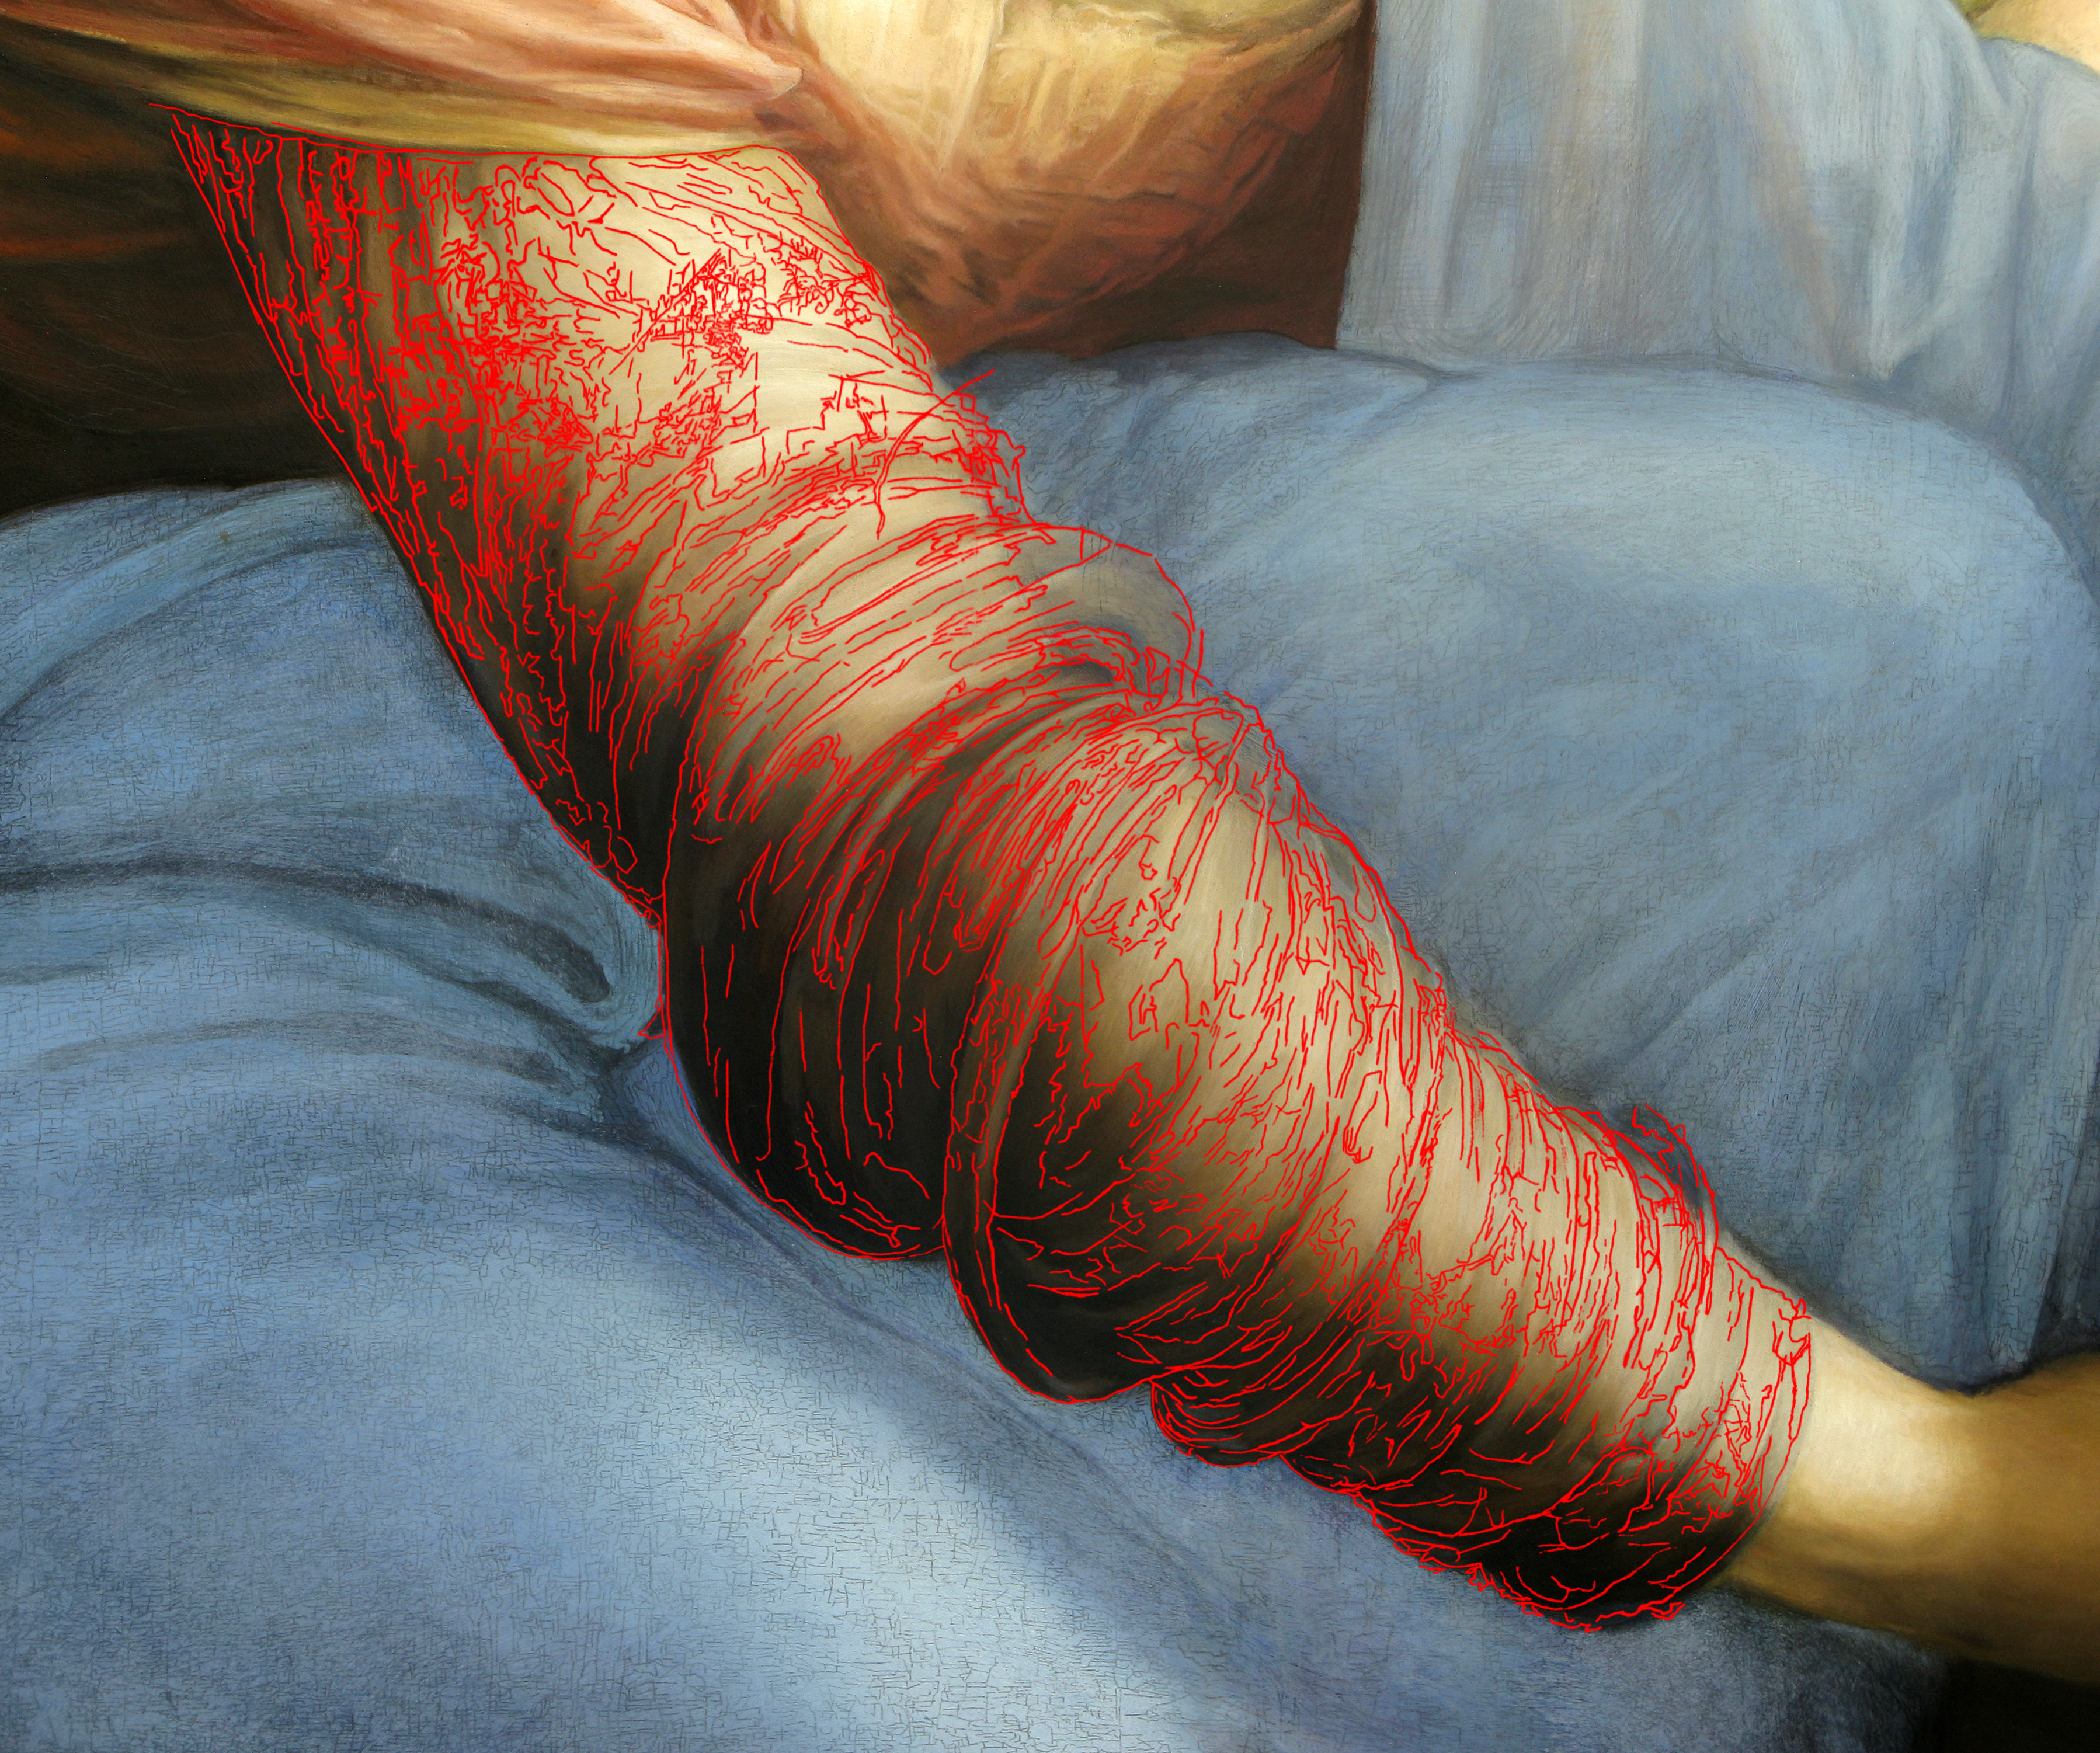
B. Path reported on the panel, highlighted by red colour.
C. The path covered by layers of oil painting is still visible on some part.
"Click" on pictures below to open them at full size in another window.
|
|
|
|
|
|
|
|
|
|
|
|

|
|
|
|


|
|
|
|
|
|
|
|
|
|
|
|
|
|
|
|

|
|
|
|


|
|
|
|

"Click" on pictures above to open them at full size in another window.
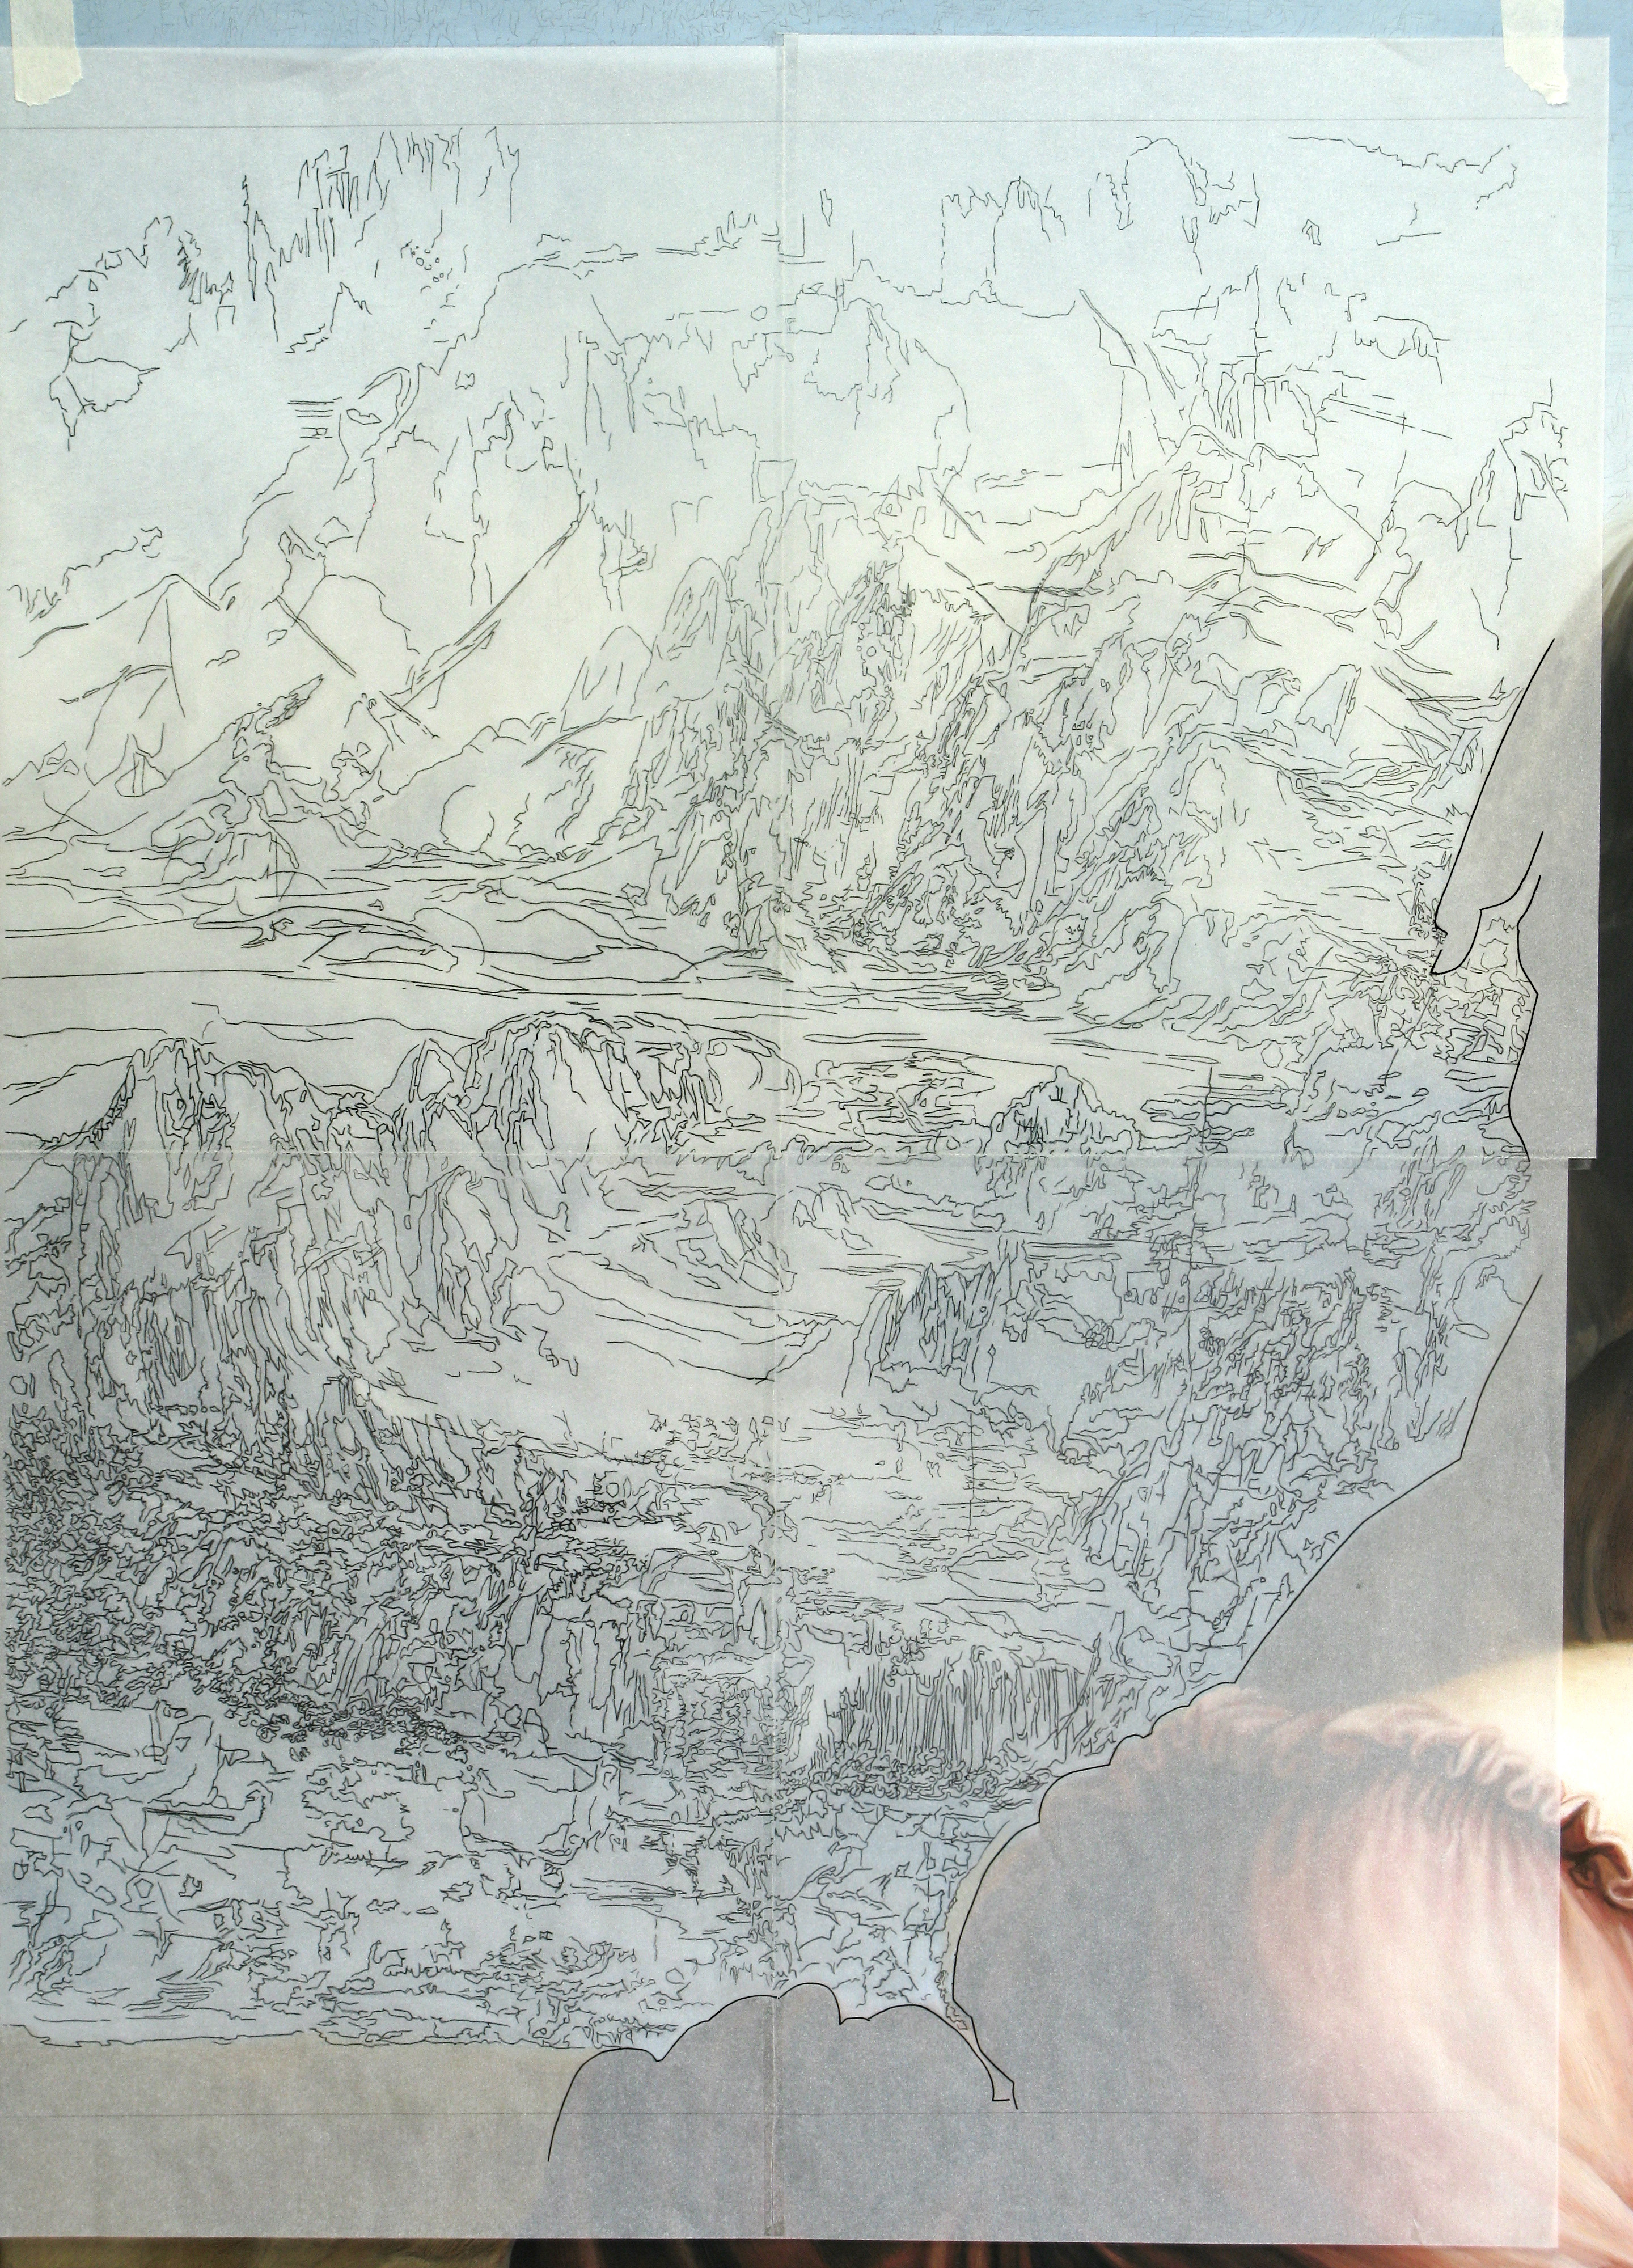
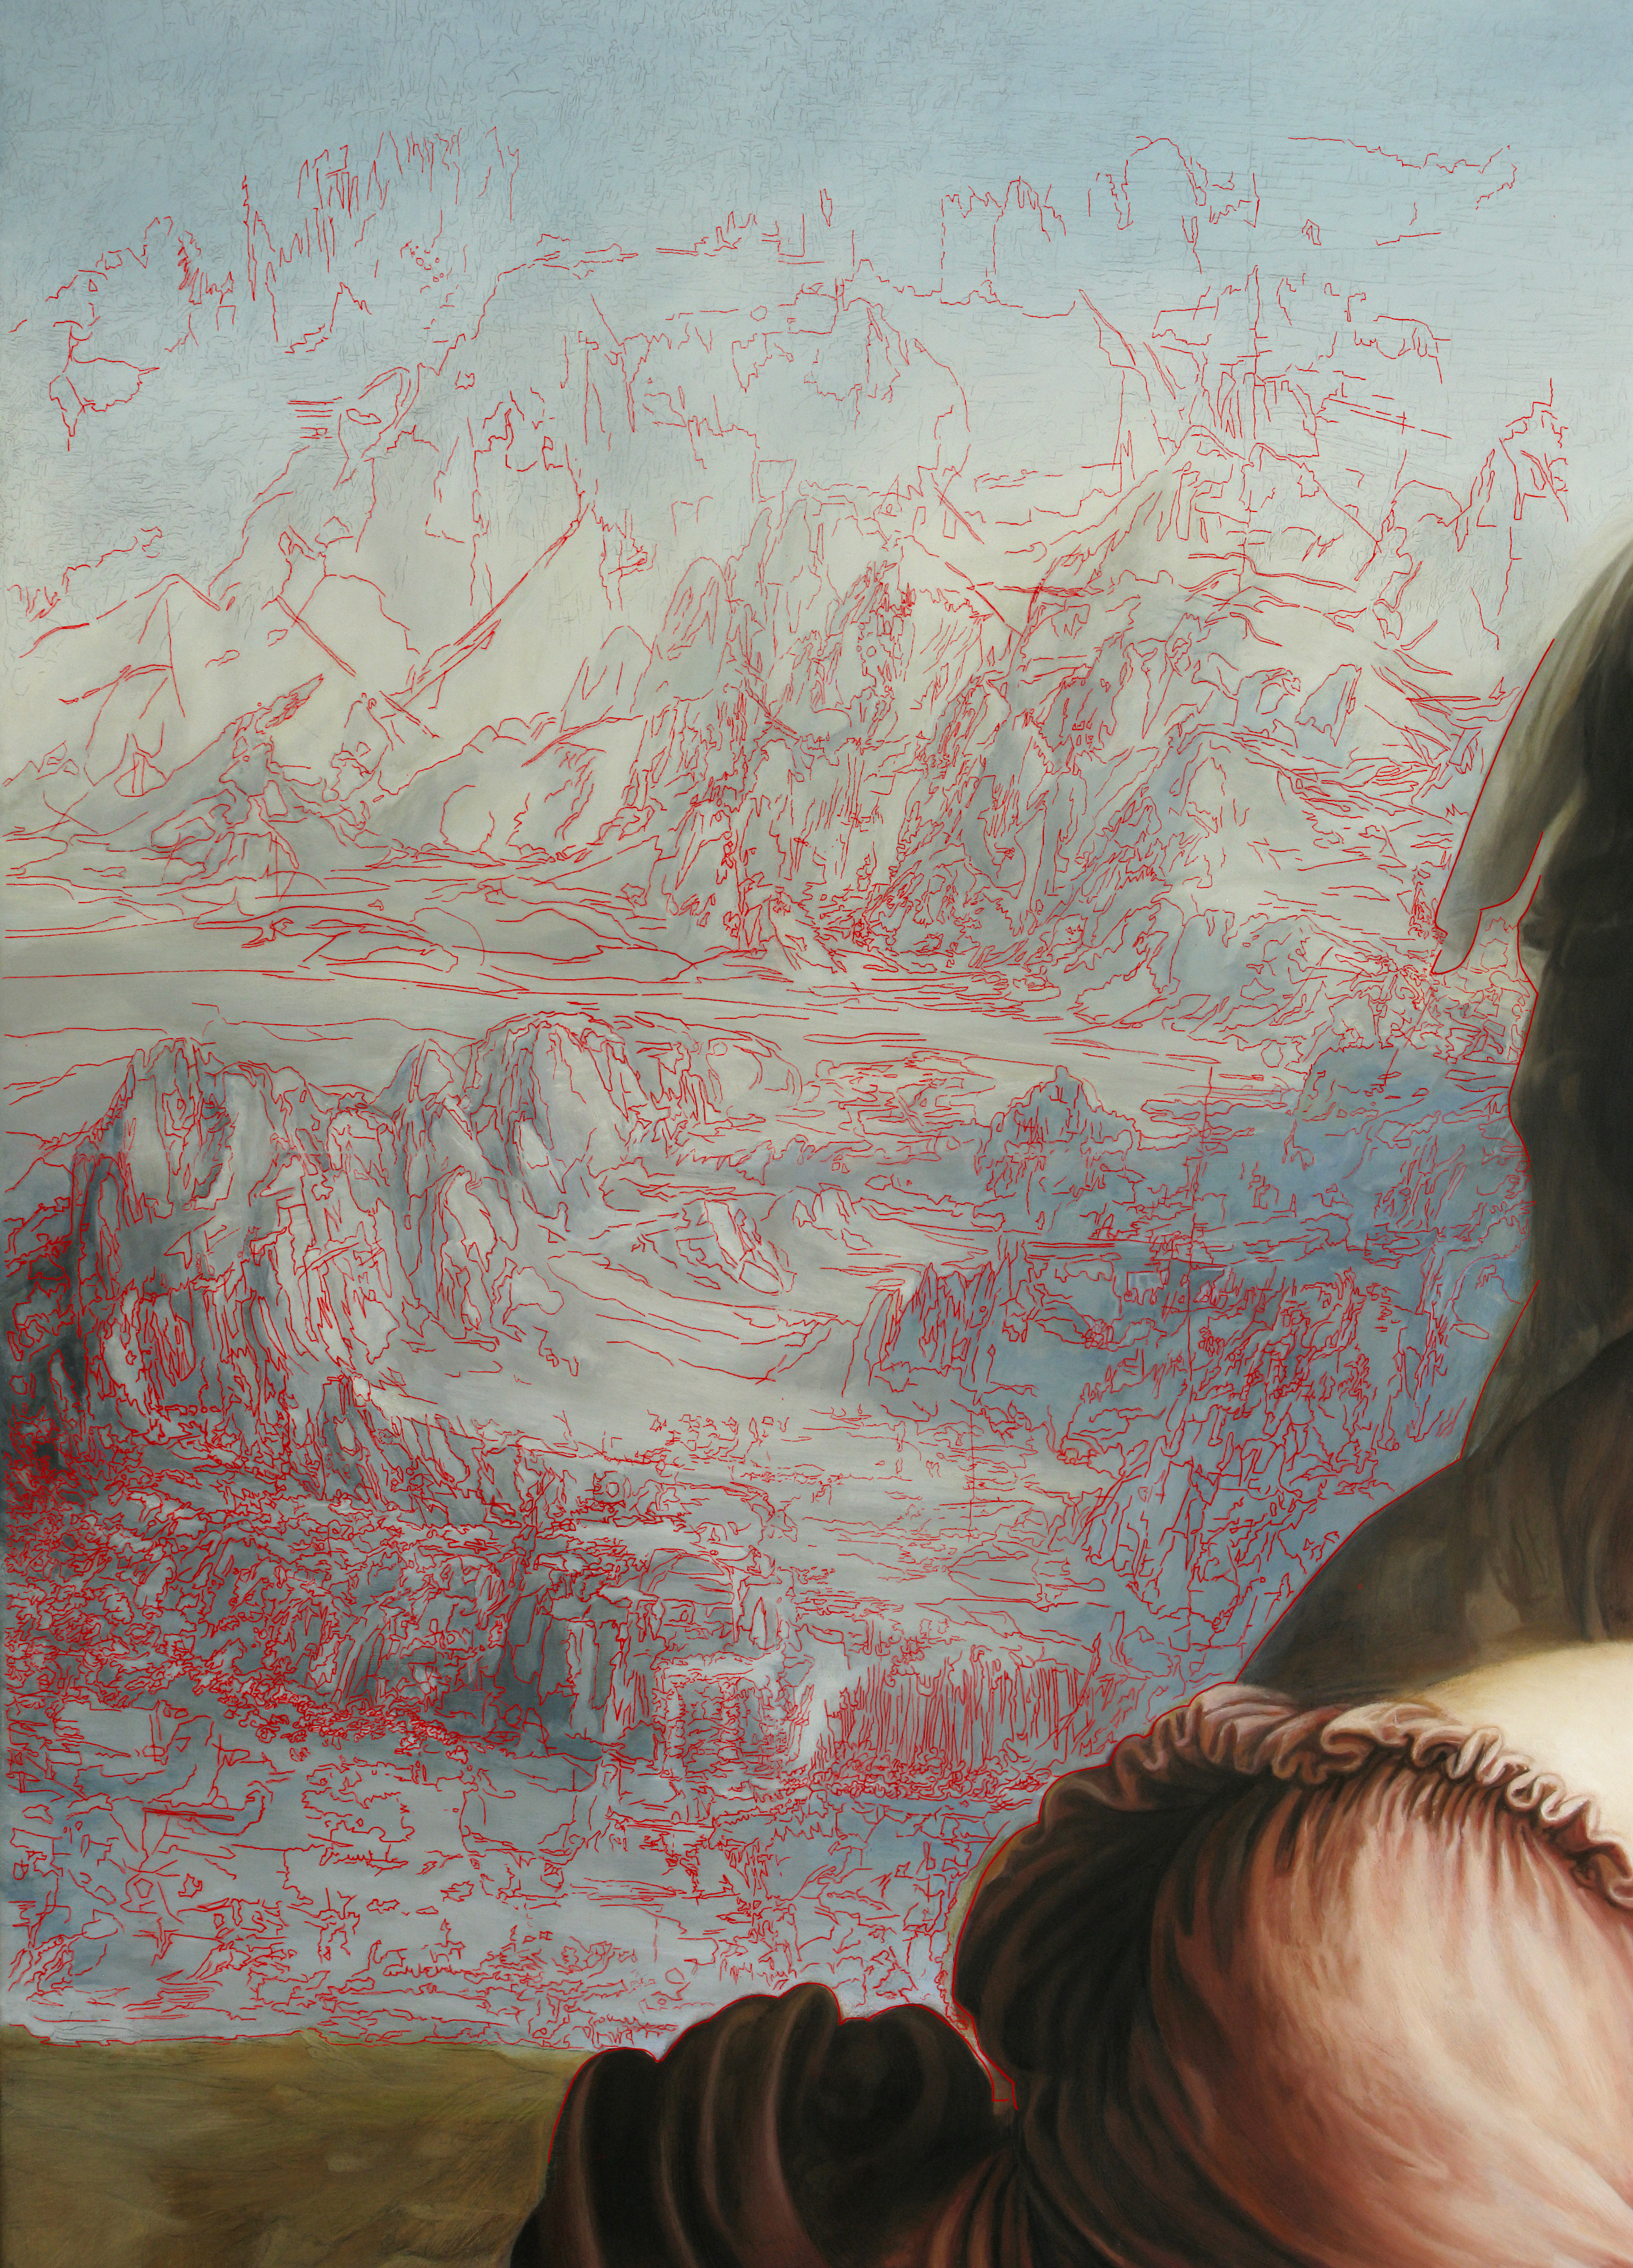
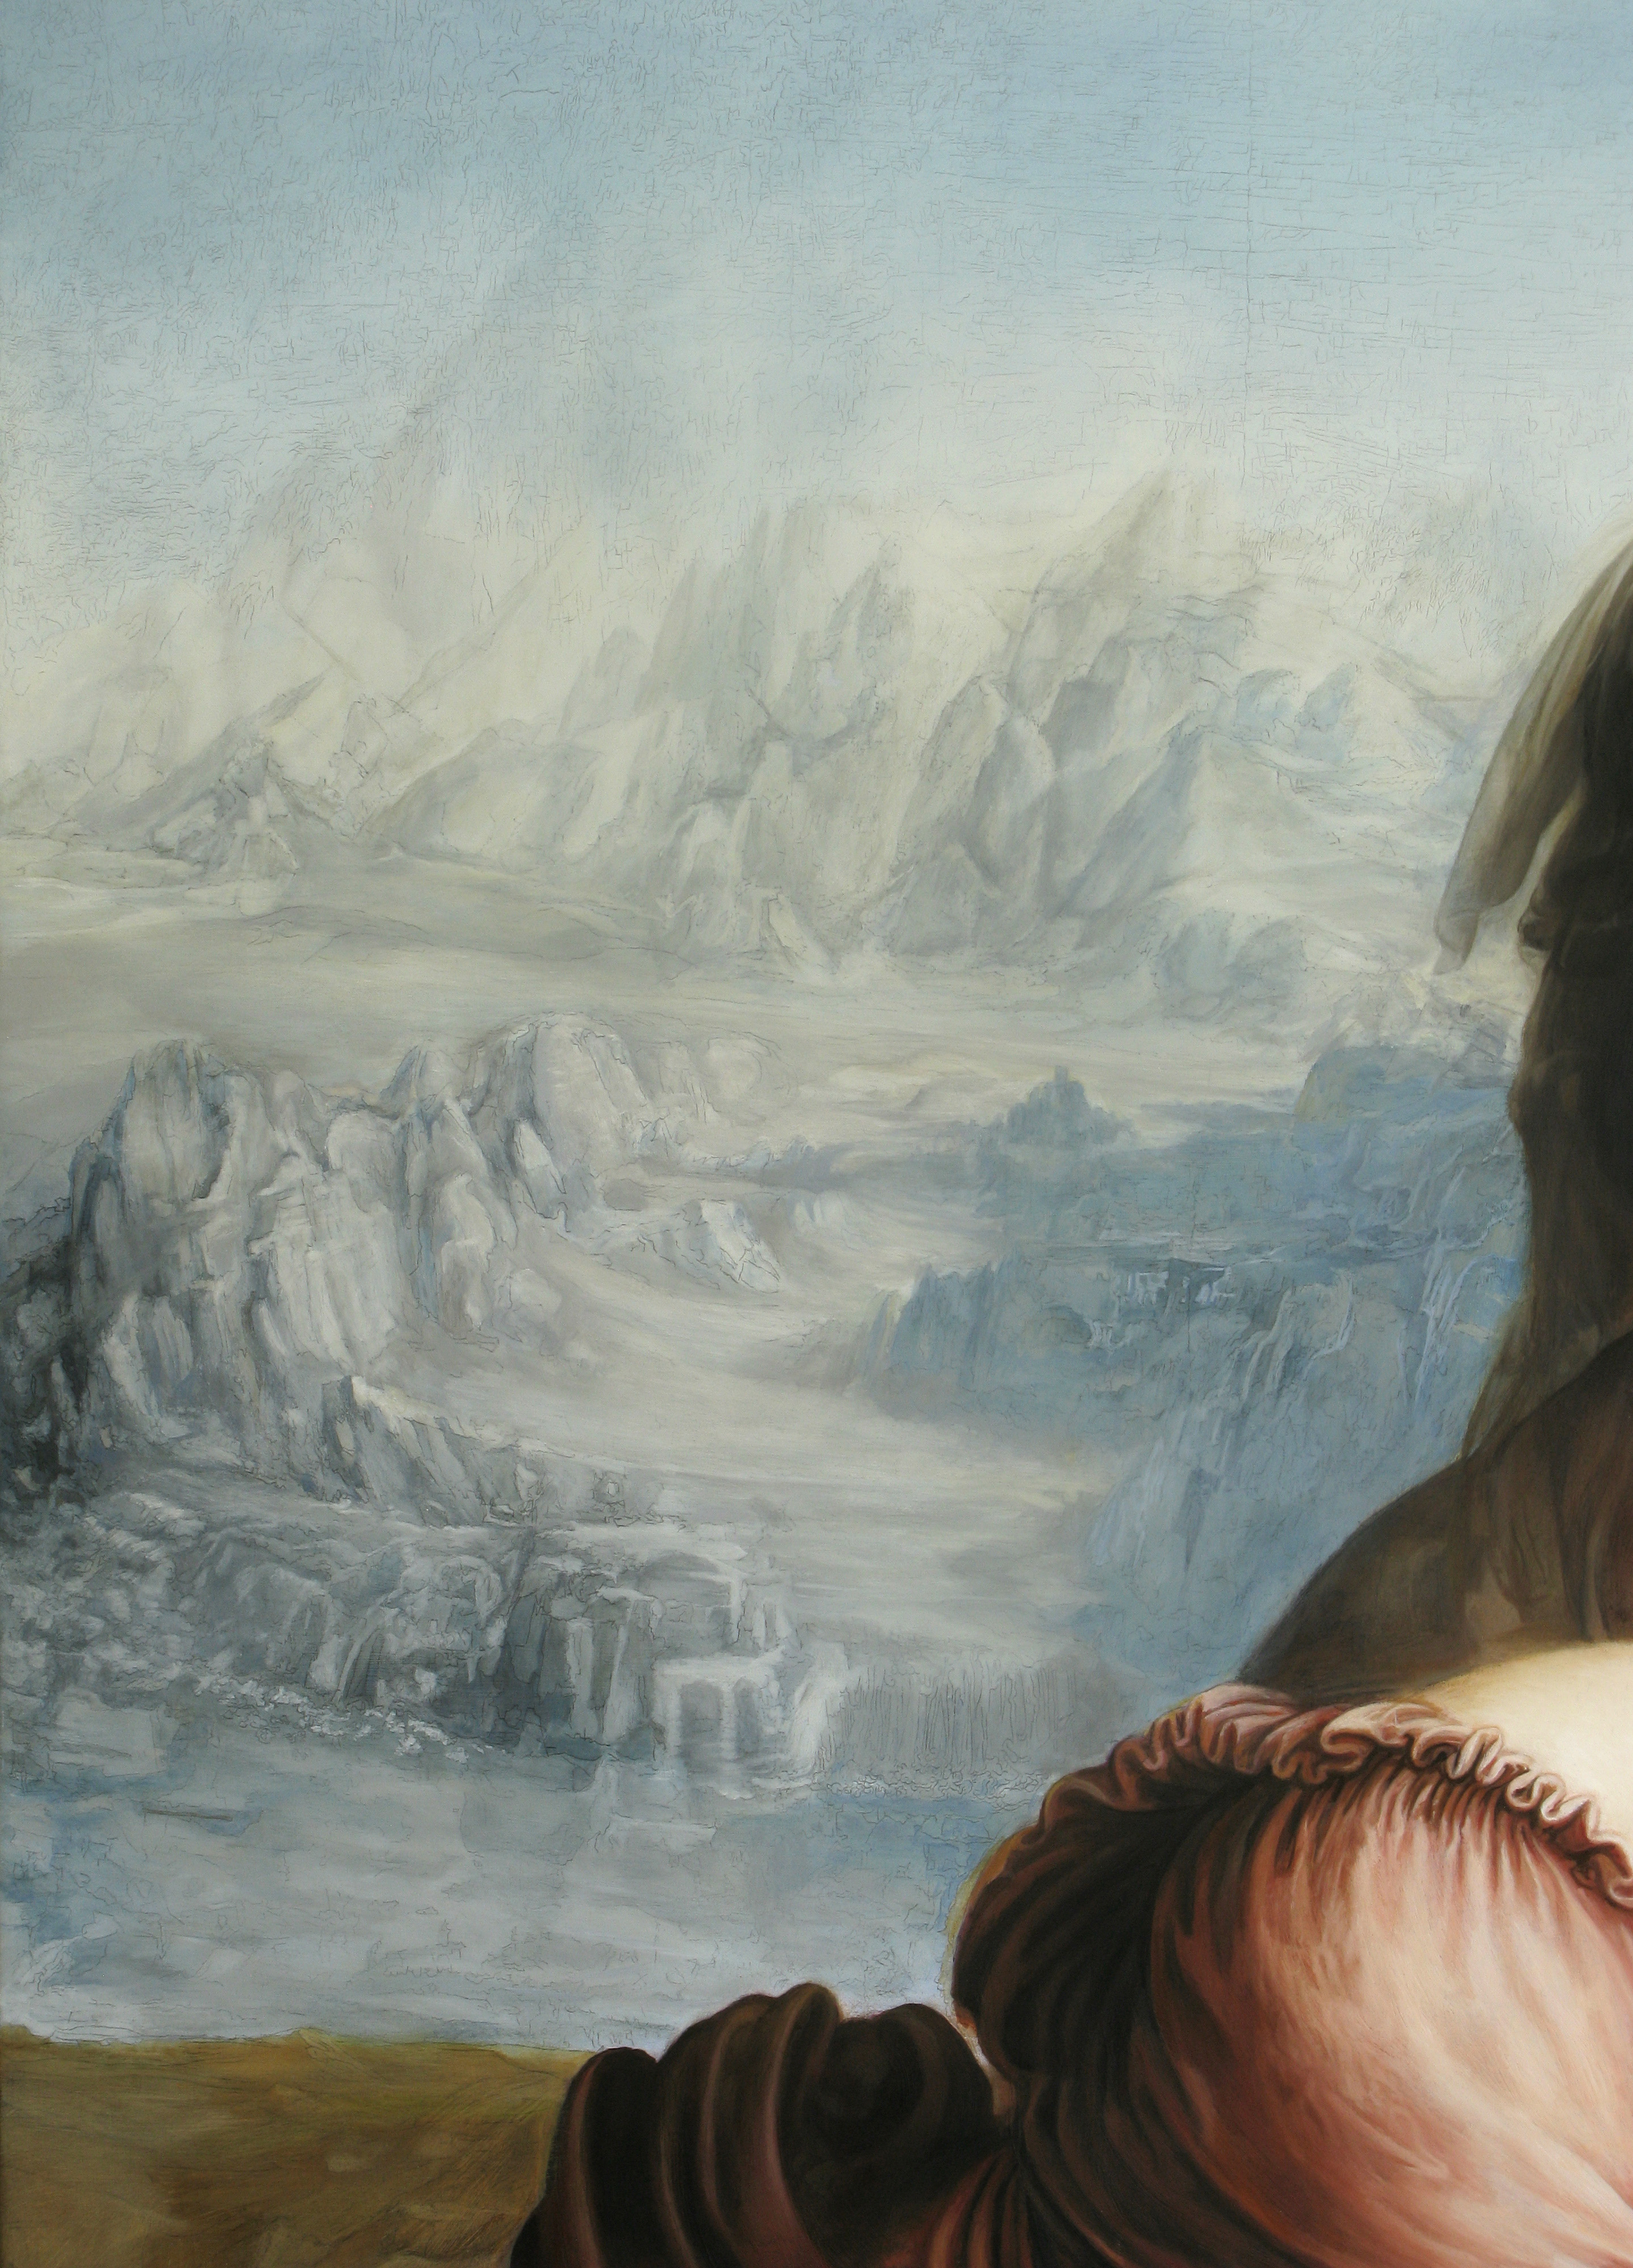
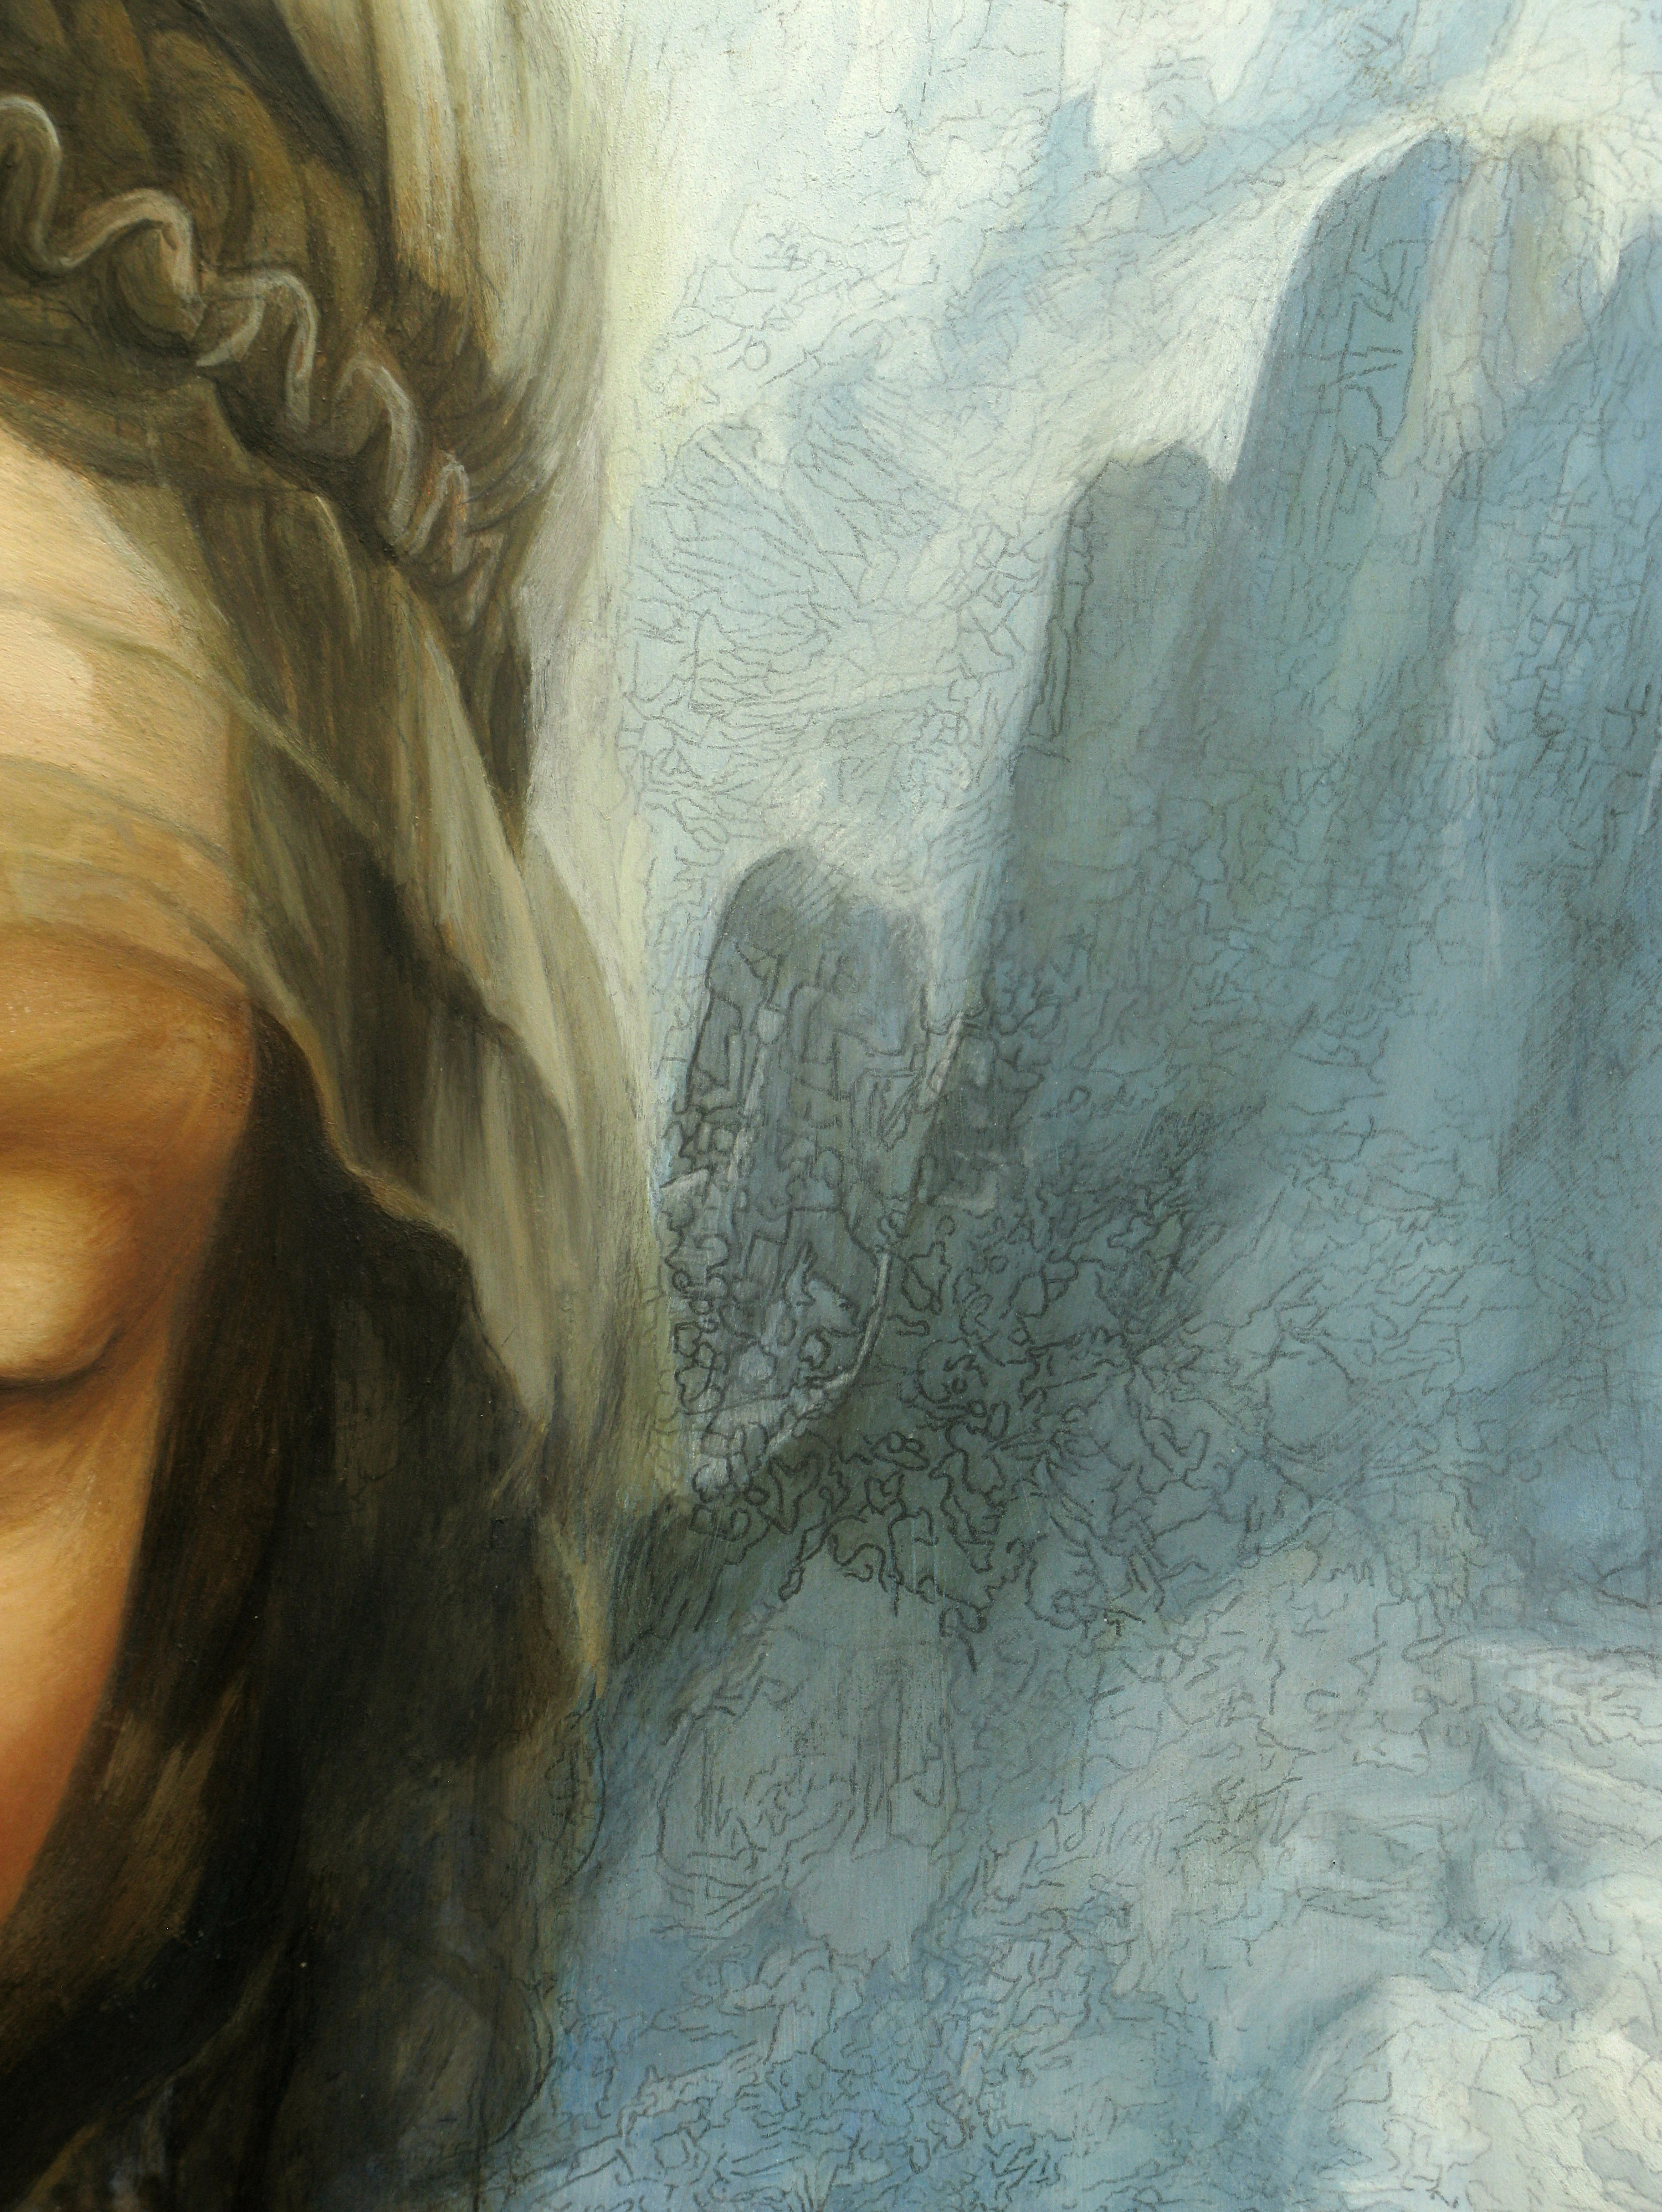
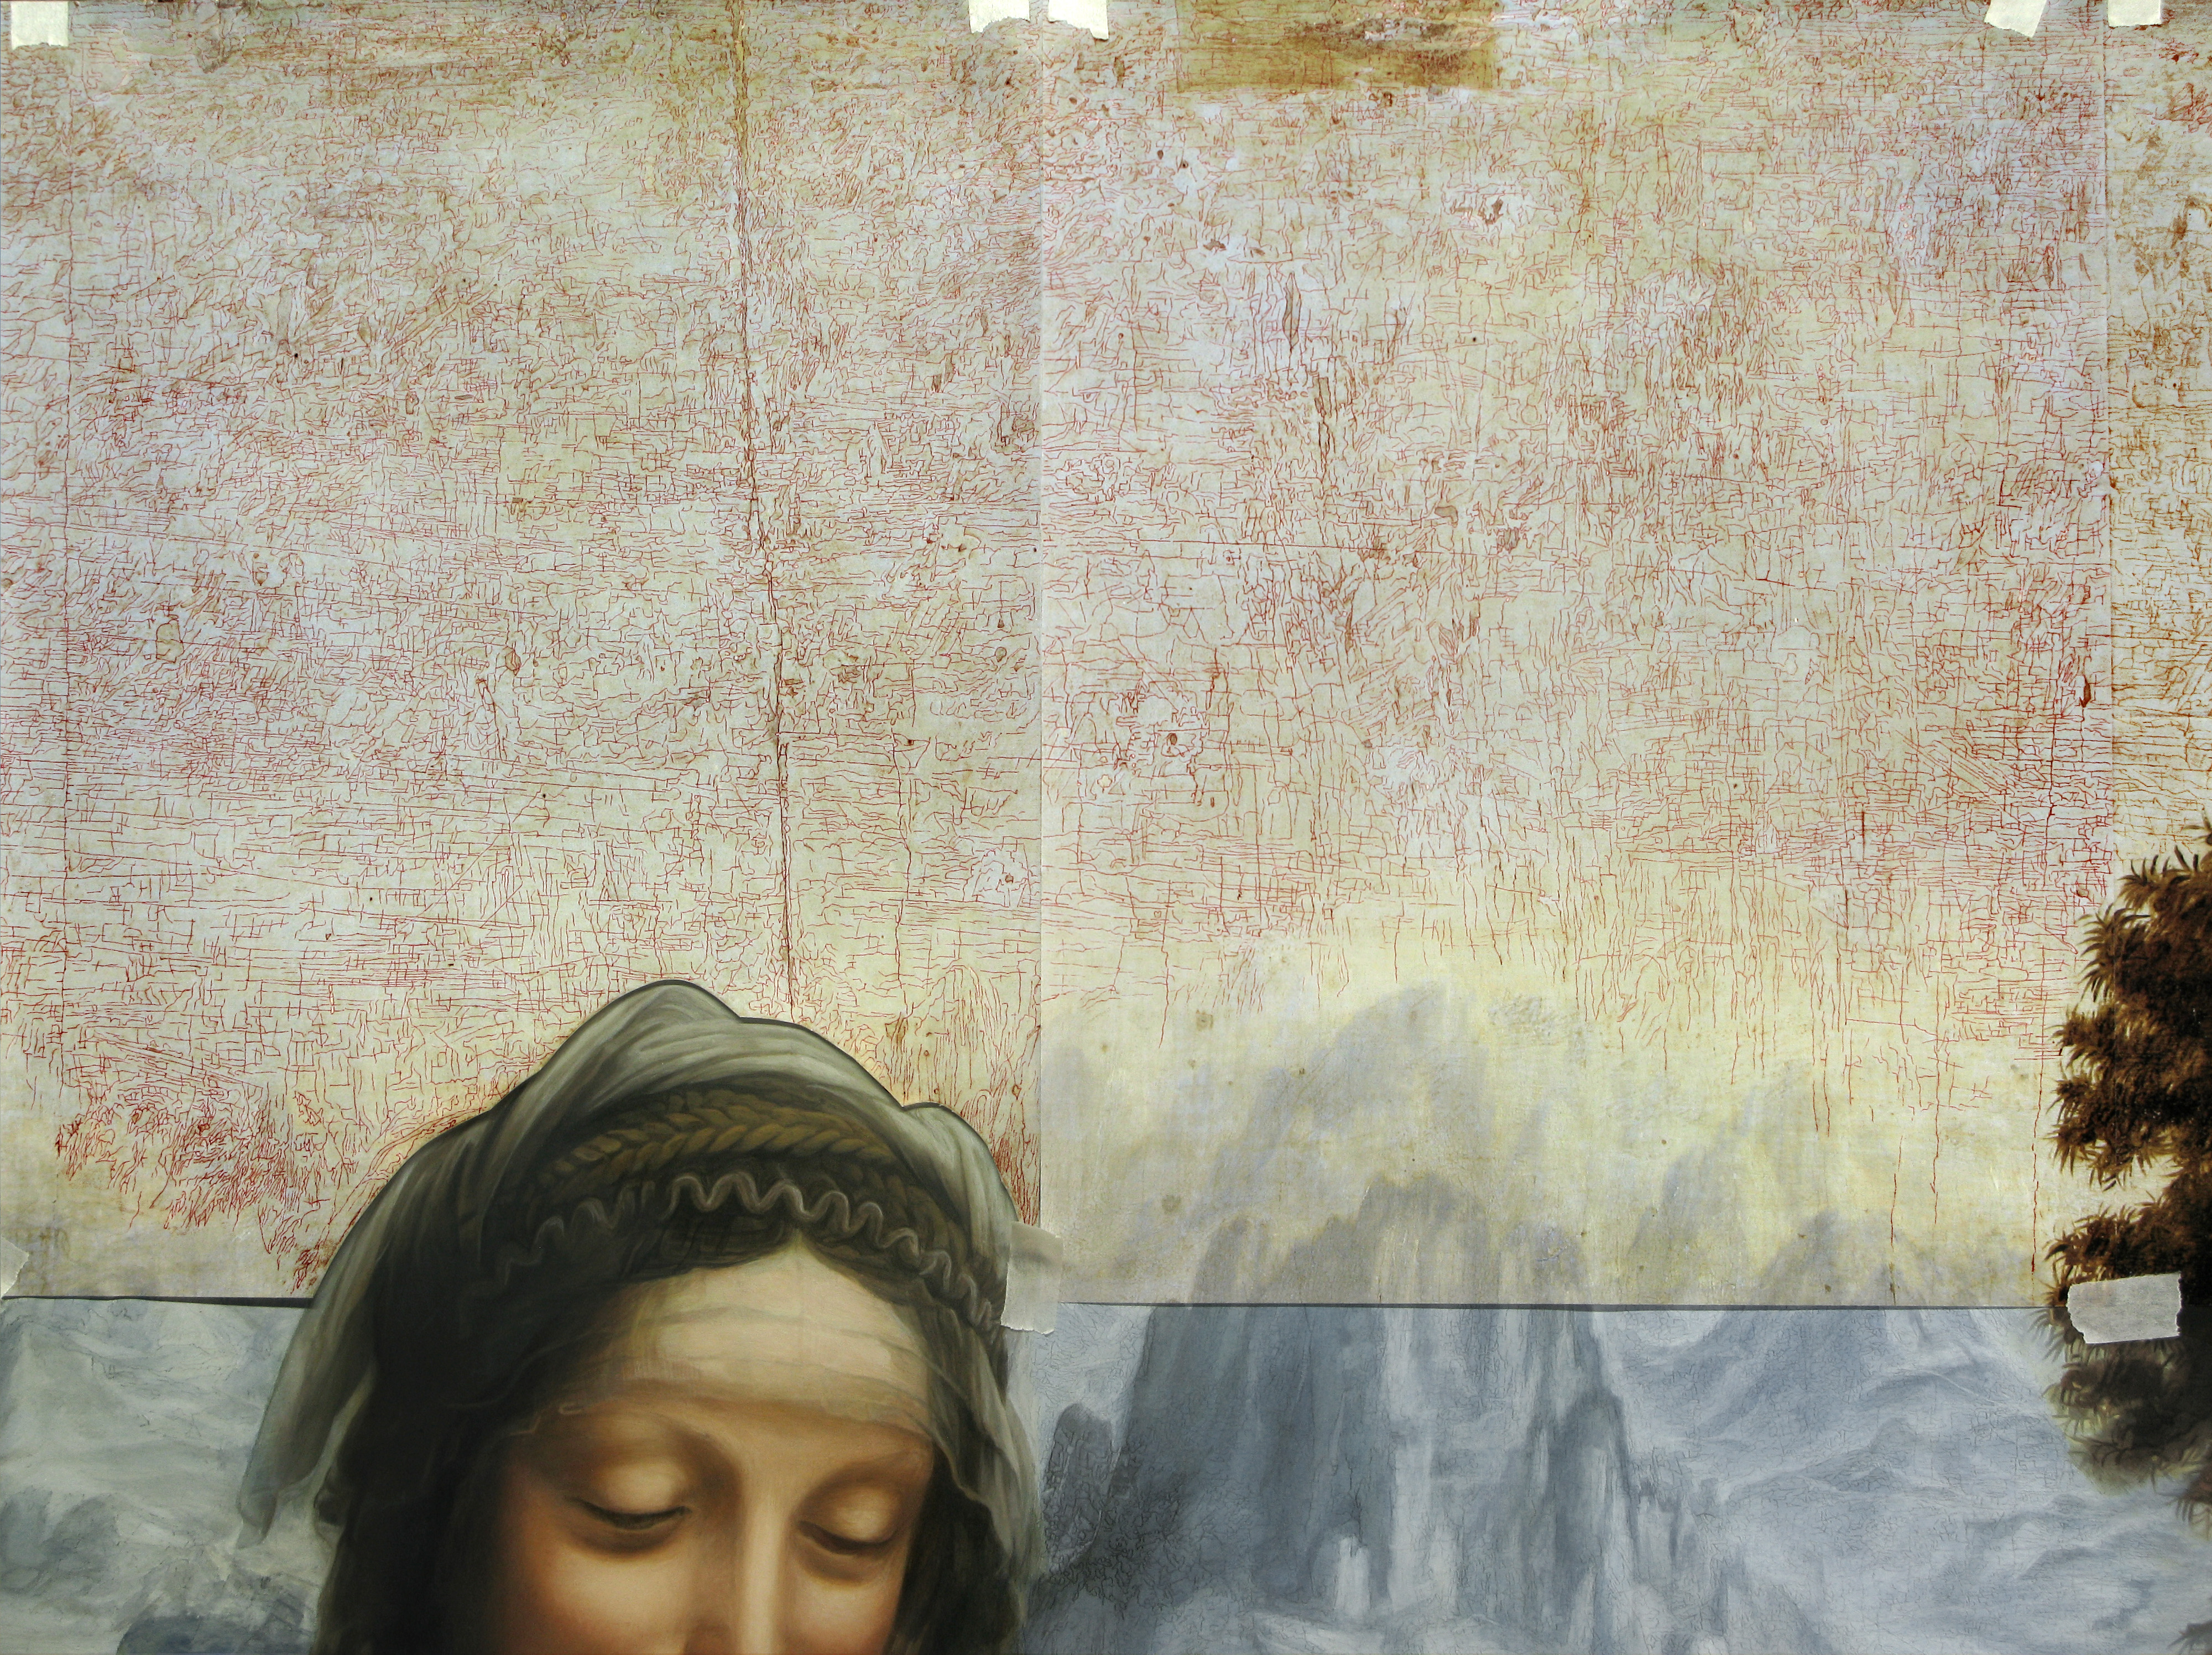
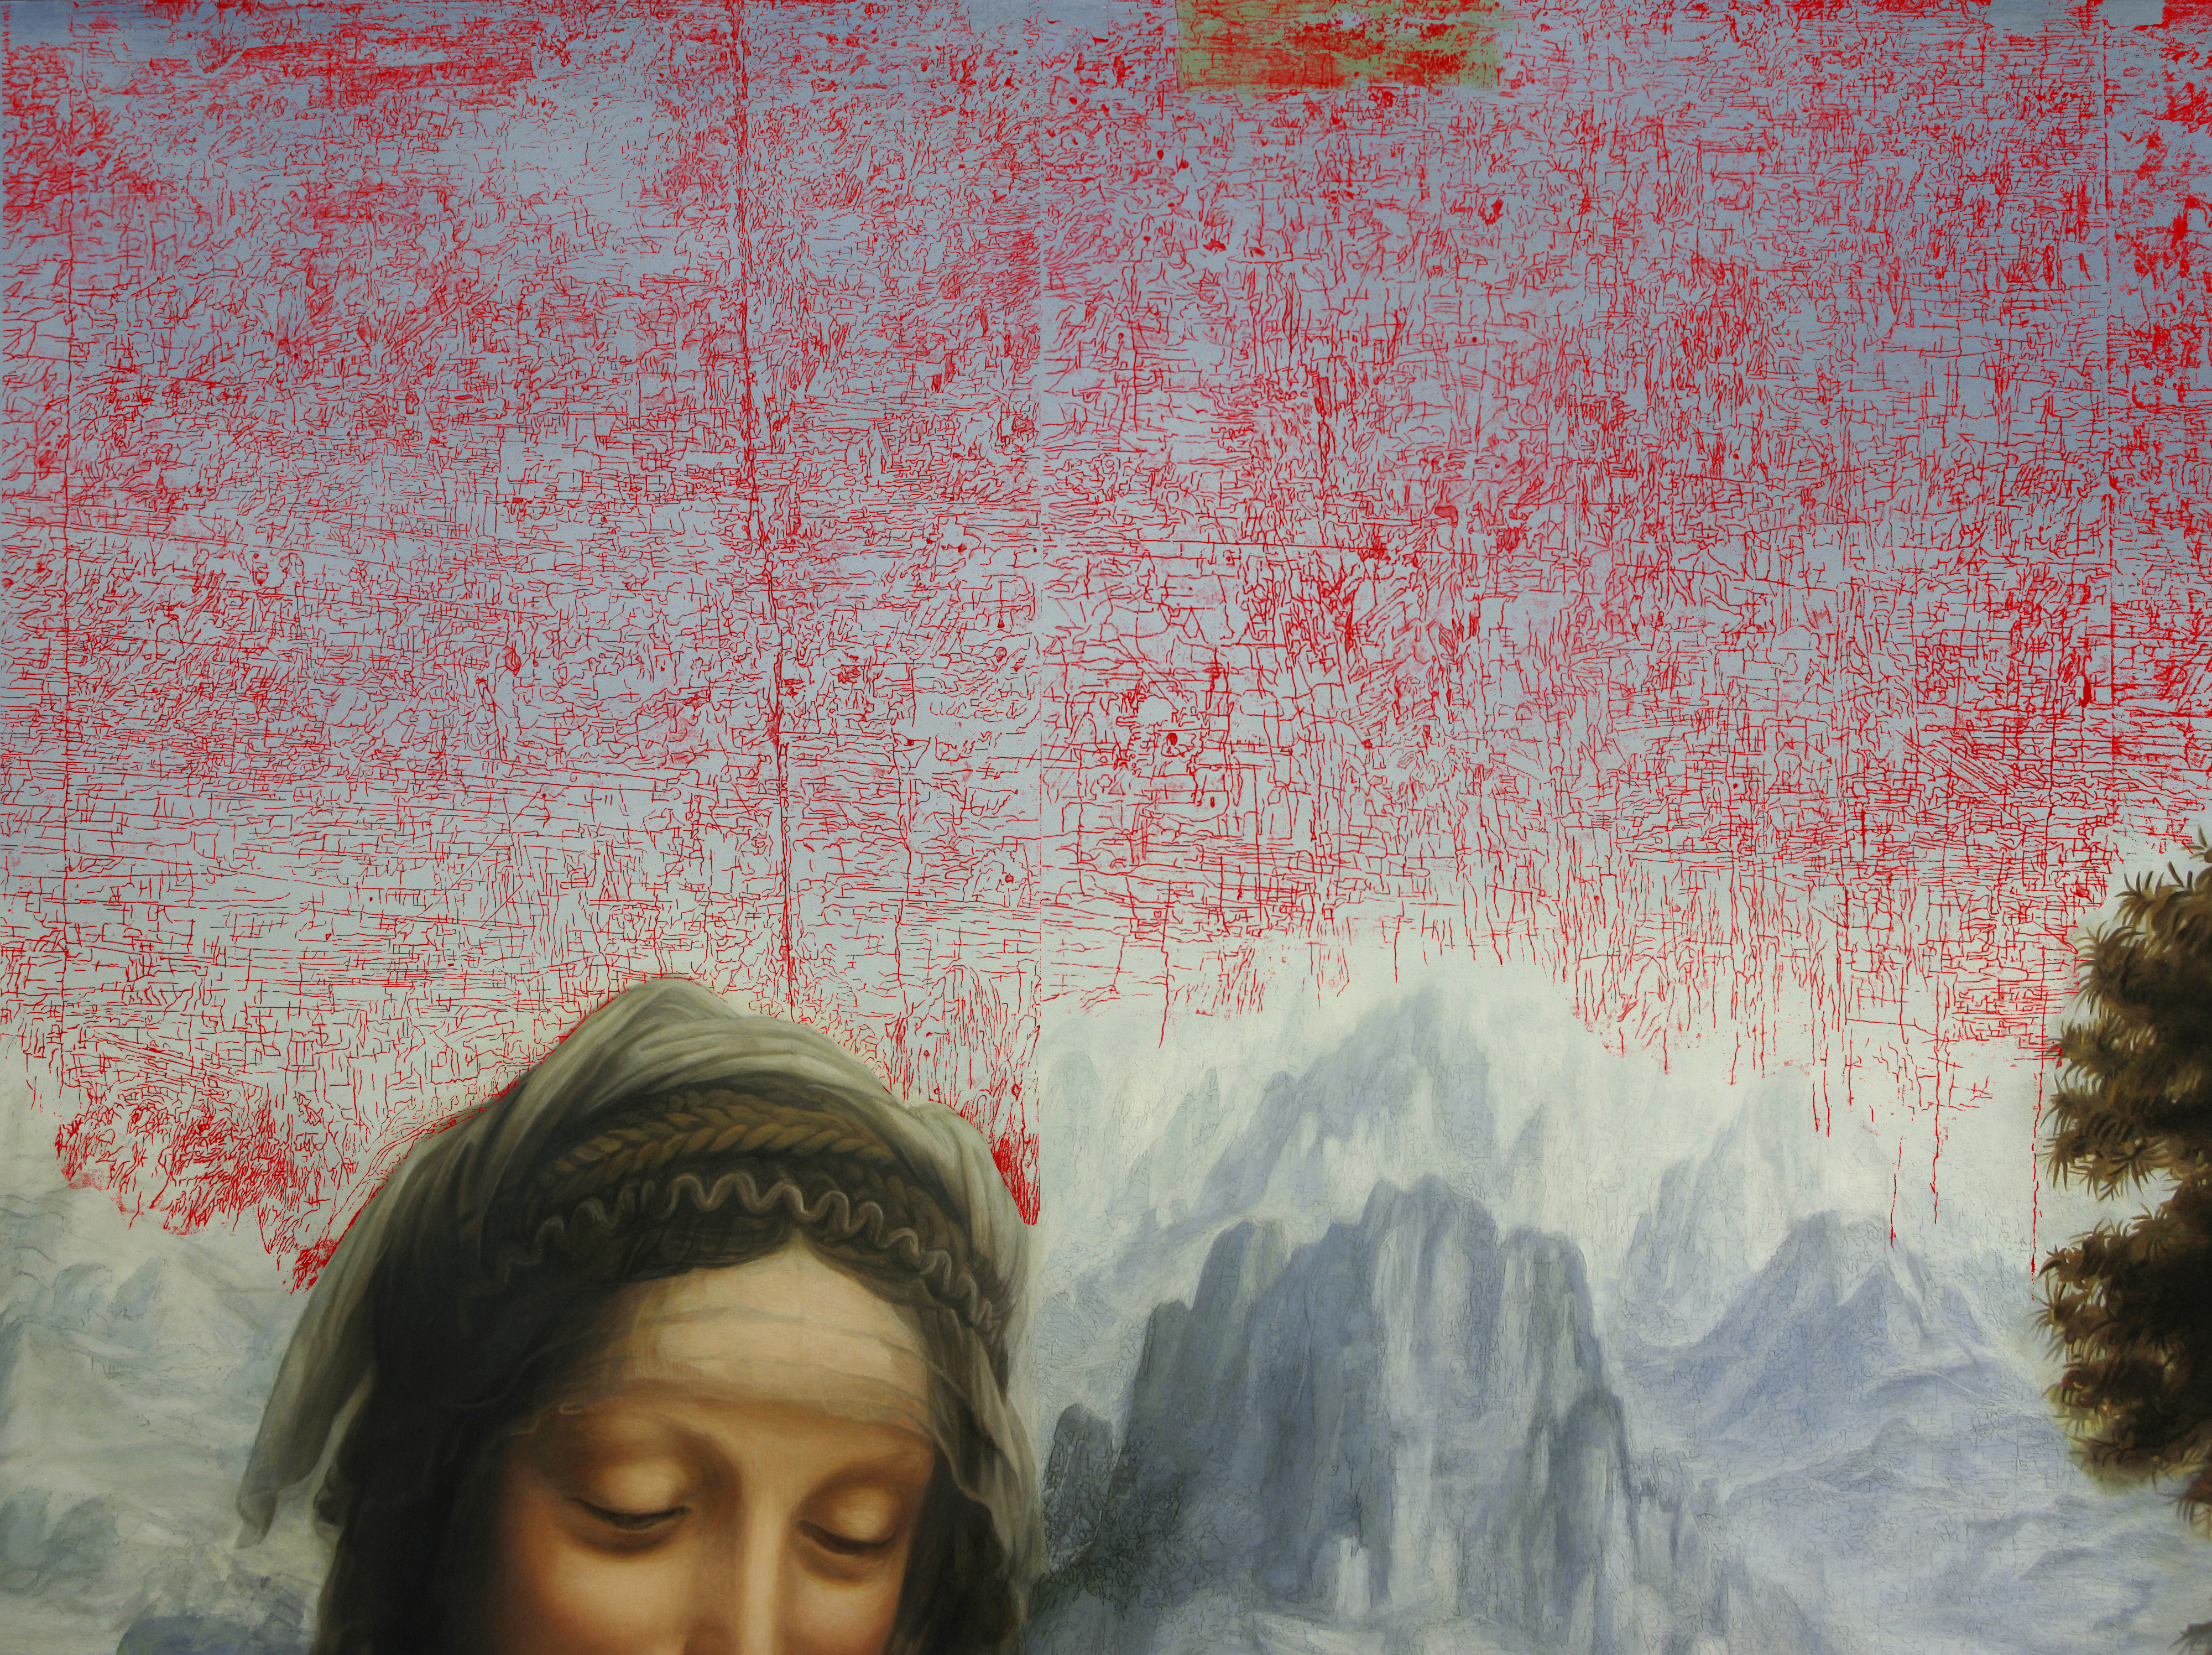
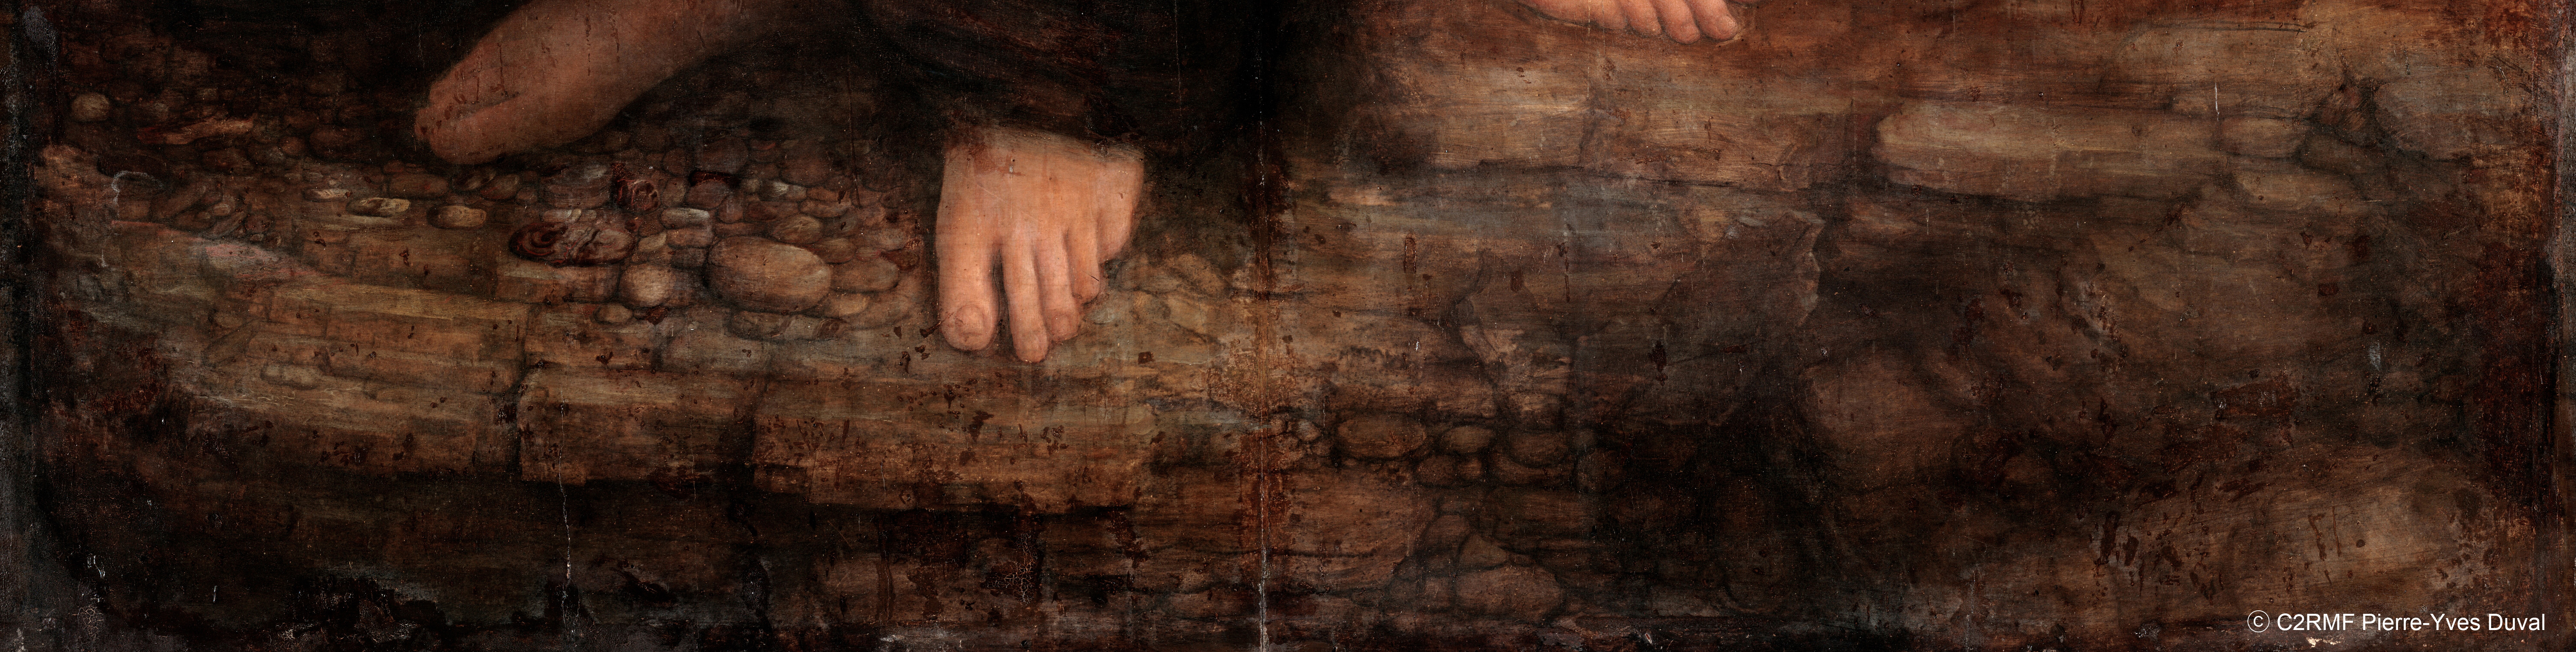
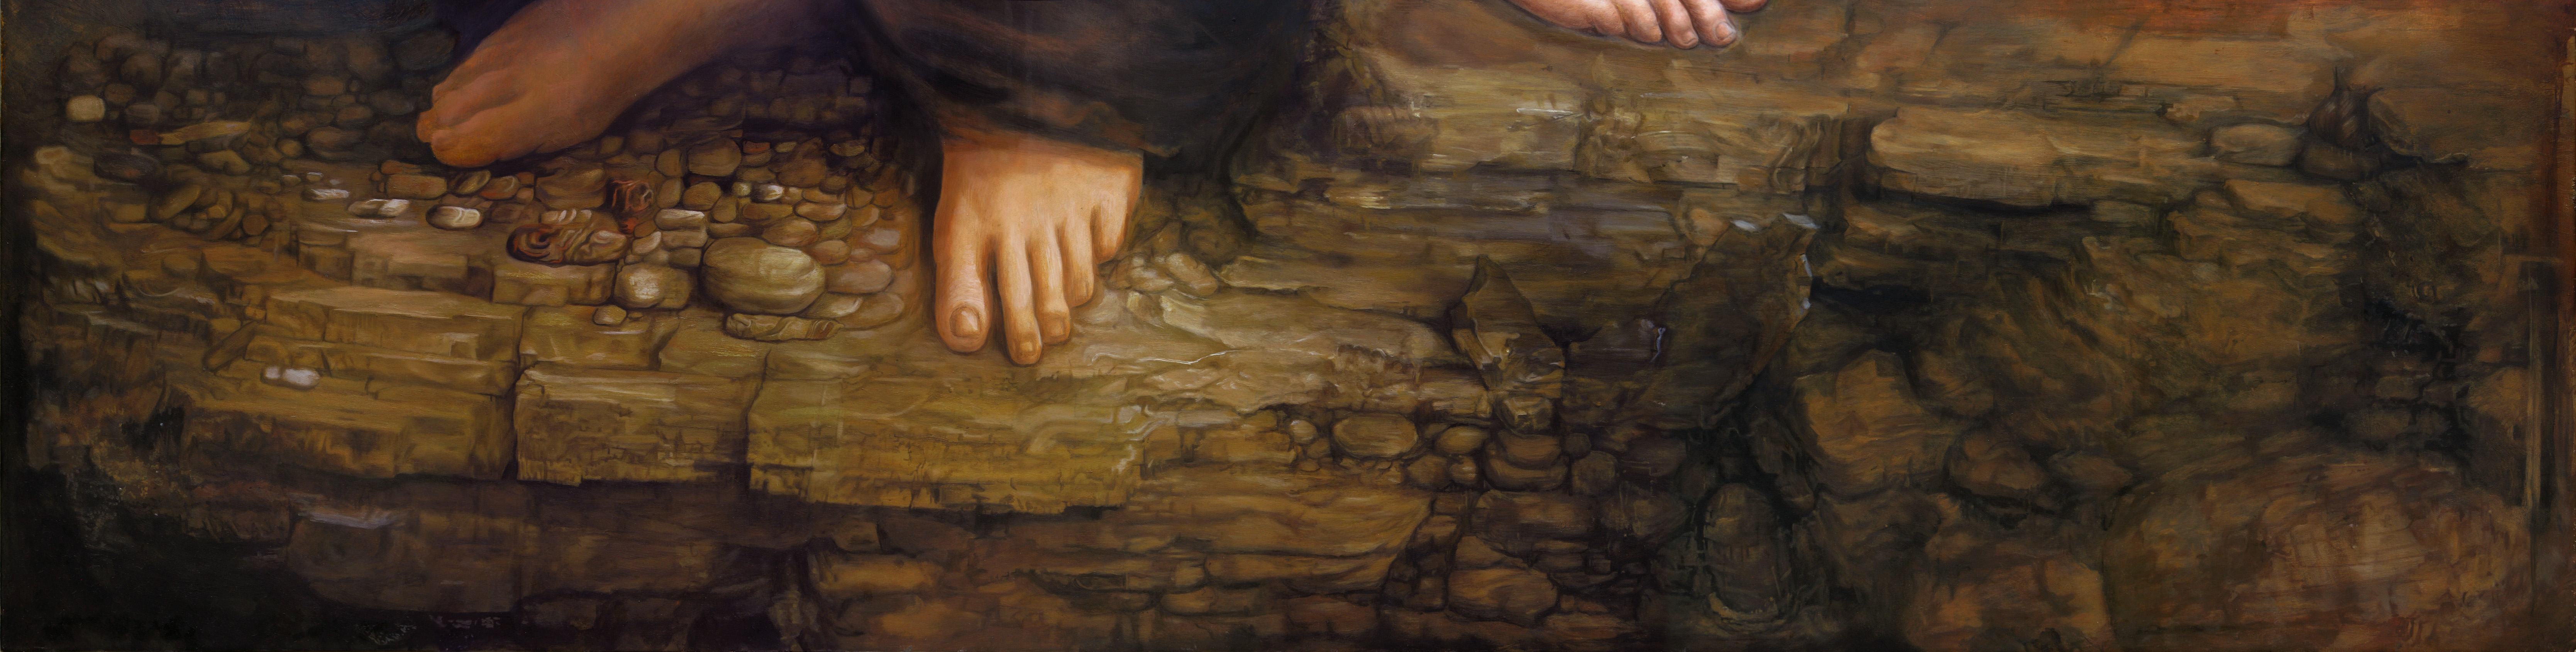
A (above). For the sky, I printed a copy of the C2RMF picture (before restoration) at the same size of the original, then reported the cracks by using a carbon paper.
B & C. In the original painting of Leonardo the sky is composed by many delicates textures. The cracks are useful benchmarks to be able to precise the different areas of this abstract composition.
II. An alternative approach with the use of an orthonormal coordinate system.
|
|
|
|
|

|
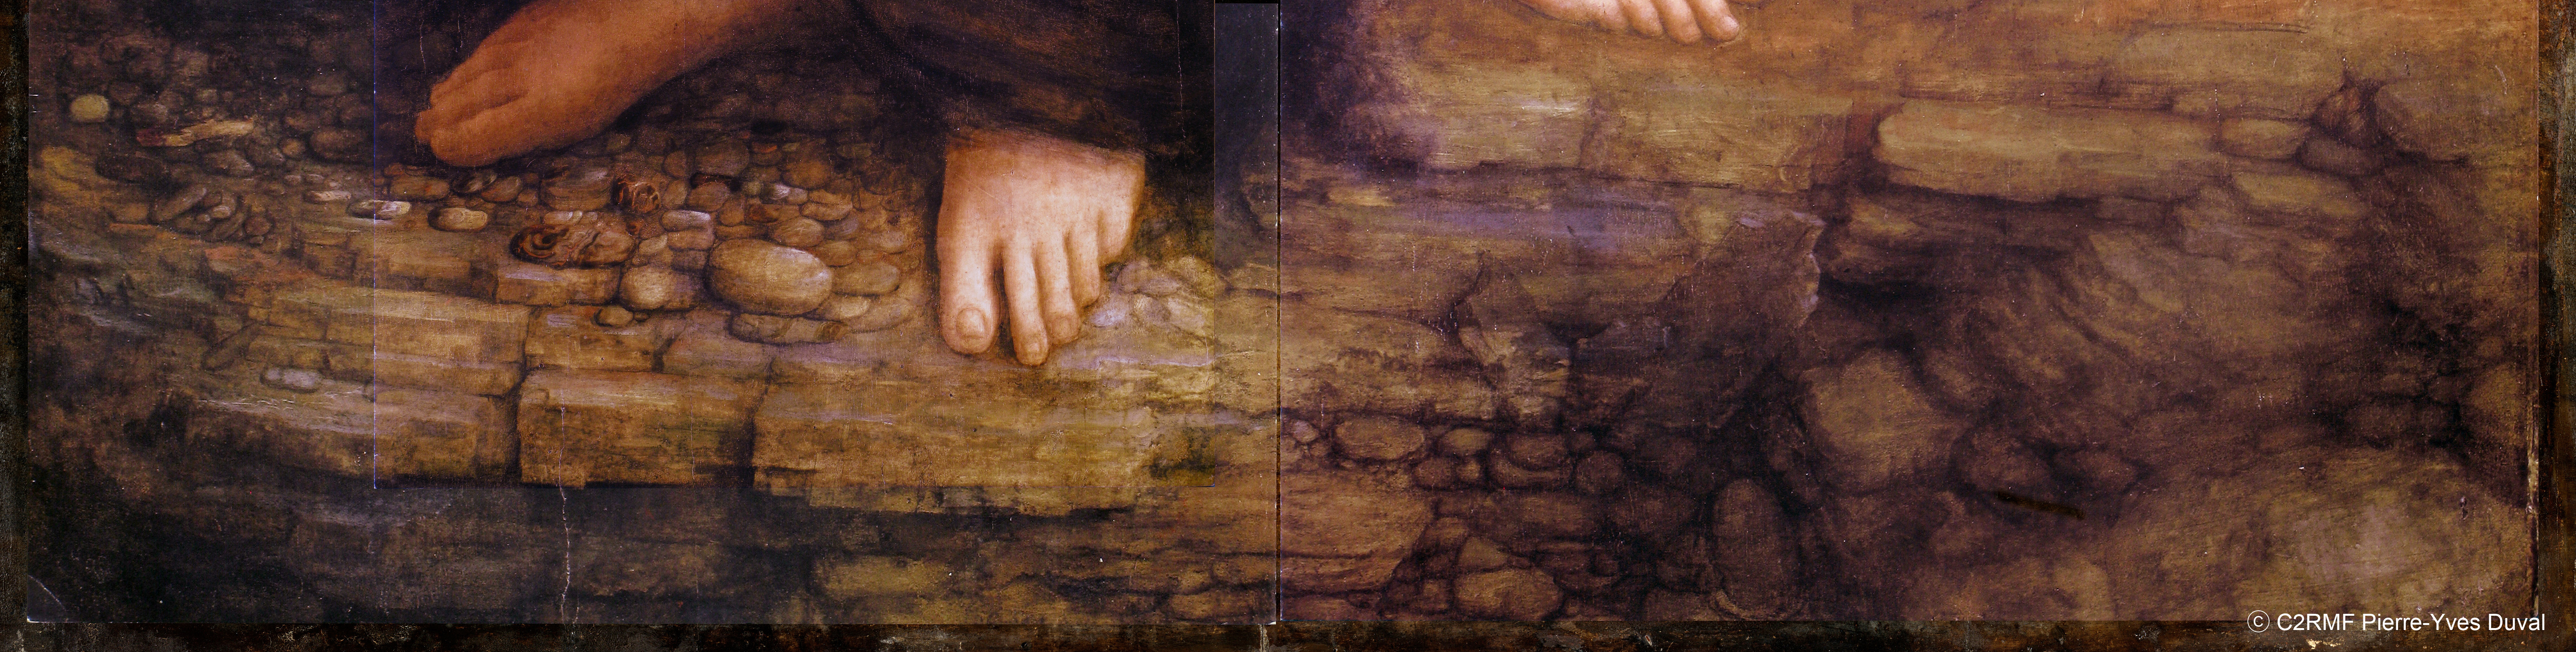
H. The C2RMF picture covered by layers of the 2012's catalog picture.This document didn't bring enough informations to complete this part of the painting. The puzzle has been done by an assembly of pictures based on different resolutions. Also the catalog's print dithering made it difficult to use.
|
|
|
|

I & J. C2MRF's picture, before restoration. Different contrast and colorimetric levels. These documents have been printed at the size of the original painting without print dithering problem. But they were not easy to use because the surface was still covered by many unsightly effects.
|
|
K. The copy is a mix of informations derived from all these different documents.
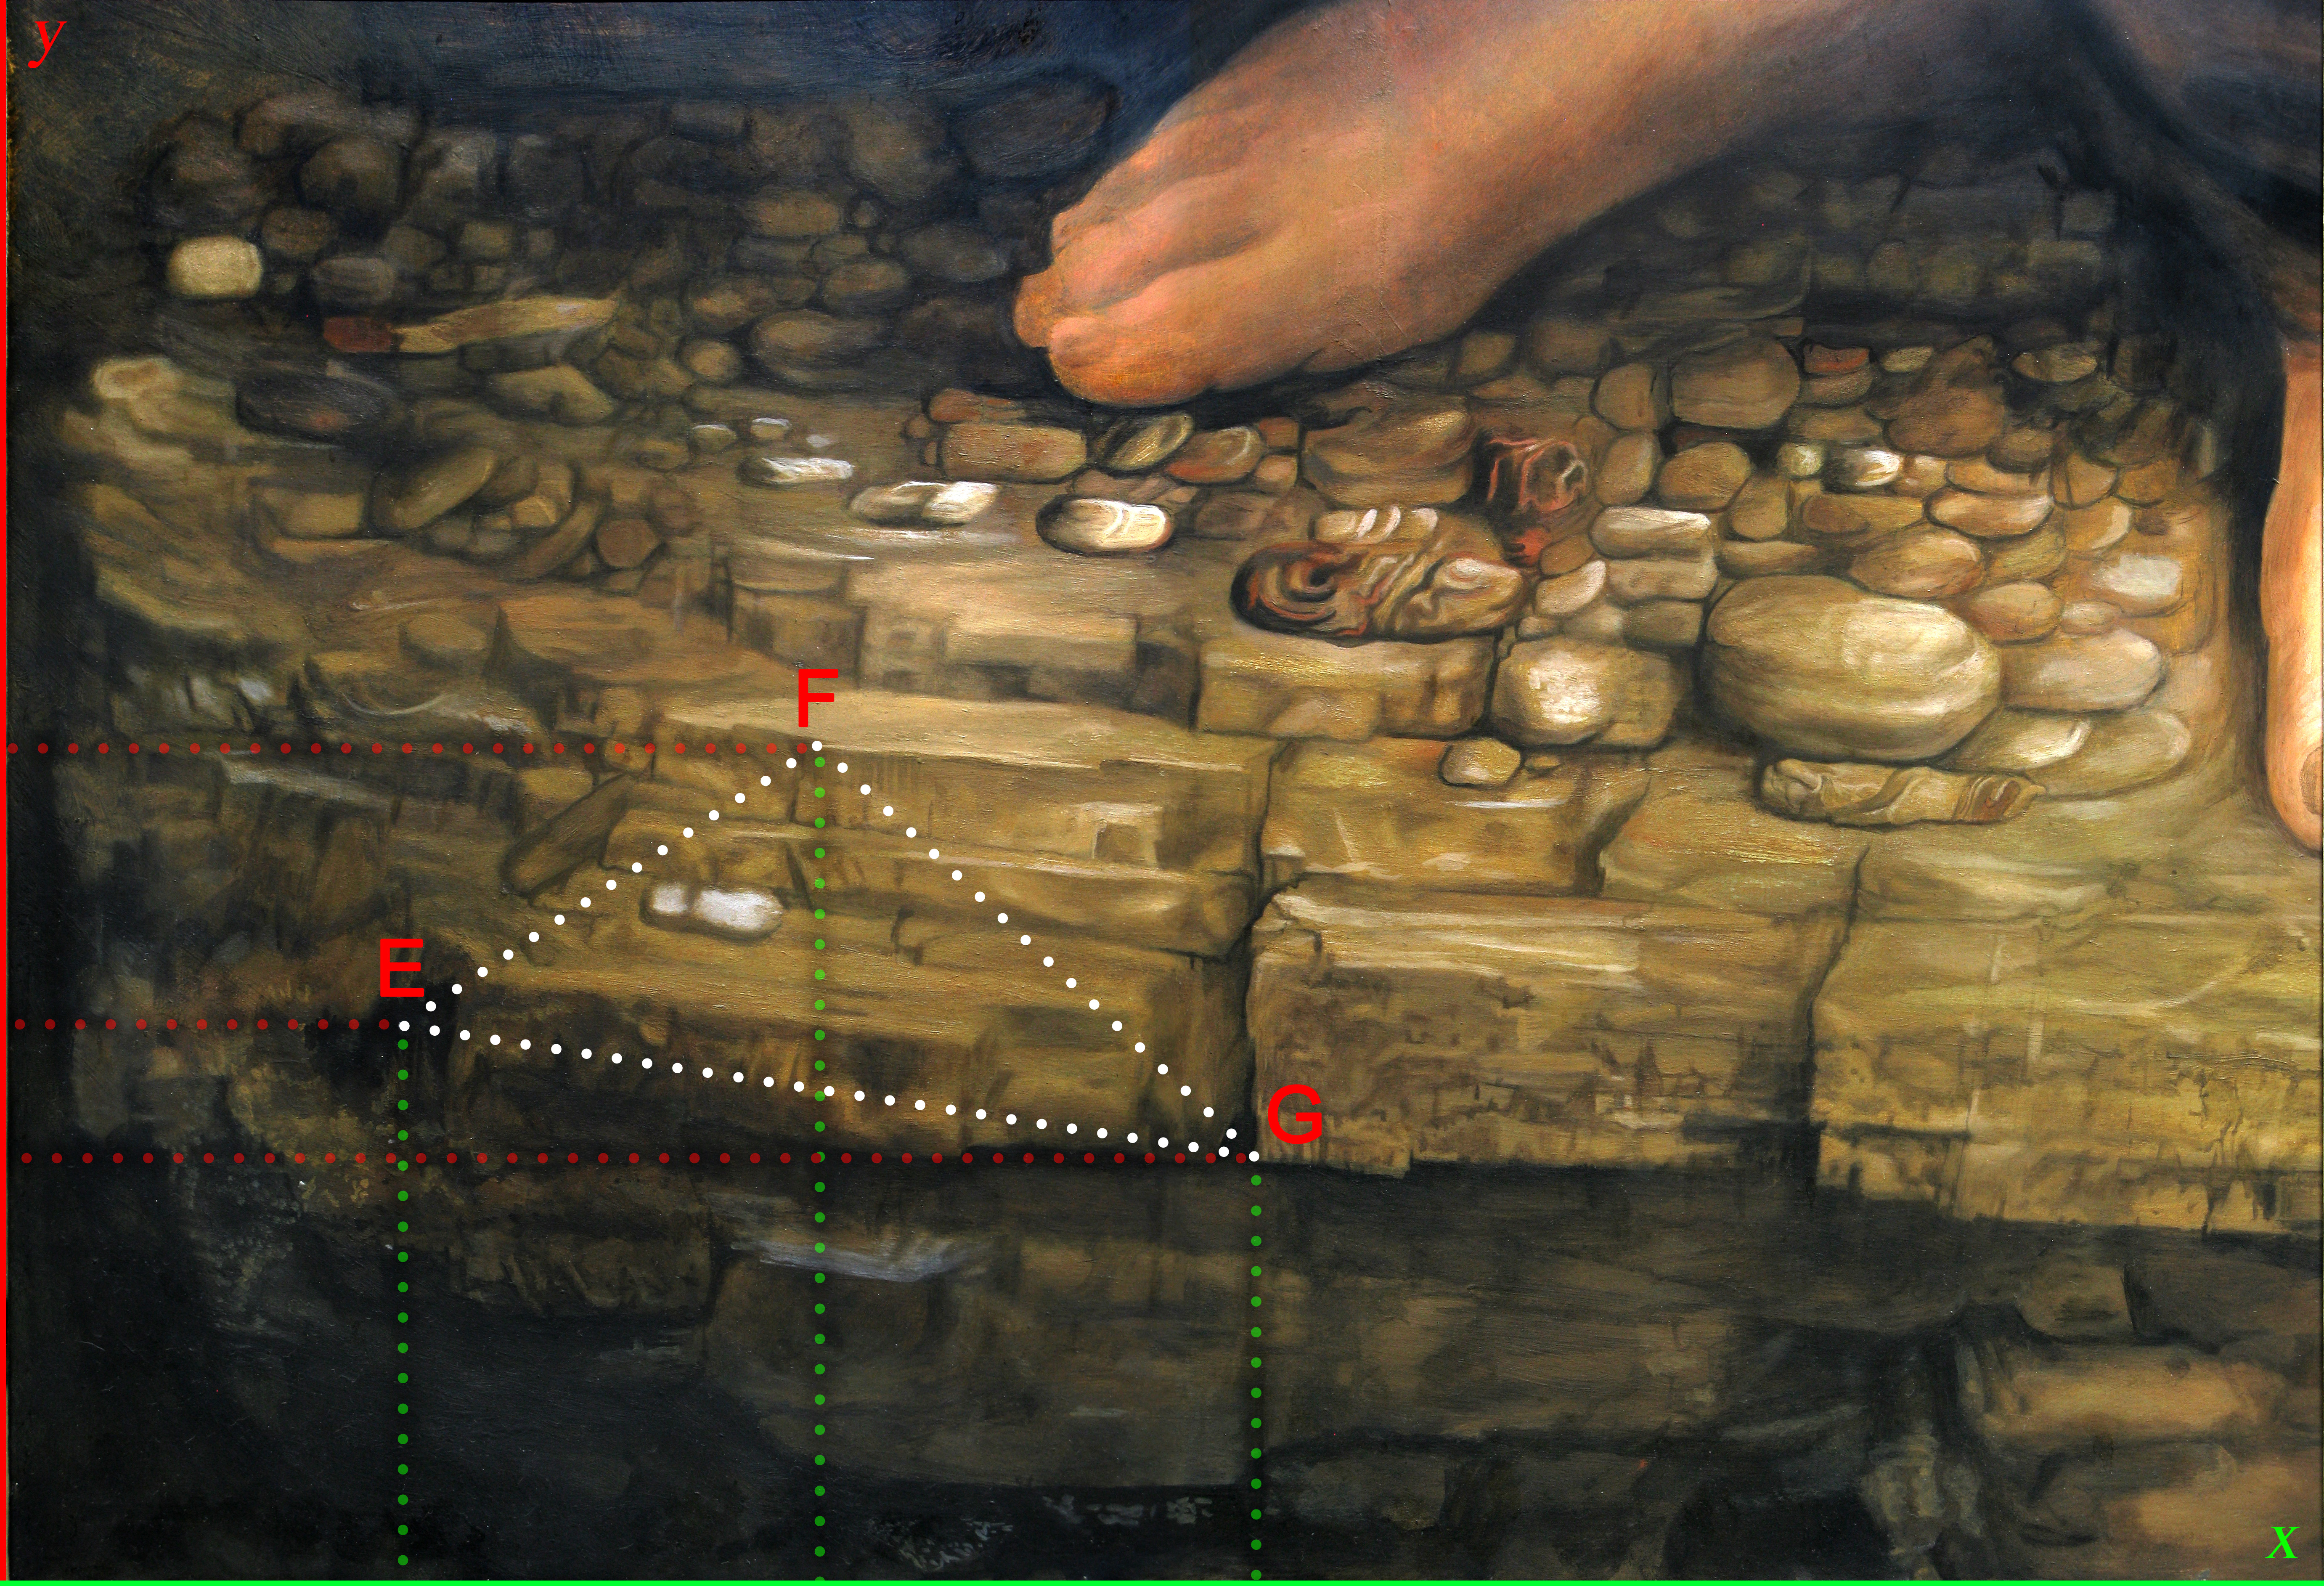
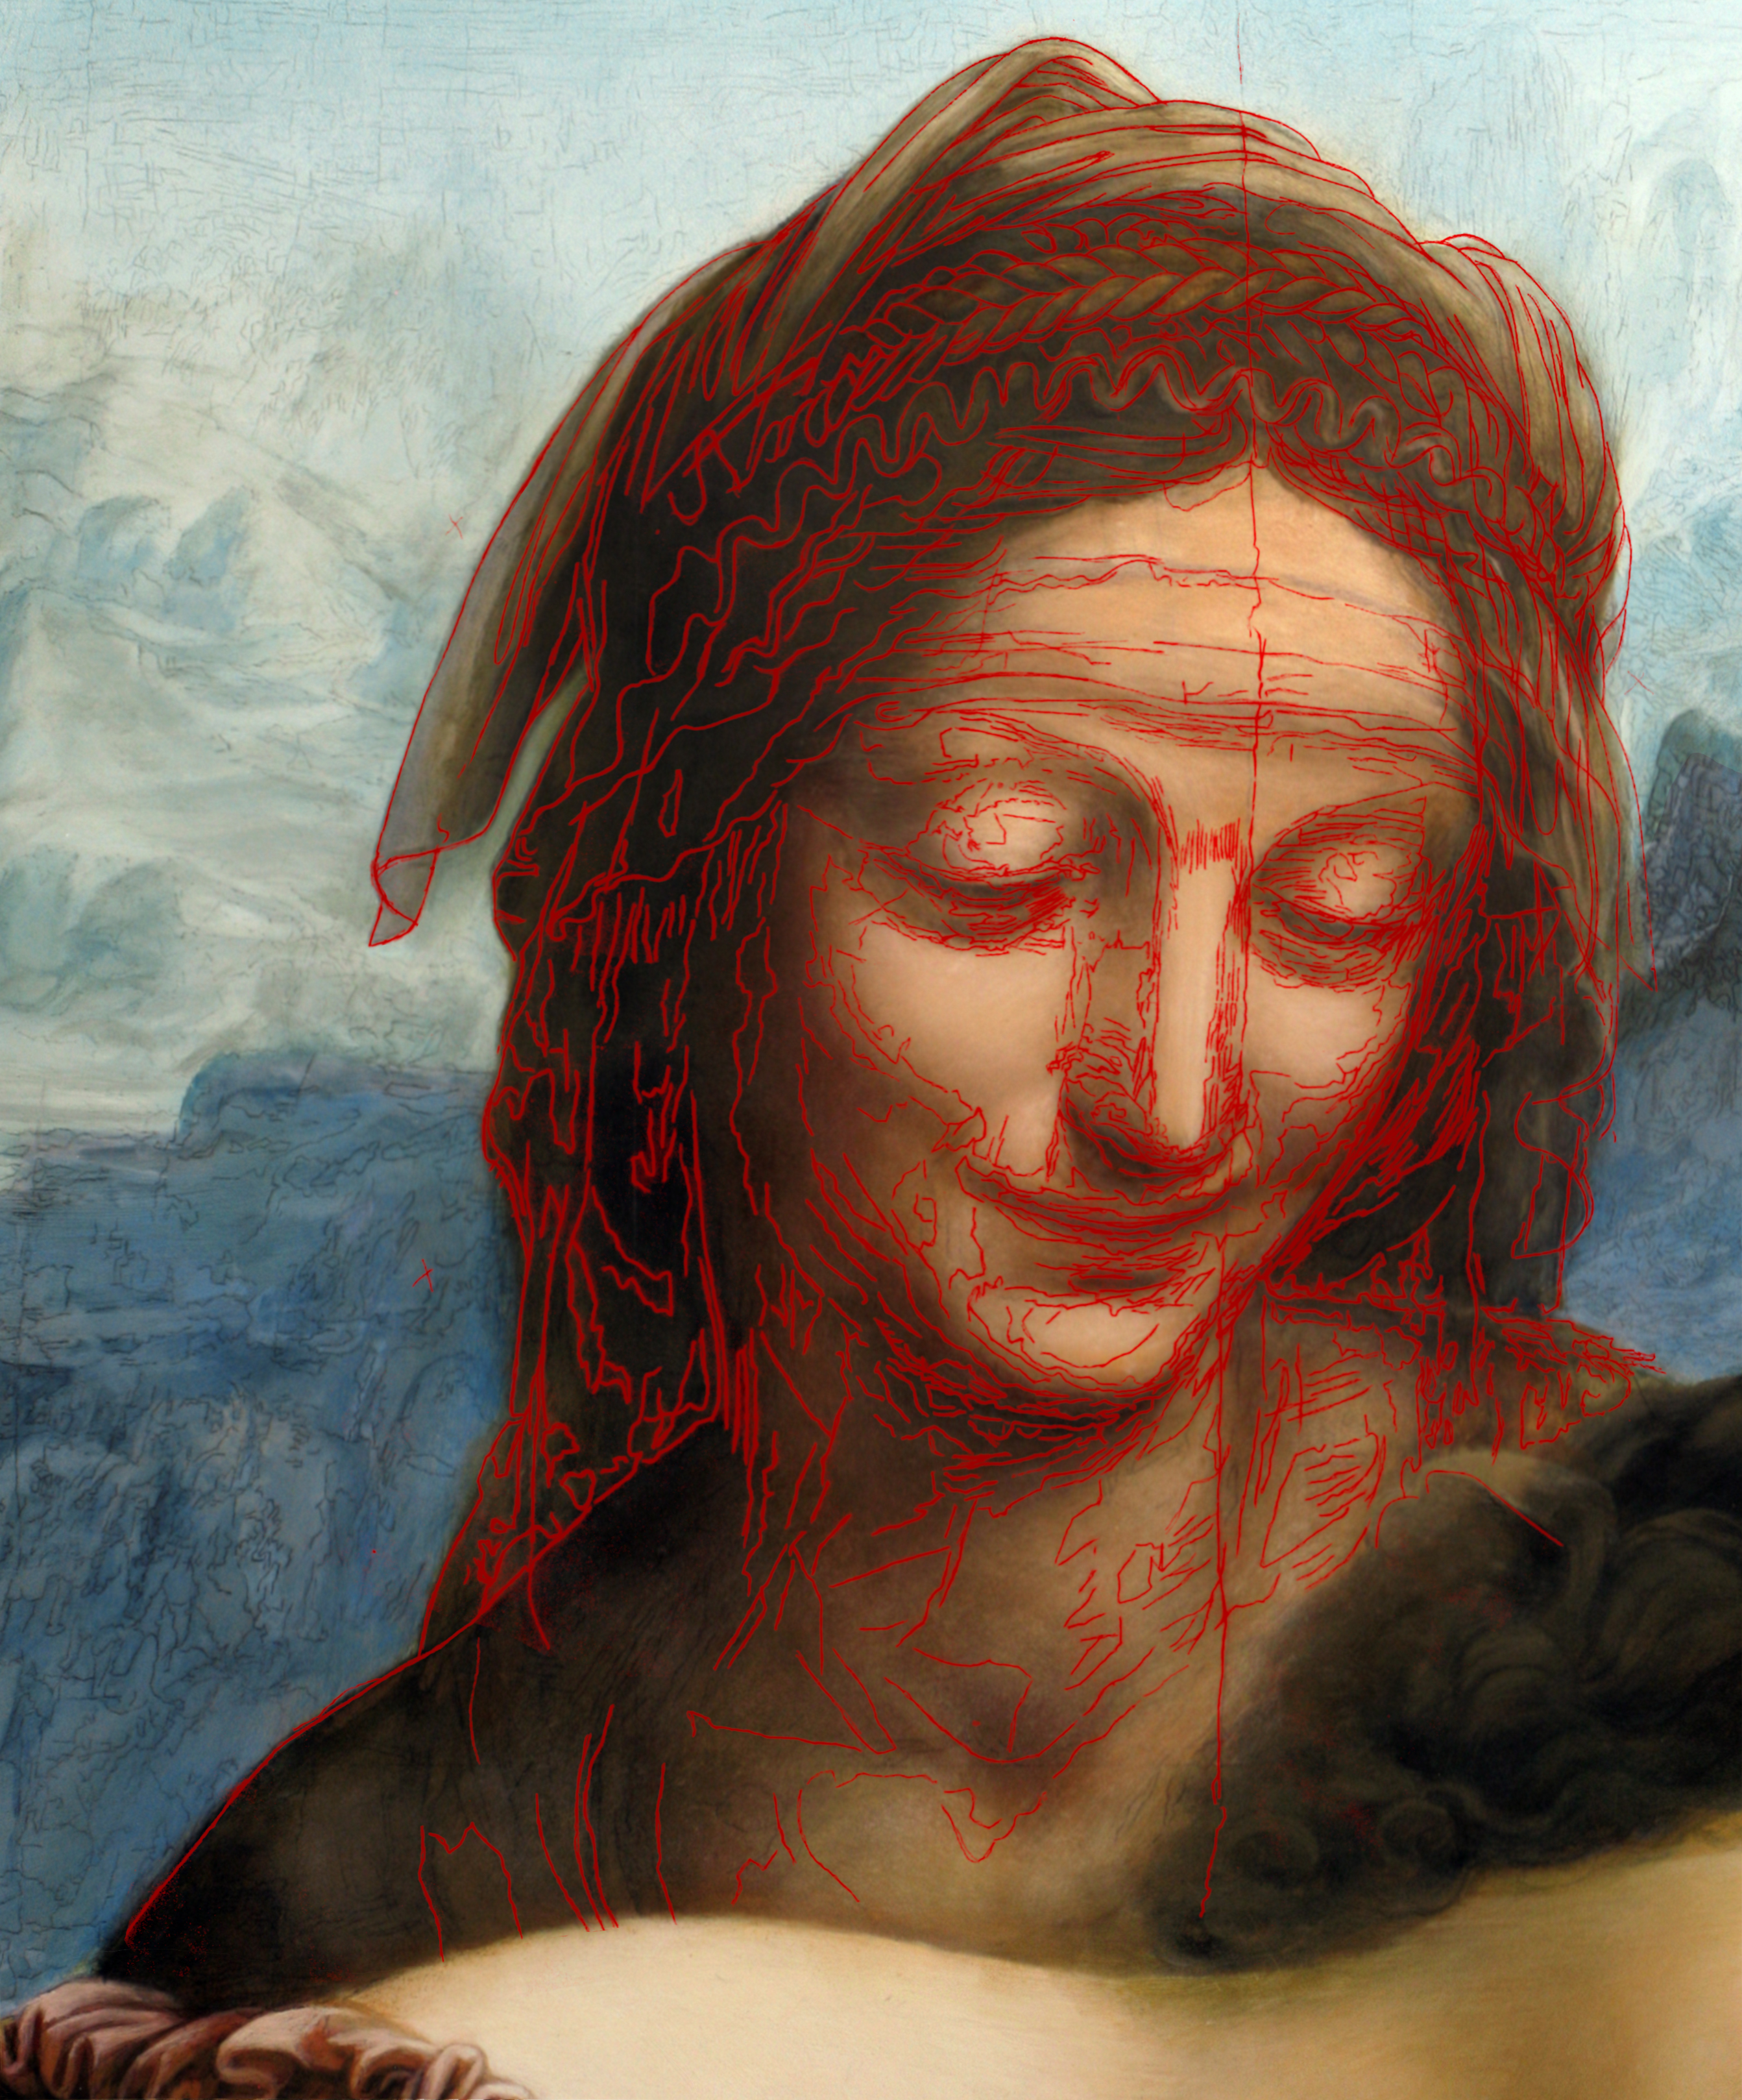
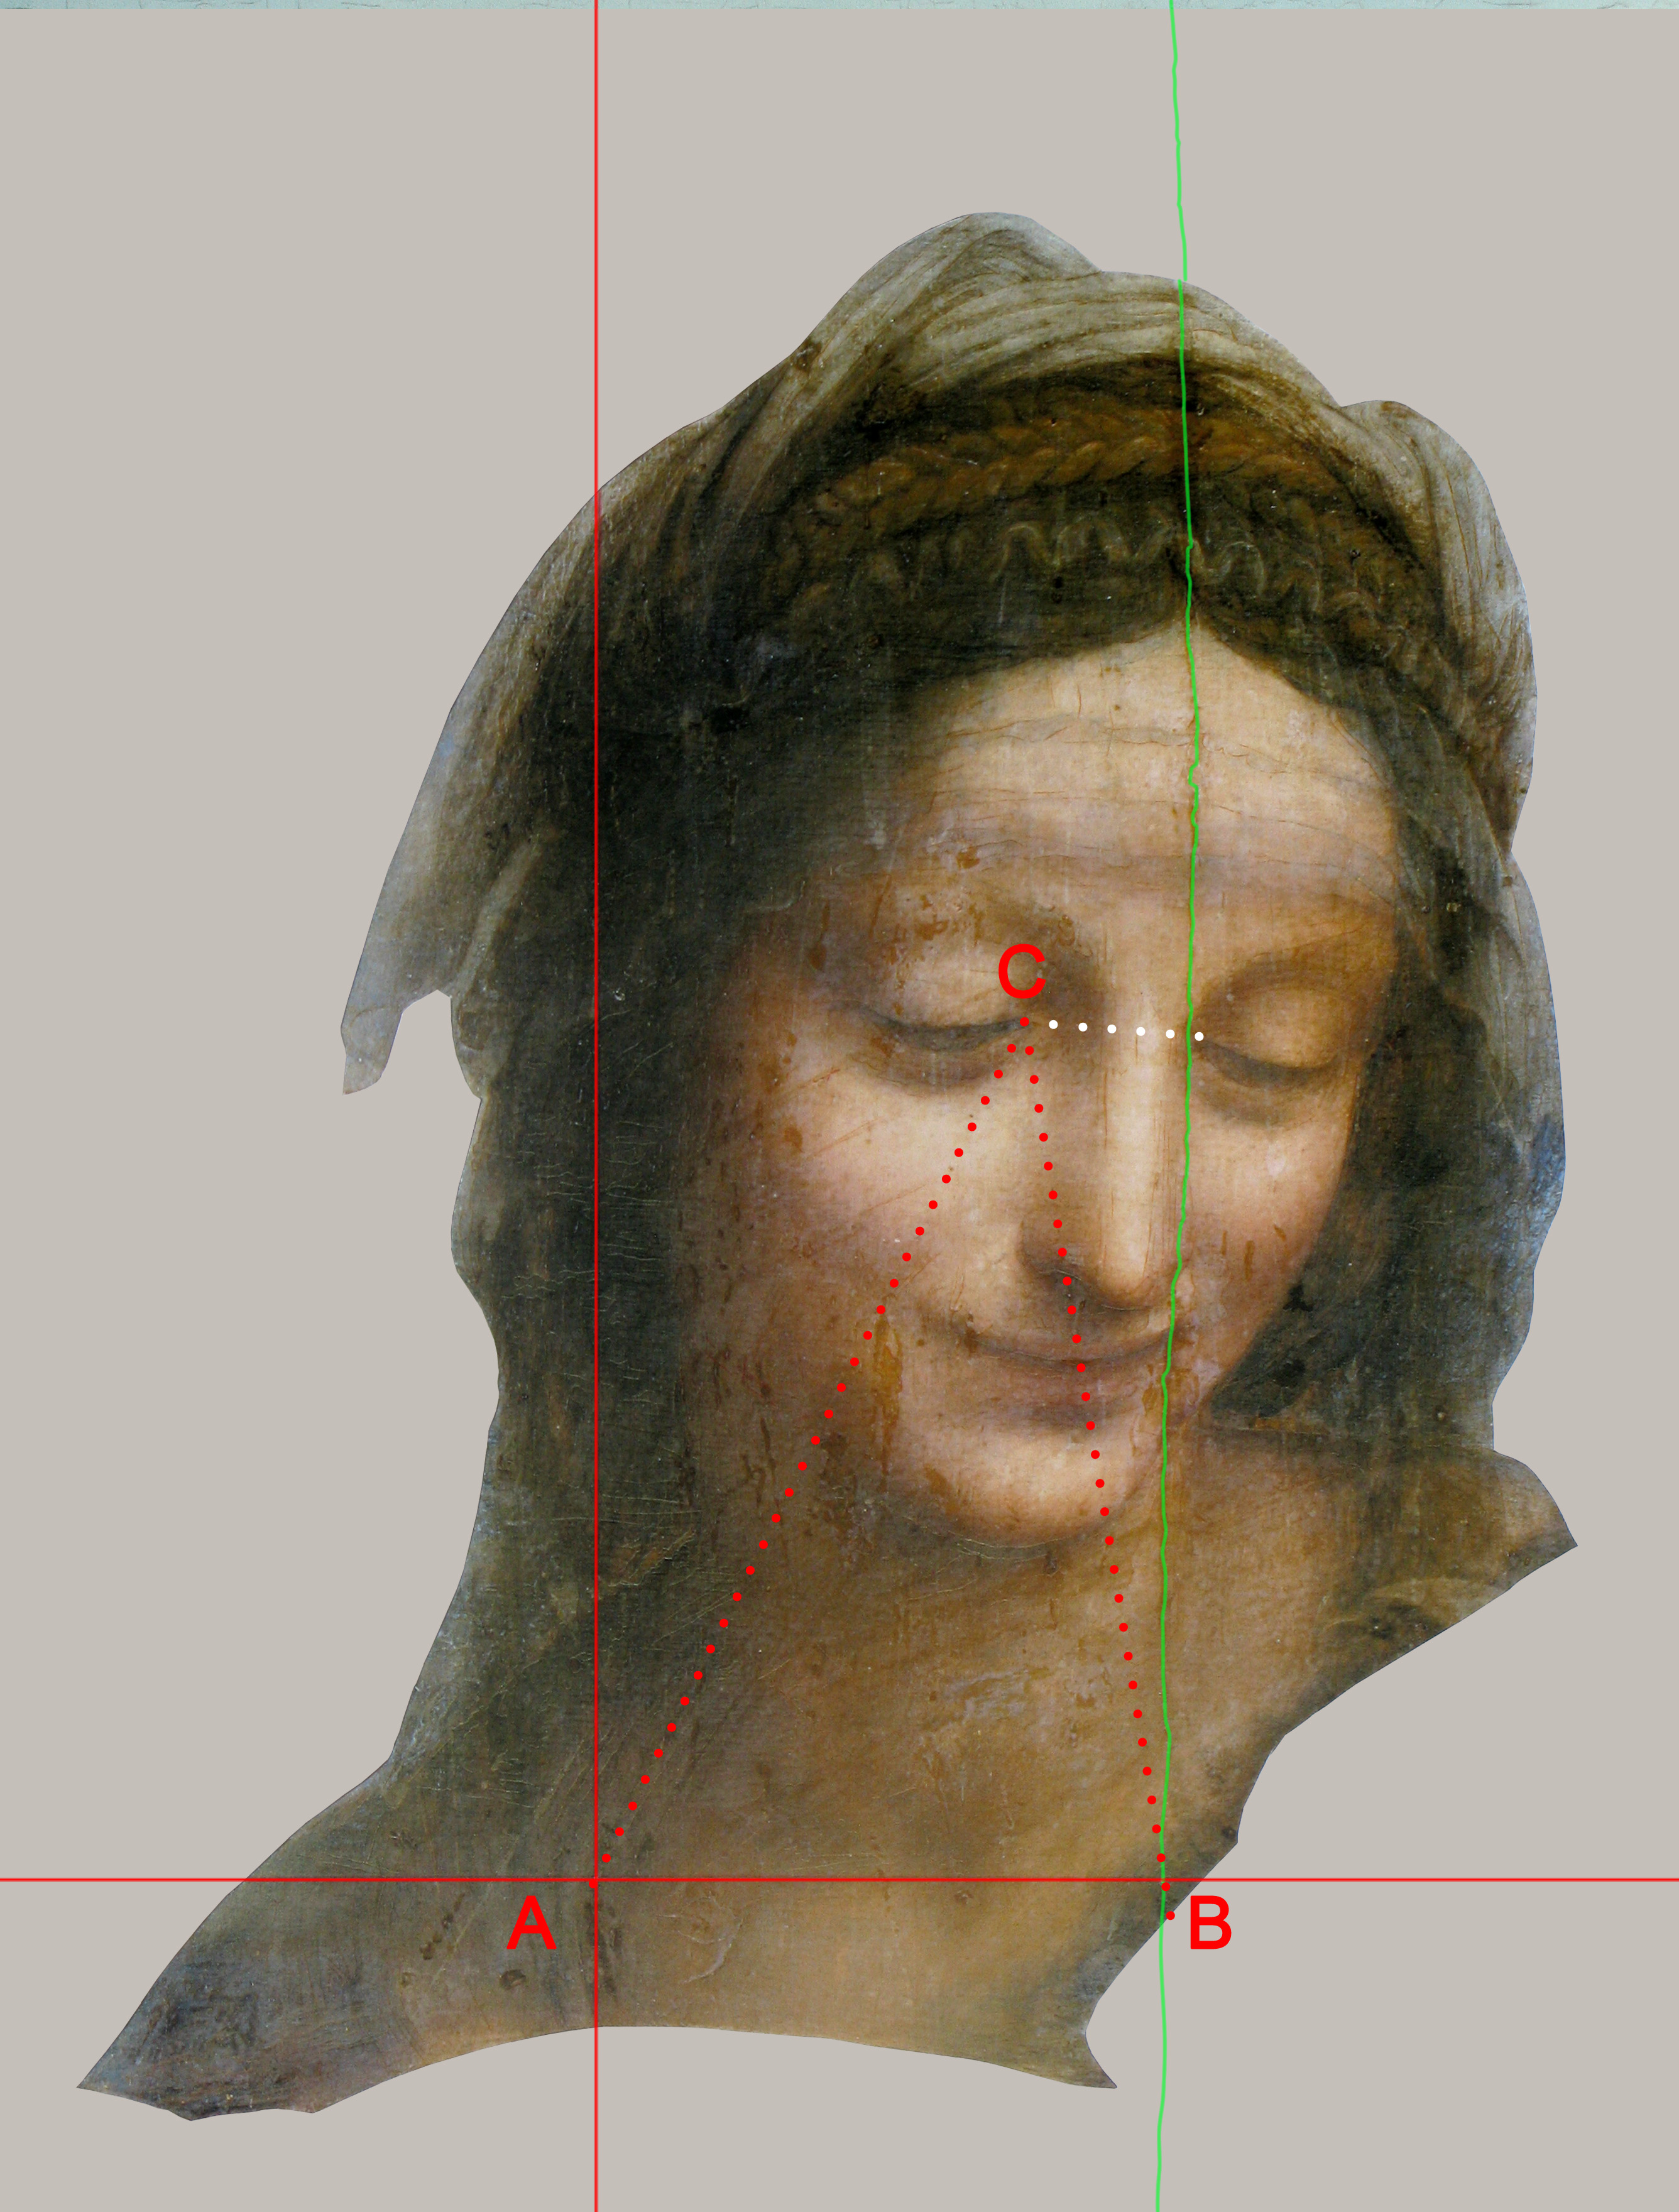
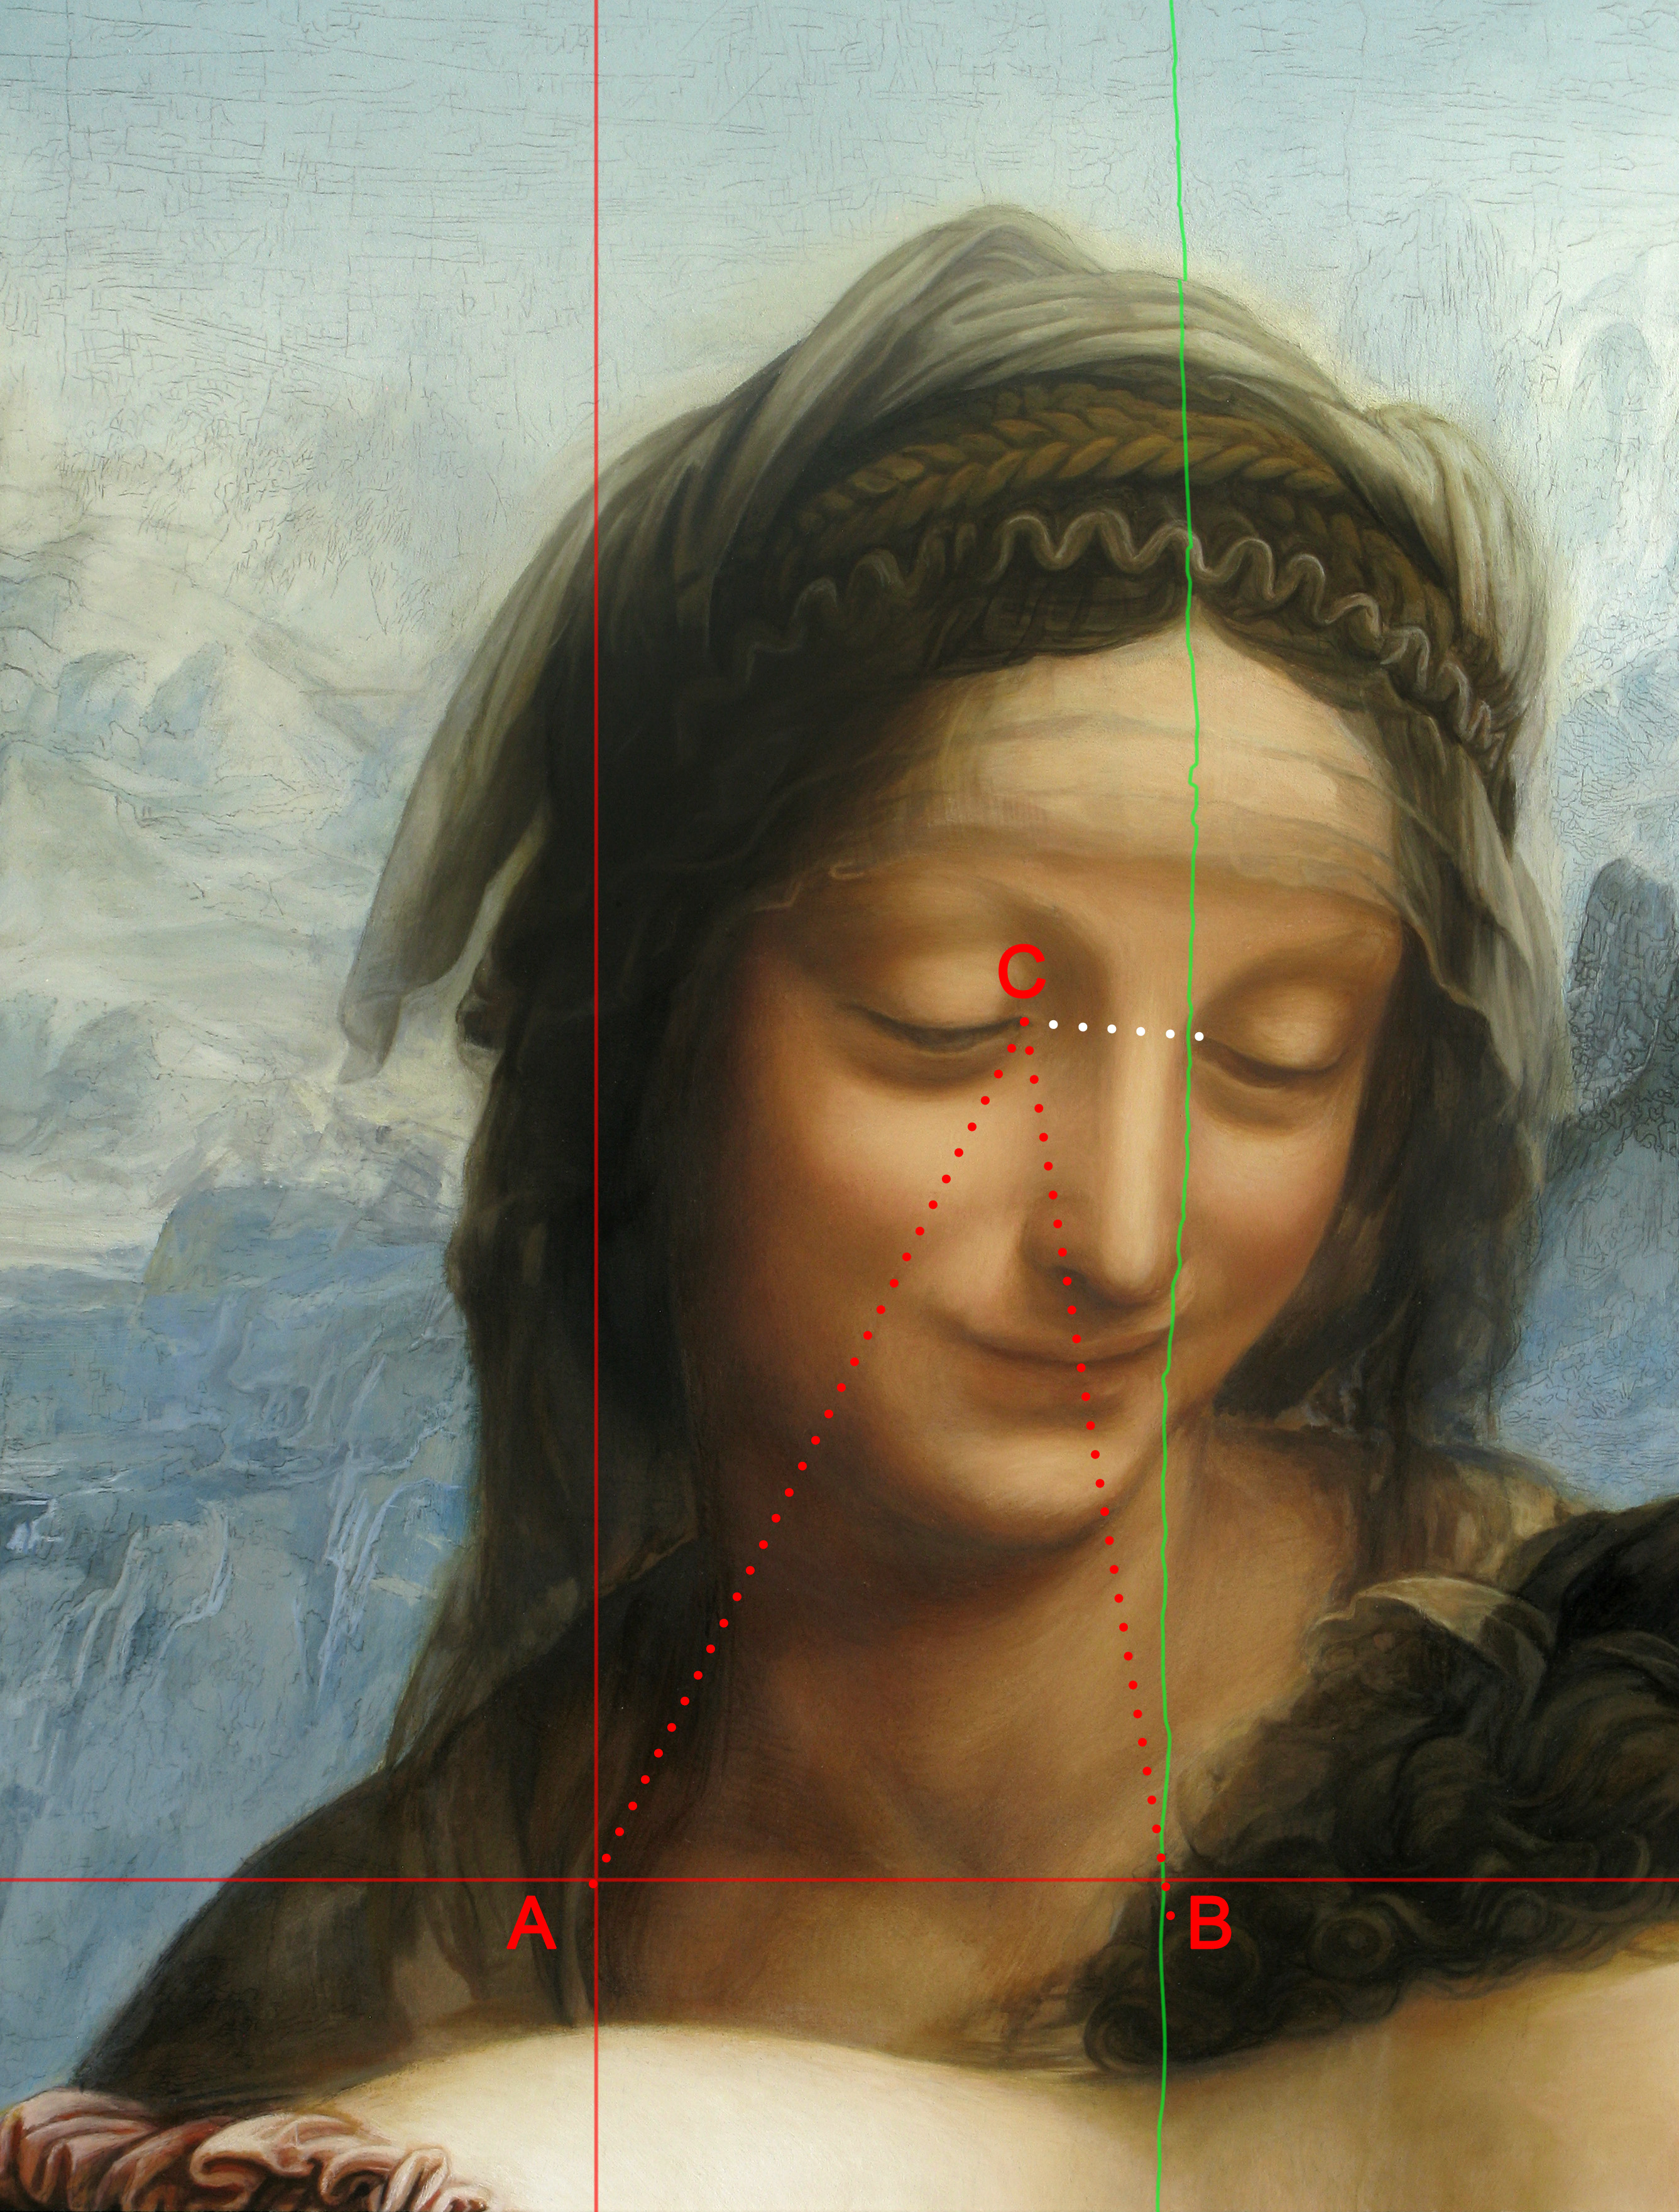
II. A specific case, the face and bust of Saint Anne.
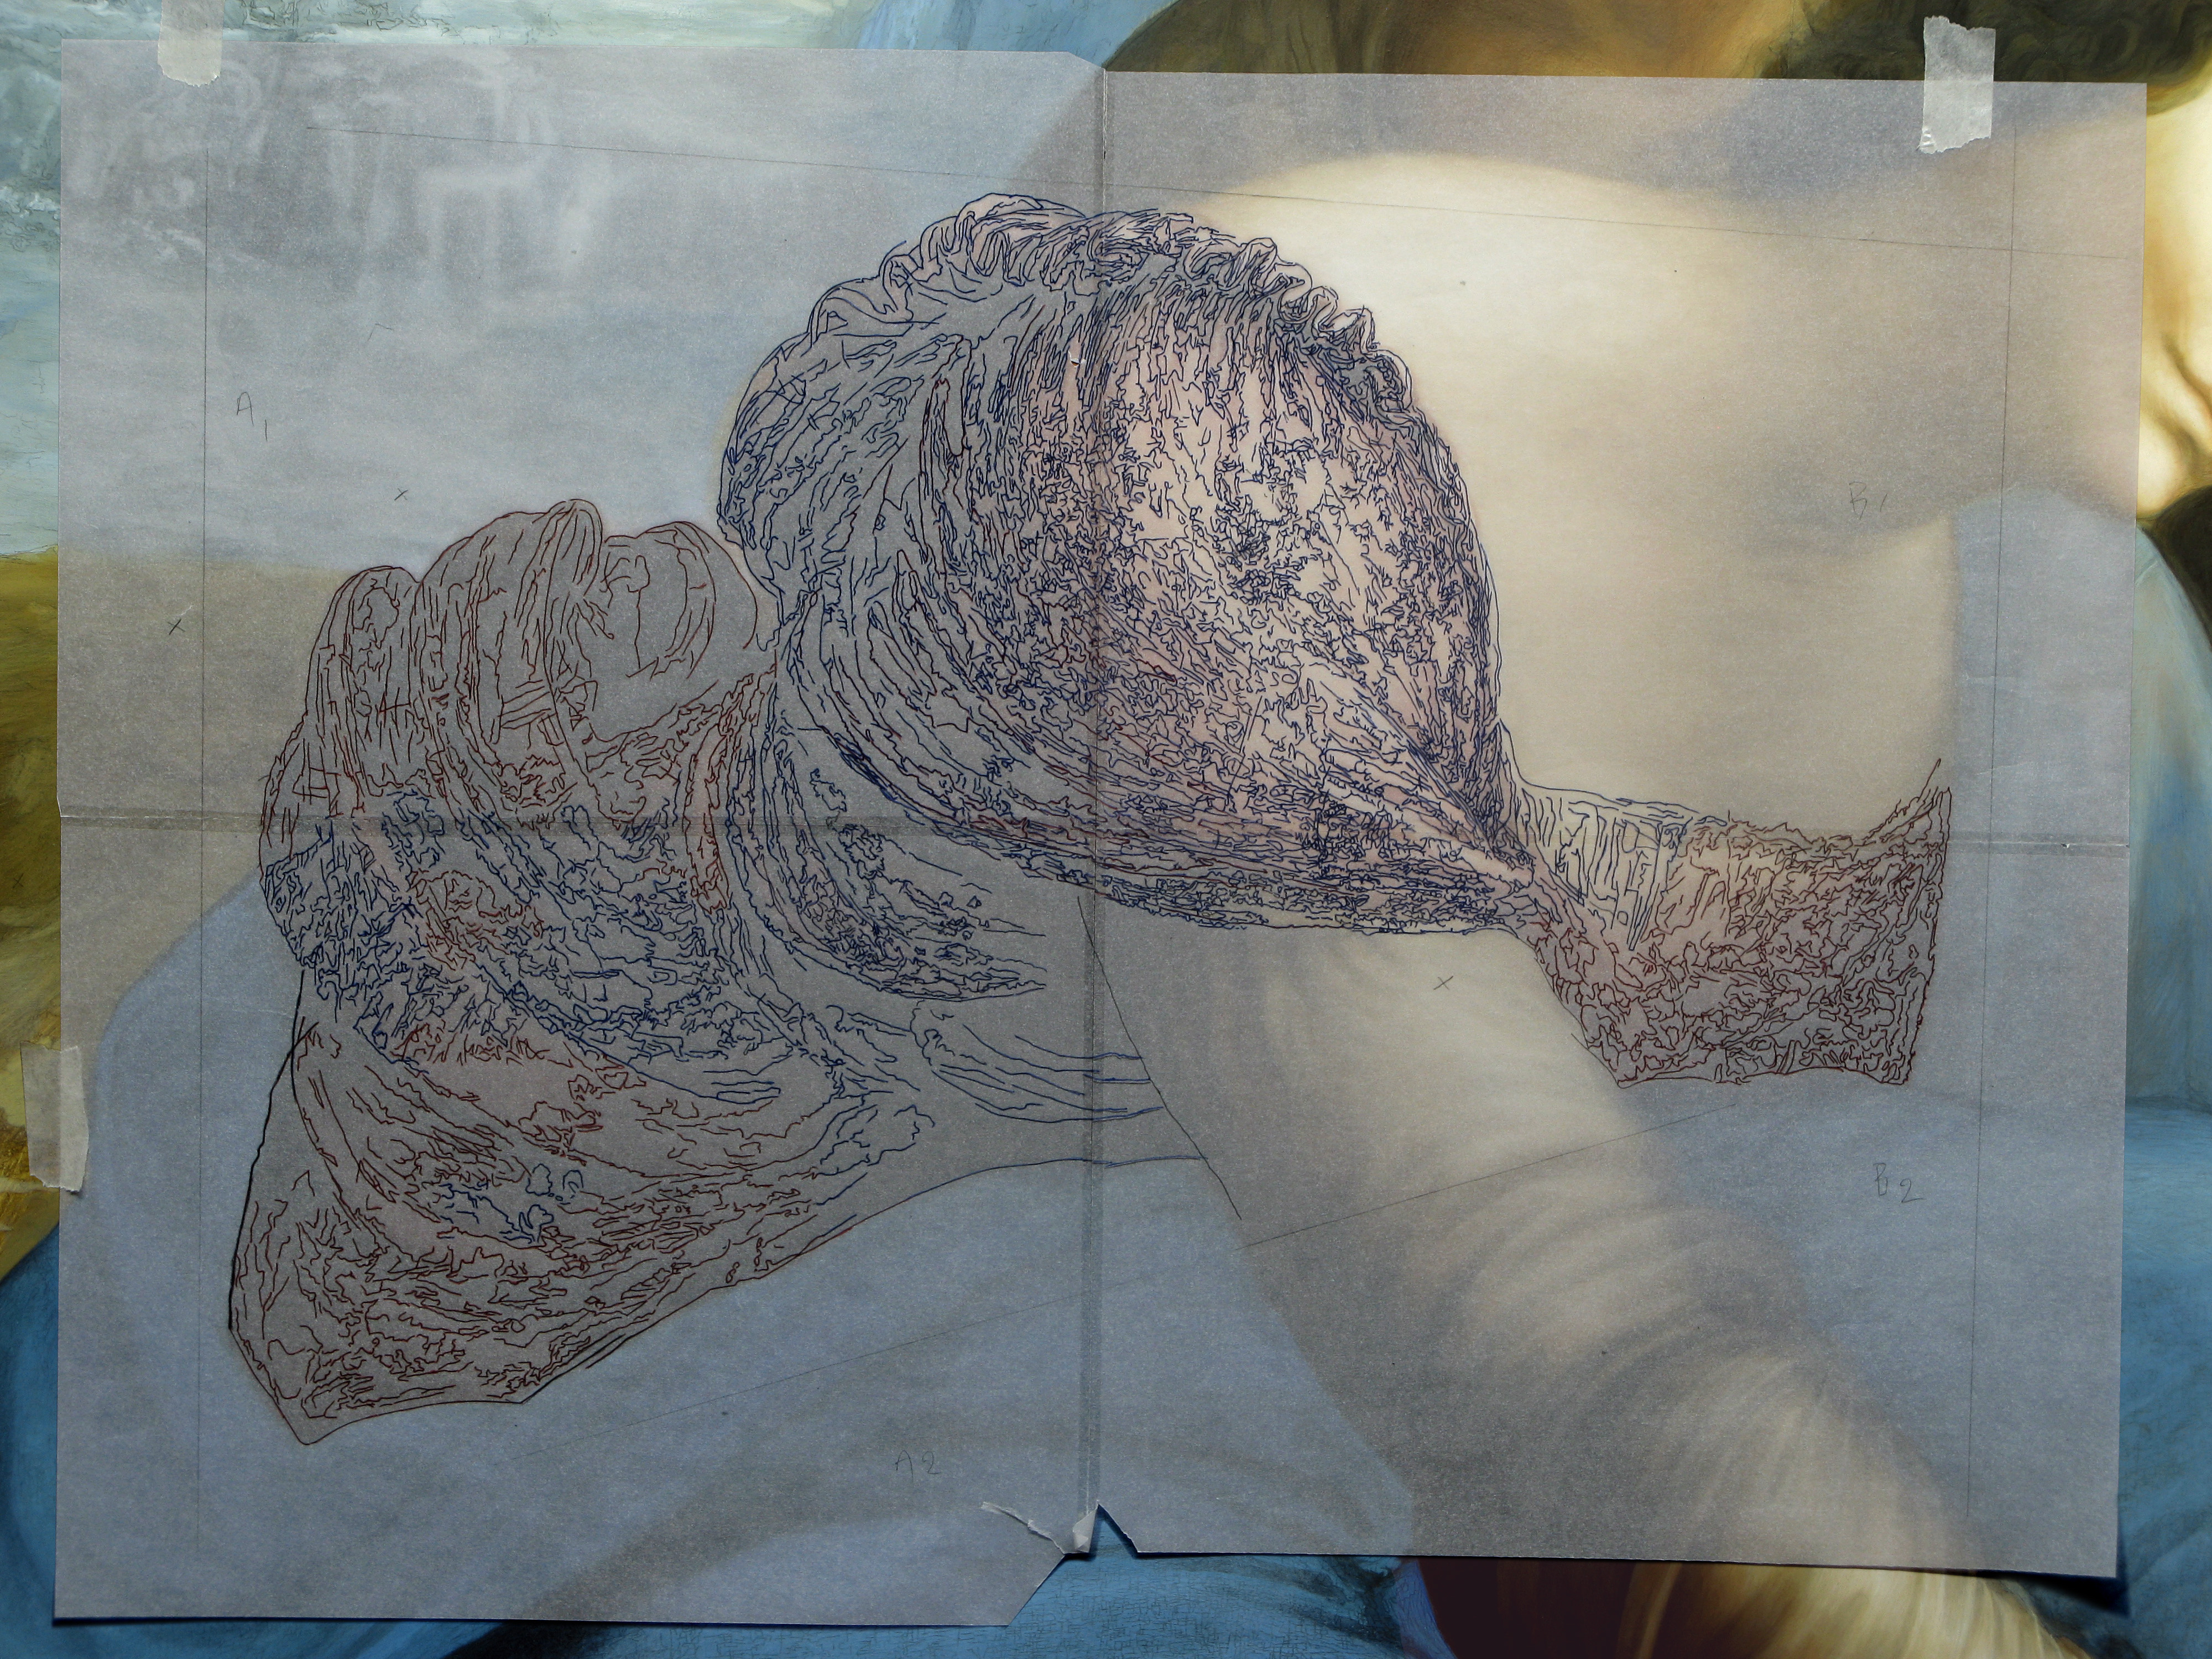
One of the most difficult part of this copy was to build the face and the bust of Saint Anne. A first vector path has been used to build the architecture and the main proportions of the face (A,B,C). But I had to be more precise and close to the original of Leonardo. So, I complete the main path by another made from a print at the original size. Then, I used an orthonormal coordinate system to confirm strategic benchmarks (D,E,F).
"Click" on pictures below to open them at full size in another window.
|
|
|
|


|
|
|
|

To use mathematic method was not enough to be able to copy the expression of this enigmatic figure. I couldn't have a millimeter of freedom because each little trace of brush influences the opening of the smile or the eyes. I had to understand the typical way that Leonardo used to model the volume of his figures.
The "Sfumato" is not a smoke with any consistency as it would be in following a basic fading technic. Leonardo used the way of cross hatching to model the volume of his figures, following the technic of Florentine's workshops. We still can see this process in his drawings and preparatory works. But he differs from other artists of his time because he came over and over on his work to set up the transition between light and shadow into a high level of density.
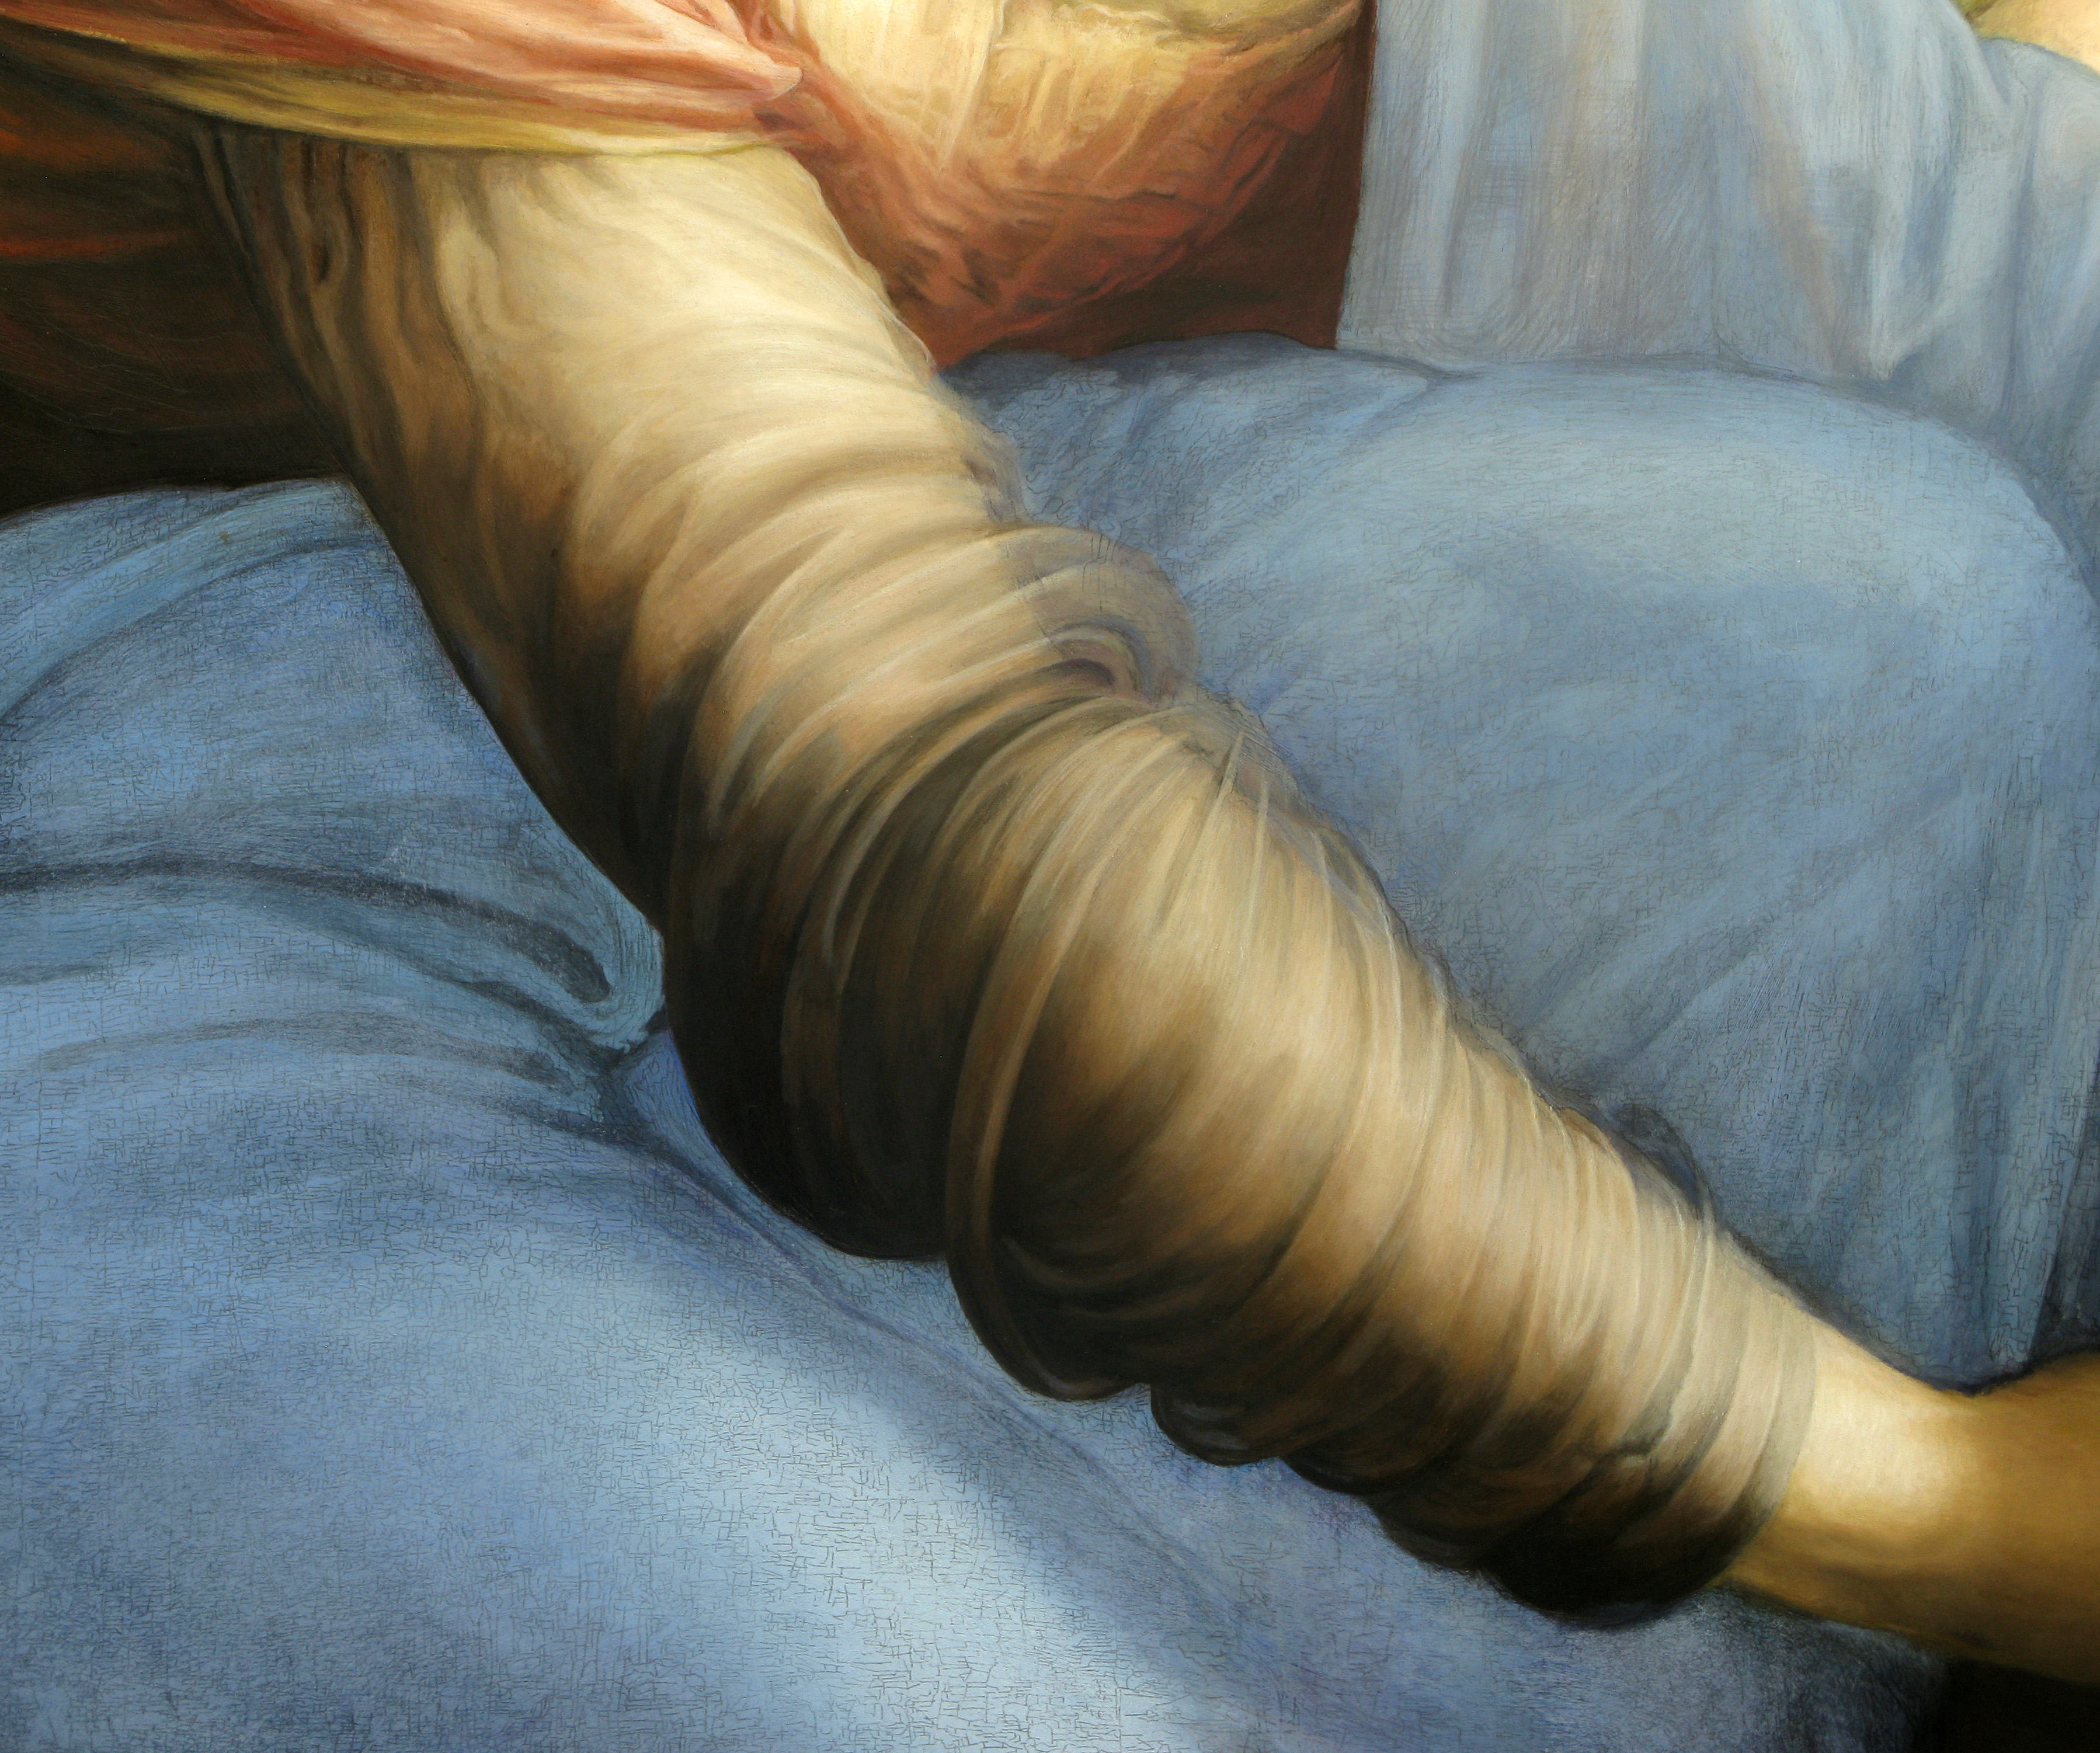
To build the neck of Saint Anne was also a challenge because of the lack of documentation. A solution came with the use of Leonardo's anatomic drawings from the Royal Trust Collection (G, H). These drawings show the anatomy of the neck in the same situation of the painting's one. I could study the way of cross hatching used by Leonardo in this specific case. The job was then to round up the modelling to adapt it to the grace of Saint Anne.
|
|
|


ⓒ Yann Le Gal 2019, from Leonardo da Vinci, all rights reserved
Part 3: From a fake facsimile to a real trompe-l'œil.